4-Week Athletic Conditioning and Strength Plan: Progression Cycle 8
A progressive plan combining strength, athletic conditioning, core work and controlled recovery.
How to use this plan
Follow the days in order, log every working set, and finish each set with one to three good repetitions still available. Use the exercise animations to learn the movement and open the video when you need a full demonstration.
Monday
Lower Strength
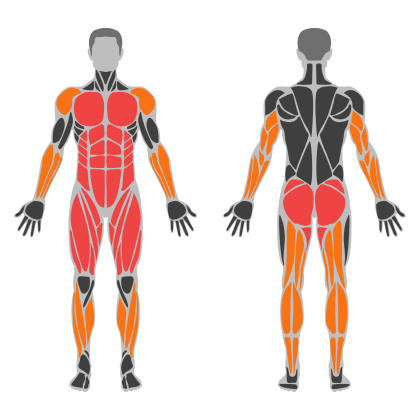
Lower Strength muscle focus
Red marks the primary training focus. Orange marks supporting muscle groups used throughout this session.
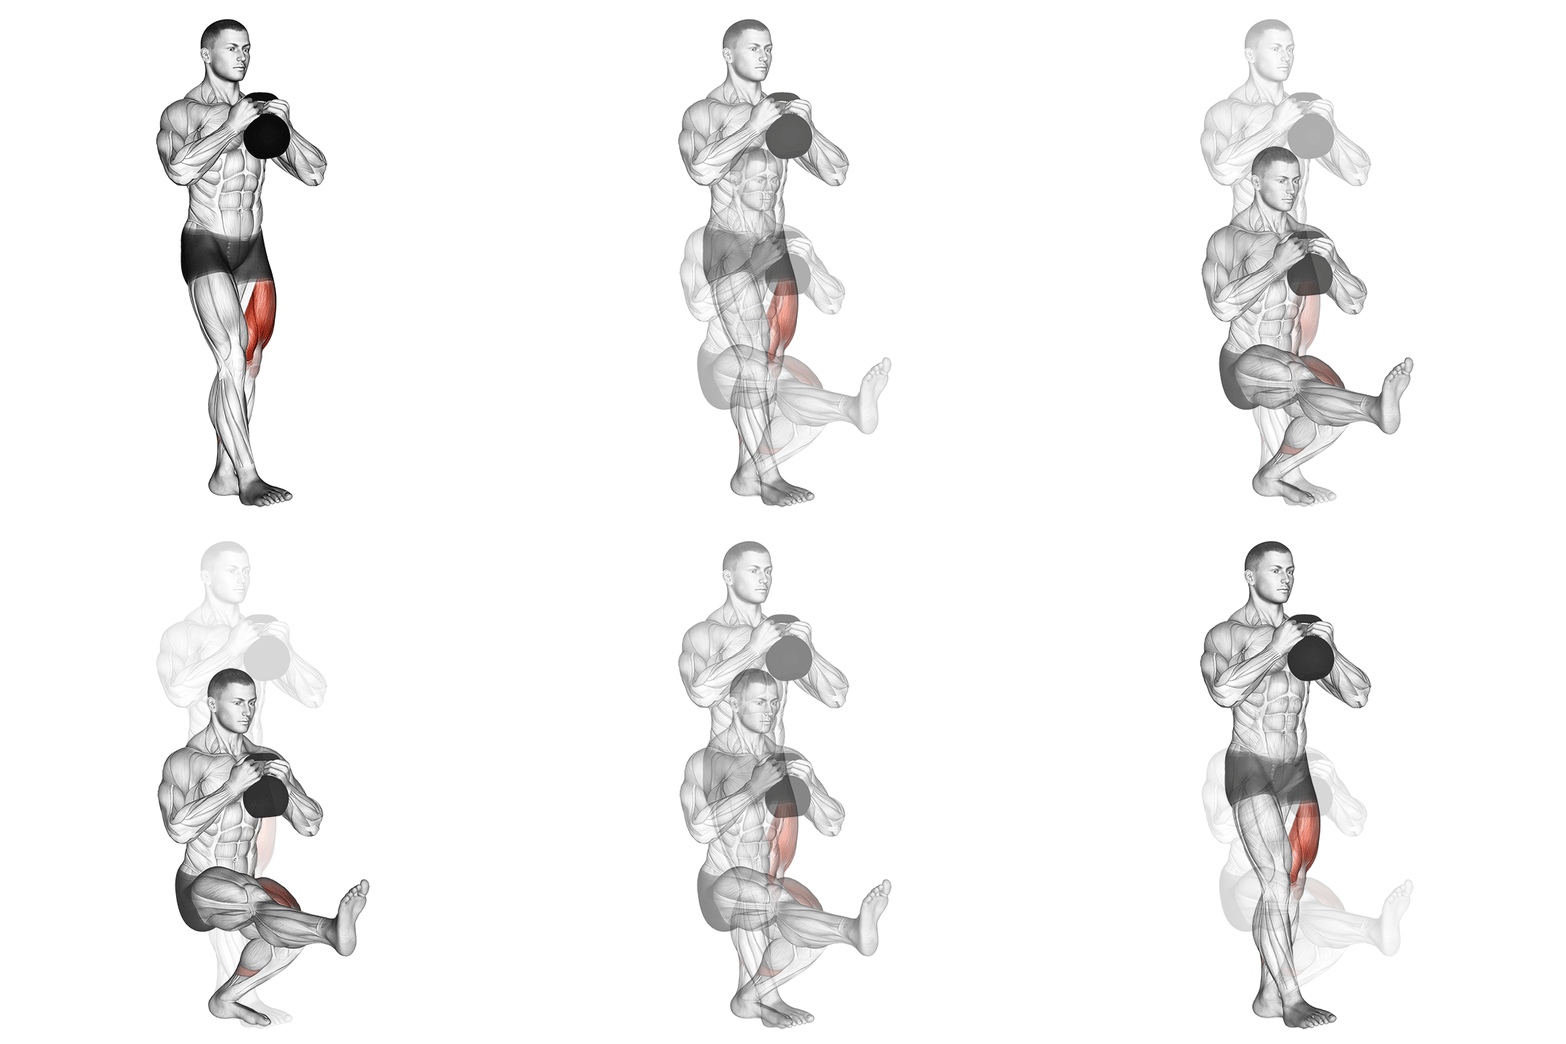
Weighted Pistol Squat
The Weighted Pistol Squat is an advanced lower body exercise that targets the quadriceps, glutes, hamstrings, and core. It involves performing a single-leg squat while holding a weight, enhancing strength, balance, and coordination. This exercise requires significant flexibility and stability, making it suitable for experienced athletes.
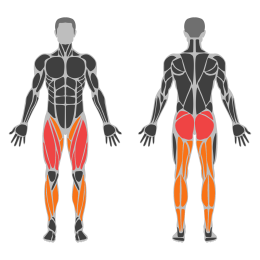
Muscle focus
Step-by-step cues
- Begin by standing upright with your feet hip-width apart and hold a dumbbell or kettlebell close to your chest.
- Extend one leg forward, keeping it straight and off the ground.
- Engage your core and slowly lower your body into a squat on the supporting leg, keeping your chest up and back straight.
- Descend until your thigh is parallel to the ground or as low as your flexibility allows.
- Pause briefly at the bottom of the movement, then press through your heel to return to the starting position.
- Complete the desired number of repetitions on one leg before switching to the other.
Technical tips
- Maintain a tight core throughout the movement to ensure balance and stability.
- Focus on keeping your knee aligned with your toes to prevent injury.
- If you're new to this exercise, start without weights to master the form before adding resistance.
- Use a bench or box for support if needed when learning the movement.
- Control the descent and ascent to maximize muscle engagement and avoid using momentum.
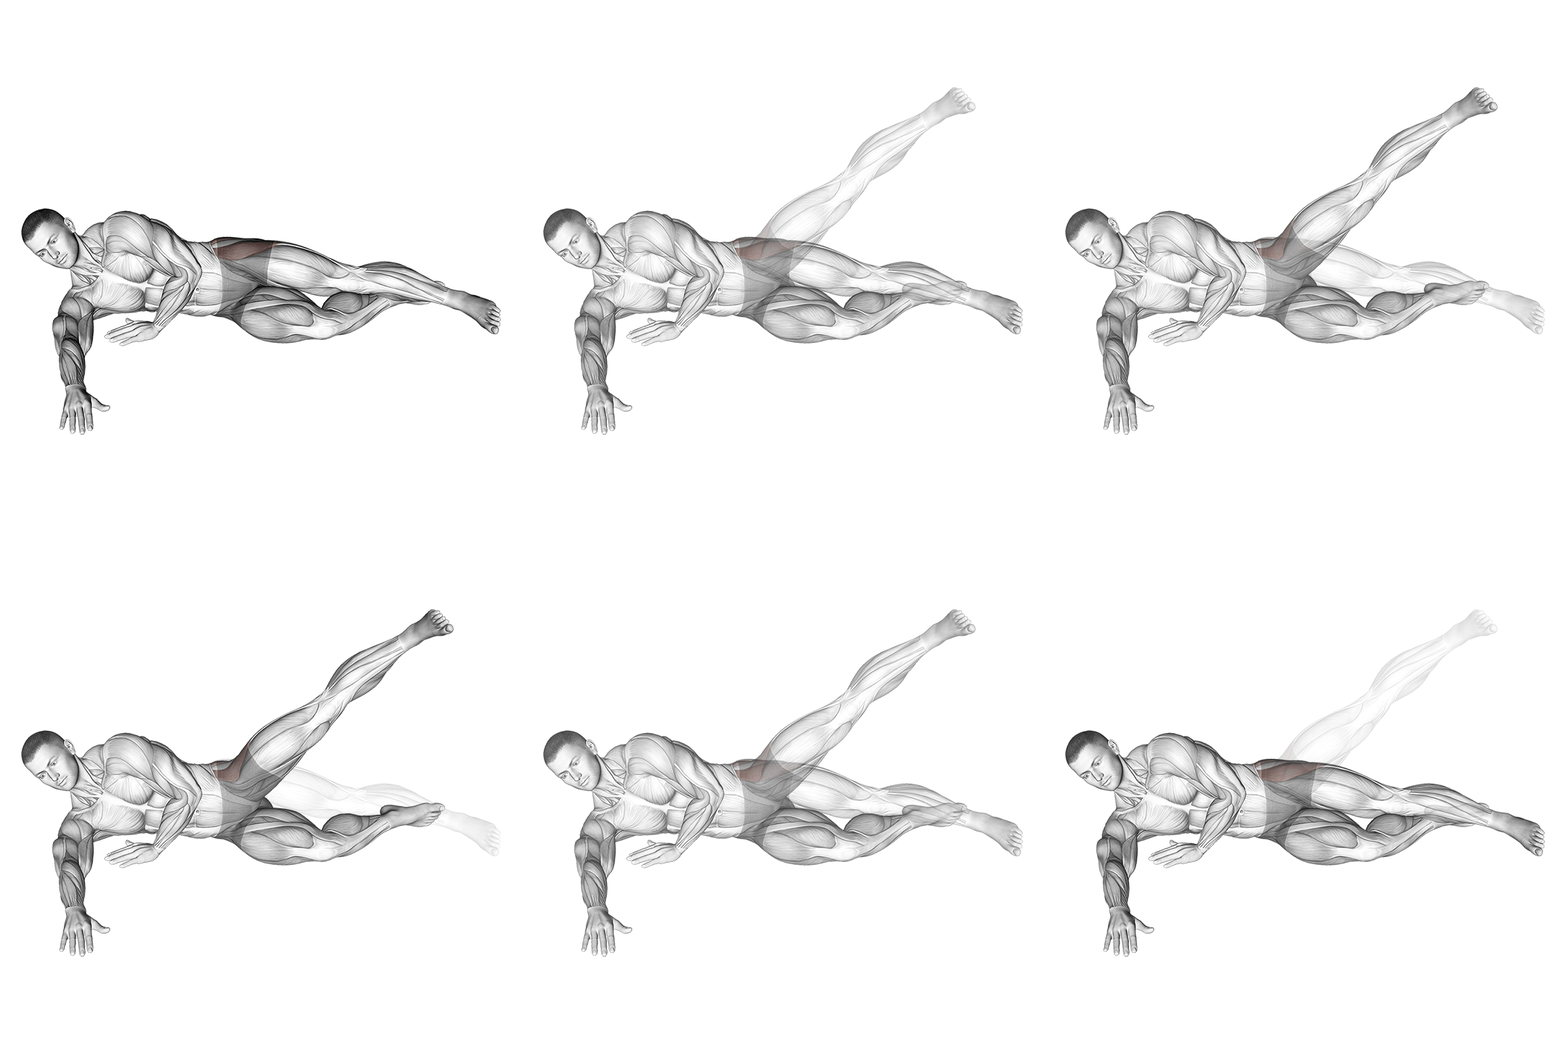
Side Lying Hip Abduction
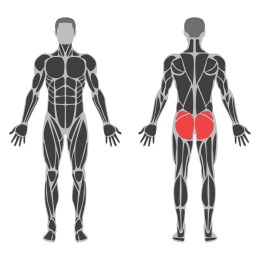
The Side Lying Hip Abduction is an isolation exercise targeting the gluteus medius and minimus muscles. It is performed by lying on one side and lifting the top leg away from the midline of the body, focusing on hip abduction.
Muscle focus
Step-by-step cues
- Lie on your side on a mat, keeping your body in a straight line from head to feet.
- Rest your head on your lower arm and place your upper hand on your hip or in front of you for balance.
- Stack your legs on top of each other with your knees straight.
- Engage your core to stabilize your torso.
- Slowly lift the top leg upwards, keeping it straight, until you feel tension in the outer hip.
- Pause briefly at the top of the movement, ensuring not to rotate your hips forward or backward.
- Lower the leg back to the starting position with control.
- Repeat for the desired number of repetitions, then switch sides.
Technical tips
- Keep your core engaged throughout the exercise to maintain stability.
- Avoid rotating your hips; keep them stacked directly over each other.
- Focus on a slow and controlled movement to maximize muscle engagement.
- Do not lift the leg too high; aim for a range that maintains tension in the glutes without compromising form.
- Breath steadily, exhaling as you lift and inhaling as you lower the leg.
- Use a resistance band around your thighs for added difficulty if needed.
Toes To Bar
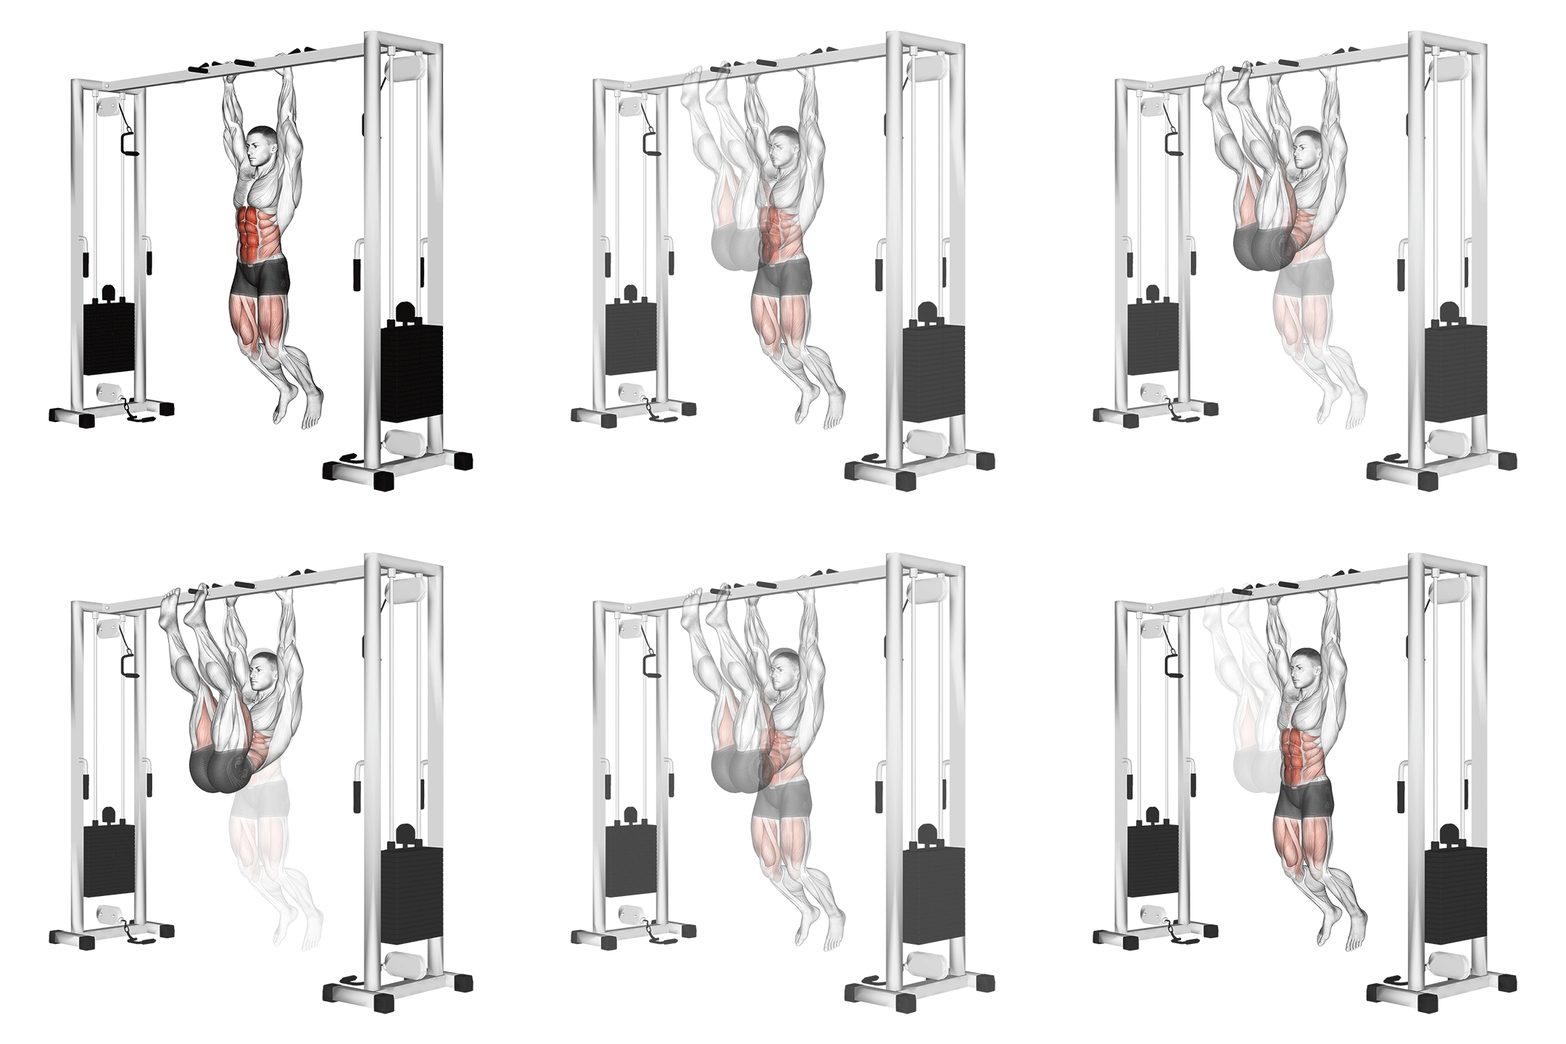
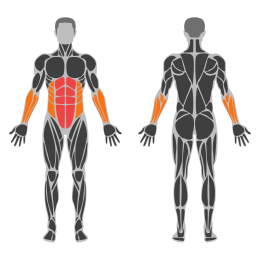
Toes To Bar is a dynamic core exercise primarily targeting the abdominal muscles, hip flexors, and grip strength. It involves hanging from a pull-up bar and lifting your toes to touch the bar, requiring coordination, strength, and flexibility.
Muscle focus
Step-by-step cues
- Begin by hanging from a pull-up bar with a shoulder-width overhand grip.
- Engage your core and initiate the movement by slightly swinging your legs back.
- Use your core muscles to lift your legs upward, aiming to bring your toes to touch the bar.
- Maintain control throughout the movement, avoiding excessive swinging.
- Lower your legs back to the starting position in a controlled manner.
- Repeat for the desired number of repetitions.
Technical tips
- Ensure your grip is firm and secure on the bar to prevent slipping.
- Focus on engaging your core muscles throughout the entire movement.
- Avoid using momentum; control is key for maximizing effectiveness and safety.
- If you struggle to reach the bar with your toes, start by bringing your knees up as high as possible.
- Breathe out as you lift your legs and inhale as you lower them back down.
- Keep your shoulders engaged and avoid letting them sag during the exercise.
Burpee
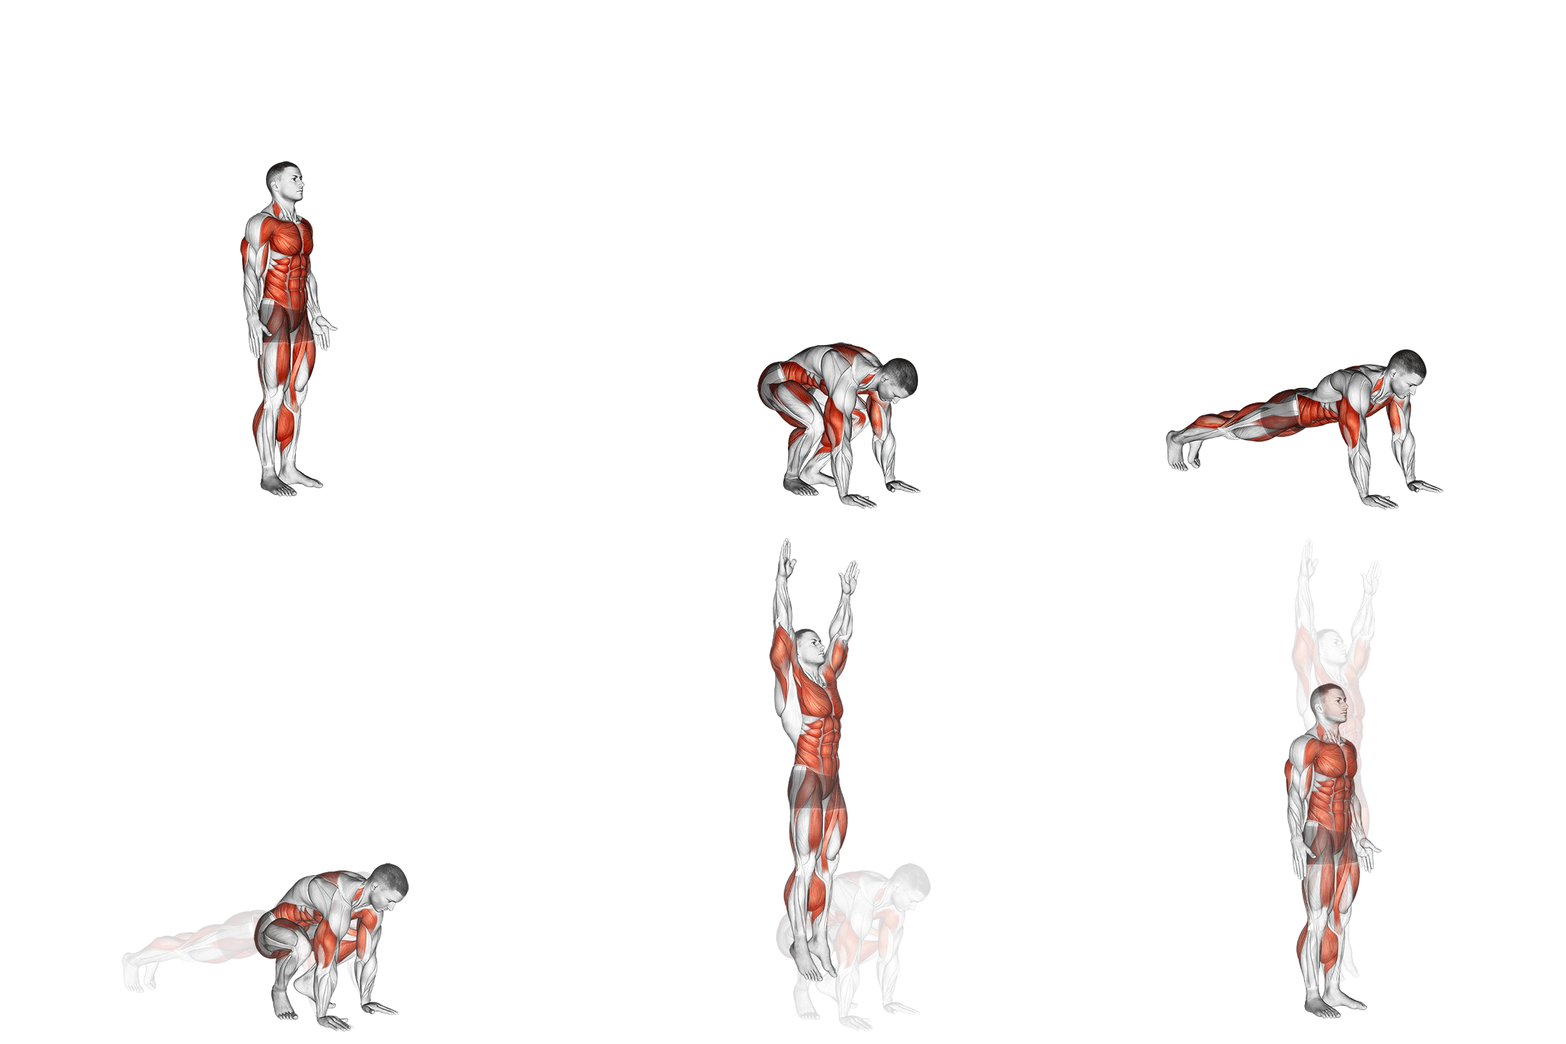
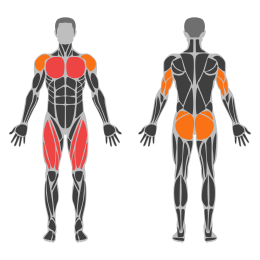
The burpee is a full-body exercise that combines a squat, push-up, and jump into one fluid movement. It is designed to improve cardiovascular endurance, strength, and agility. Burpees are often used in high-intensity interval training (HIIT) due to their ability to elevate heart rate quickly.
Muscle focus
Step-by-step cues
- Start in a standing position with your feet shoulder-width apart.
- Lower your body into a squat position and place your hands on the floor in front of you.
- Kick your feet back to assume a plank position, keeping your body straight and core engaged.
- Perform a push-up by lowering your chest to the ground and then pushing back up to the plank position.
- Jump your feet forward to return to the squat position.
- Explosively jump into the air, reaching your arms overhead.
- Land softly and immediately go into the next repetition.
Technical tips
- Maintain a steady pace to ensure proper form throughout the exercise.
- Engage your core during the plank and push-up phases to protect your lower back.
- Focus on landing softly on the balls of your feet during the jump to reduce impact on your joints.
- Keep your elbows close to your body during the push-up for better control and efficiency.
- Breathe consistently: inhale as you lower into the squat and exhale as you jump up.
- If you're a beginner, start with a modified version by stepping back into the plank instead of jumping.
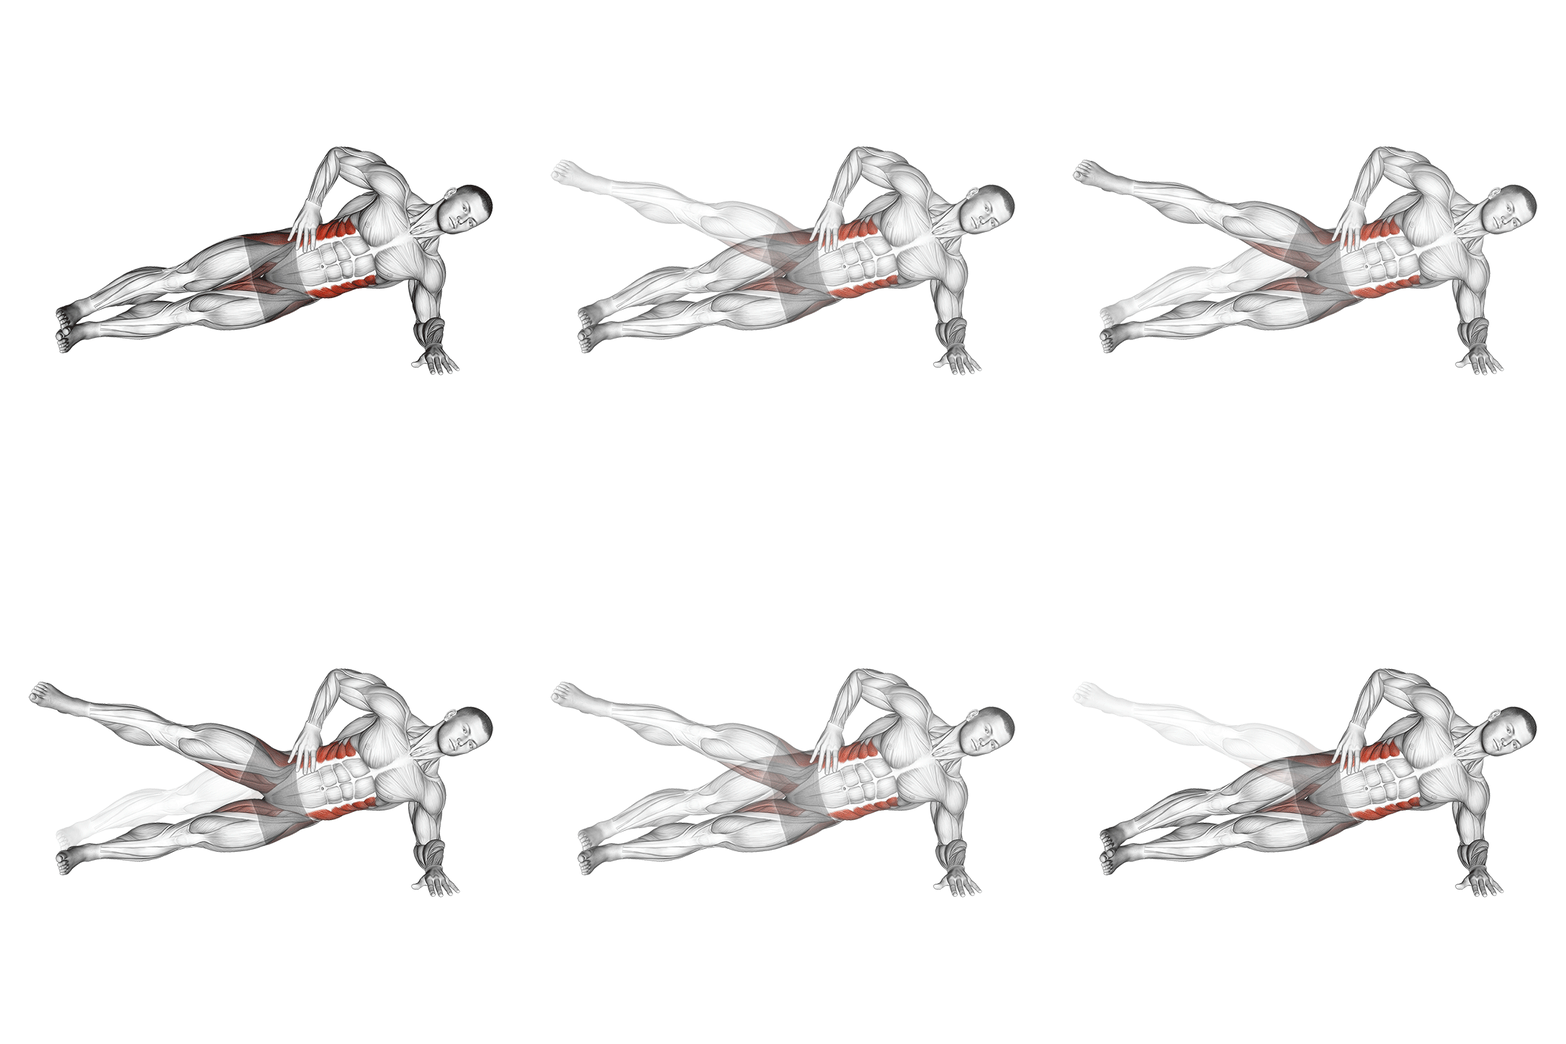
Side Plank Hip Abduction
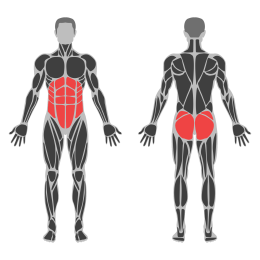
The Side Plank Hip Abduction is an advanced core and lower body exercise that targets the obliques, gluteus medius, and hip abductors. It enhances core stability, balance, and strength in the lateral muscles of the body.
Muscle focus
Step-by-step cues
- Begin by lying on your side with your legs extended and stacked on top of each other.
- Place your elbow directly under your shoulder to support your upper body.
- Engage your core and lift your hips off the ground, forming a straight line from head to heels.
- Once in the side plank position, lift your top leg as high as possible without compromising form.
- Hold the position briefly, then slowly lower your leg back to the starting position.
- Maintain a stable core throughout the movement and avoid letting your hips drop.
- Repeat for the desired number of repetitions before switching sides.
Technical tips
- Ensure your elbow is directly under your shoulder to prevent strain.
- Keep your body in a straight line from head to heels for optimal form.
- Engage your core muscles to maintain stability during the exercise.
- Focus on controlled movements when lifting and lowering your leg.
- Avoid rotating your hips or shoulders; keep them square to the ground.
- Breathe steadily throughout the exercise to maintain focus and endurance.
- If you're new to this exercise, start with shorter holds and gradually increase duration as you build strength.
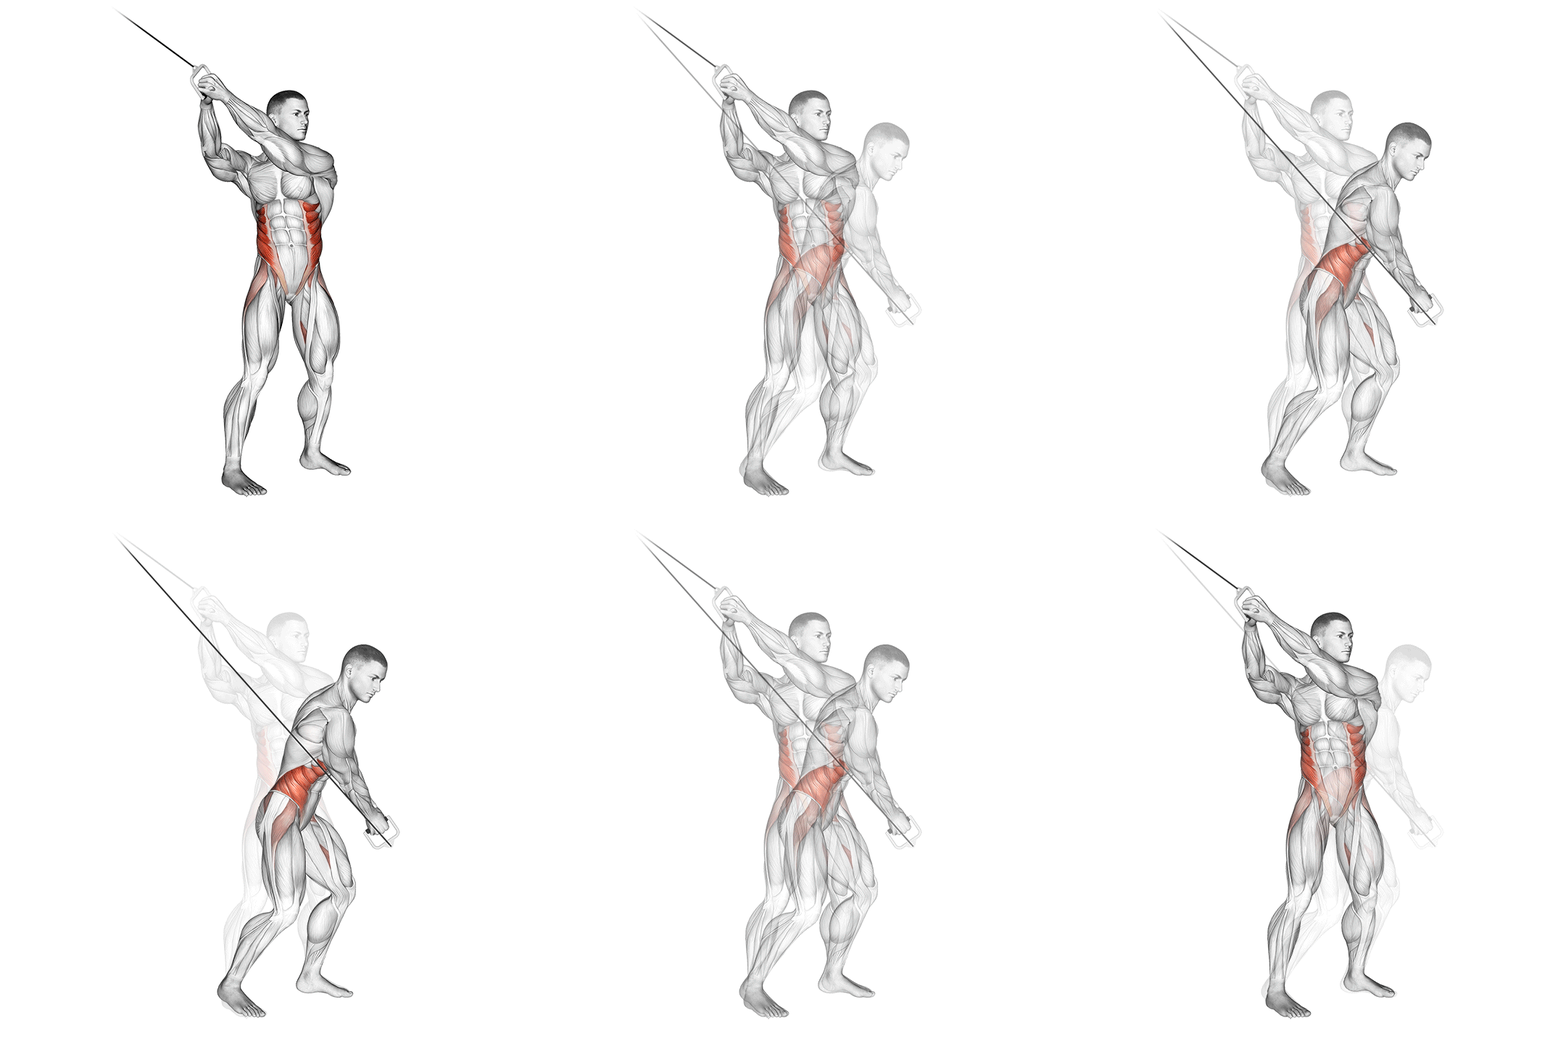
Cable Twist (up down)
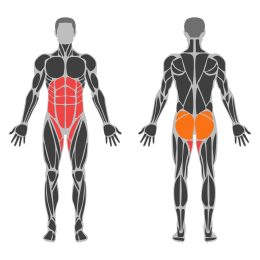
The Cable Twist (up down) is a core-strengthening exercise that targets the obliques and transverse abdominis. It involves rotational movement using a cable machine, enhancing stability and improving rotational power.
Muscle focus
Step-by-step cues
- Set the cable machine to a high pulley position and attach a single handle.
- Stand with feet shoulder-width apart, side-on to the machine, and grasp the handle with both hands.
- Engage your core and slightly bend your knees for stability.
- Pull the handle downward across your body in a controlled motion, rotating your torso as you do so.
- Continue the movement until your hands are near your opposite hip.
- Slowly return to the starting position by reversing the motion, maintaining control throughout.
- Complete the desired number of repetitions before switching sides.
Technical tips
- Keep your core engaged throughout the exercise to maximize effectiveness and protect your lower back.
- Focus on slow, controlled movements rather than using momentum to ensure proper muscle engagement.
- Maintain a slight bend in your knees to stabilize your stance and prevent unnecessary strain.
- Exhale as you pull the cable downwards and inhale as you return to the starting position.
- Ensure that your shoulders remain relaxed and avoid shrugging them during the movement.
Tuesday
Upper Strength
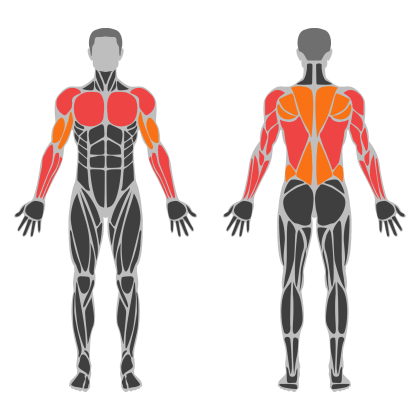
Upper Strength muscle focus
Red marks the primary training focus. Orange marks supporting muscle groups used throughout this session.
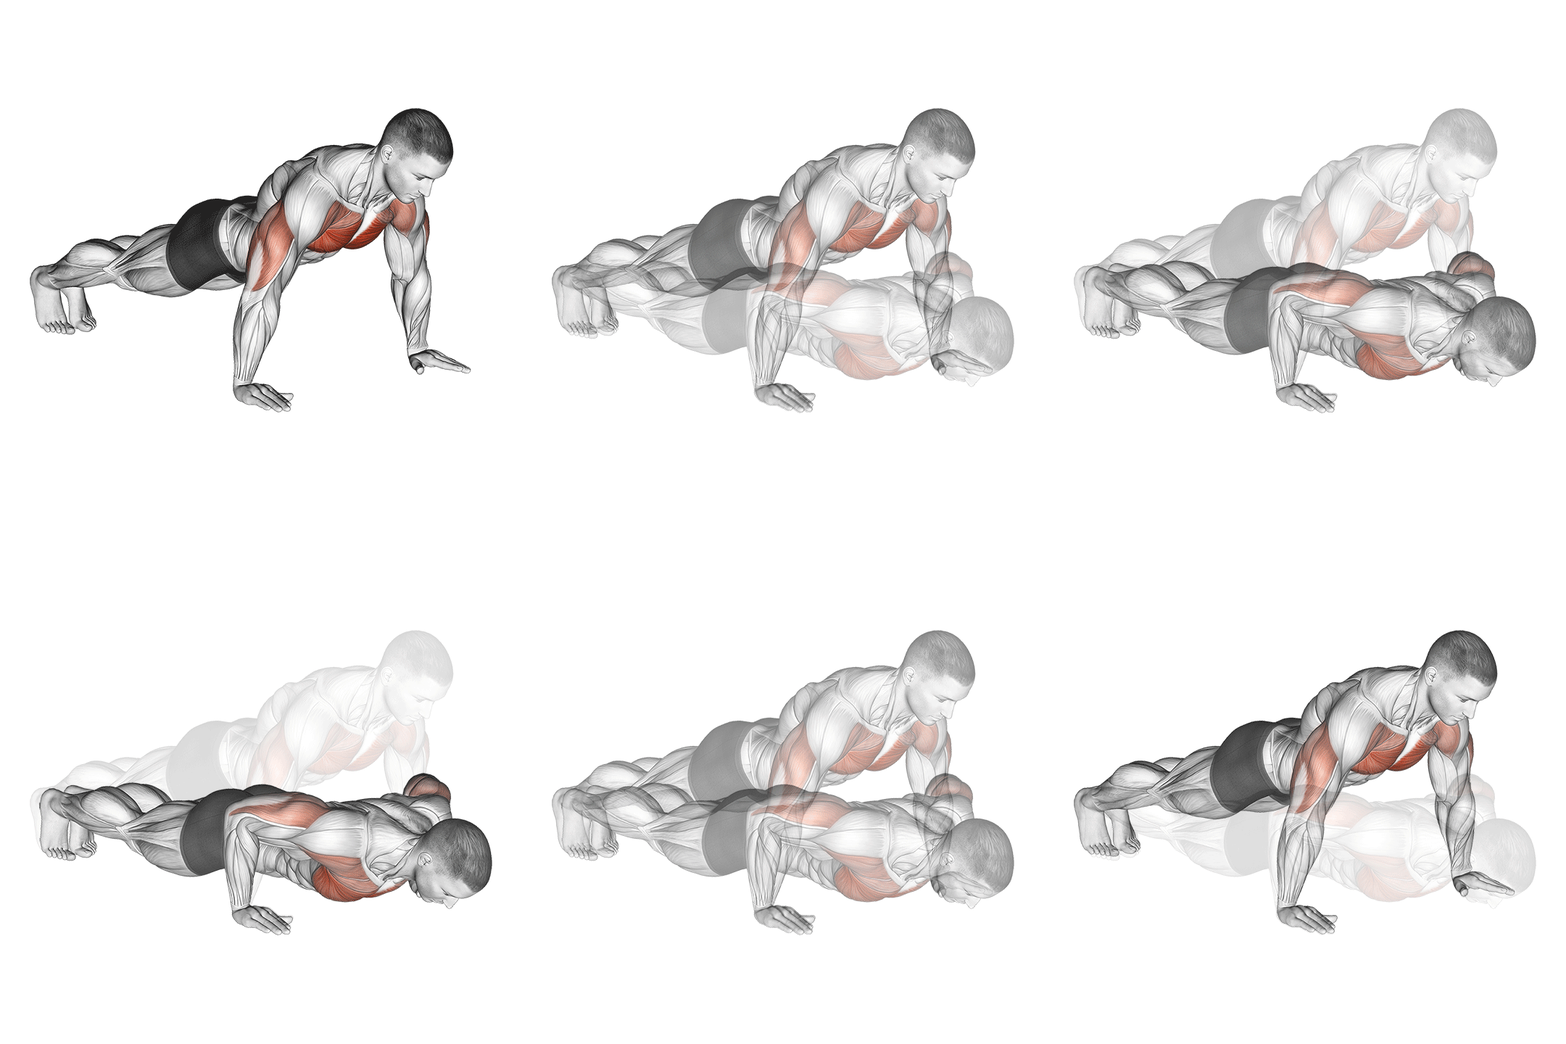
Push-Up
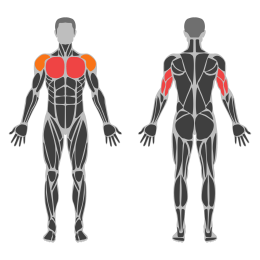
The push-up is a bodyweight exercise that primarily targets the chest, triceps, and shoulders. It also engages the core and stabilizing muscles, making it a comprehensive upper body workout. Push-ups can be performed anywhere and are fundamental for building strength and endurance.
Muscle focus
Step-by-step cues
- Start in a plank position with your hands placed slightly wider than shoulder-width apart and your feet together. Your body should form a straight line from head to heels.
- Engage your core by pulling your belly button towards your spine to maintain a neutral spine position.
- Lower your body by bending your elbows, keeping them at a 45-degree angle to your torso. Descend until your chest nearly touches the floor.
- Pause briefly at the bottom, then push through your palms to extend your elbows and return to the starting position.
- Ensure that your body remains in a straight line throughout the movement without sagging or arching your back.
Technical tips
- Keep your elbows at a 45-degree angle to protect your shoulders and maximize chest engagement.
- Maintain a tight core throughout the exercise to prevent your hips from sagging.
- Focus on controlled movements; avoid bouncing off the floor at the bottom of the push-up.
- If you struggle with full push-ups, start with knee push-ups or incline push-ups to build strength.
- Breathe in as you lower yourself and exhale as you push back up.
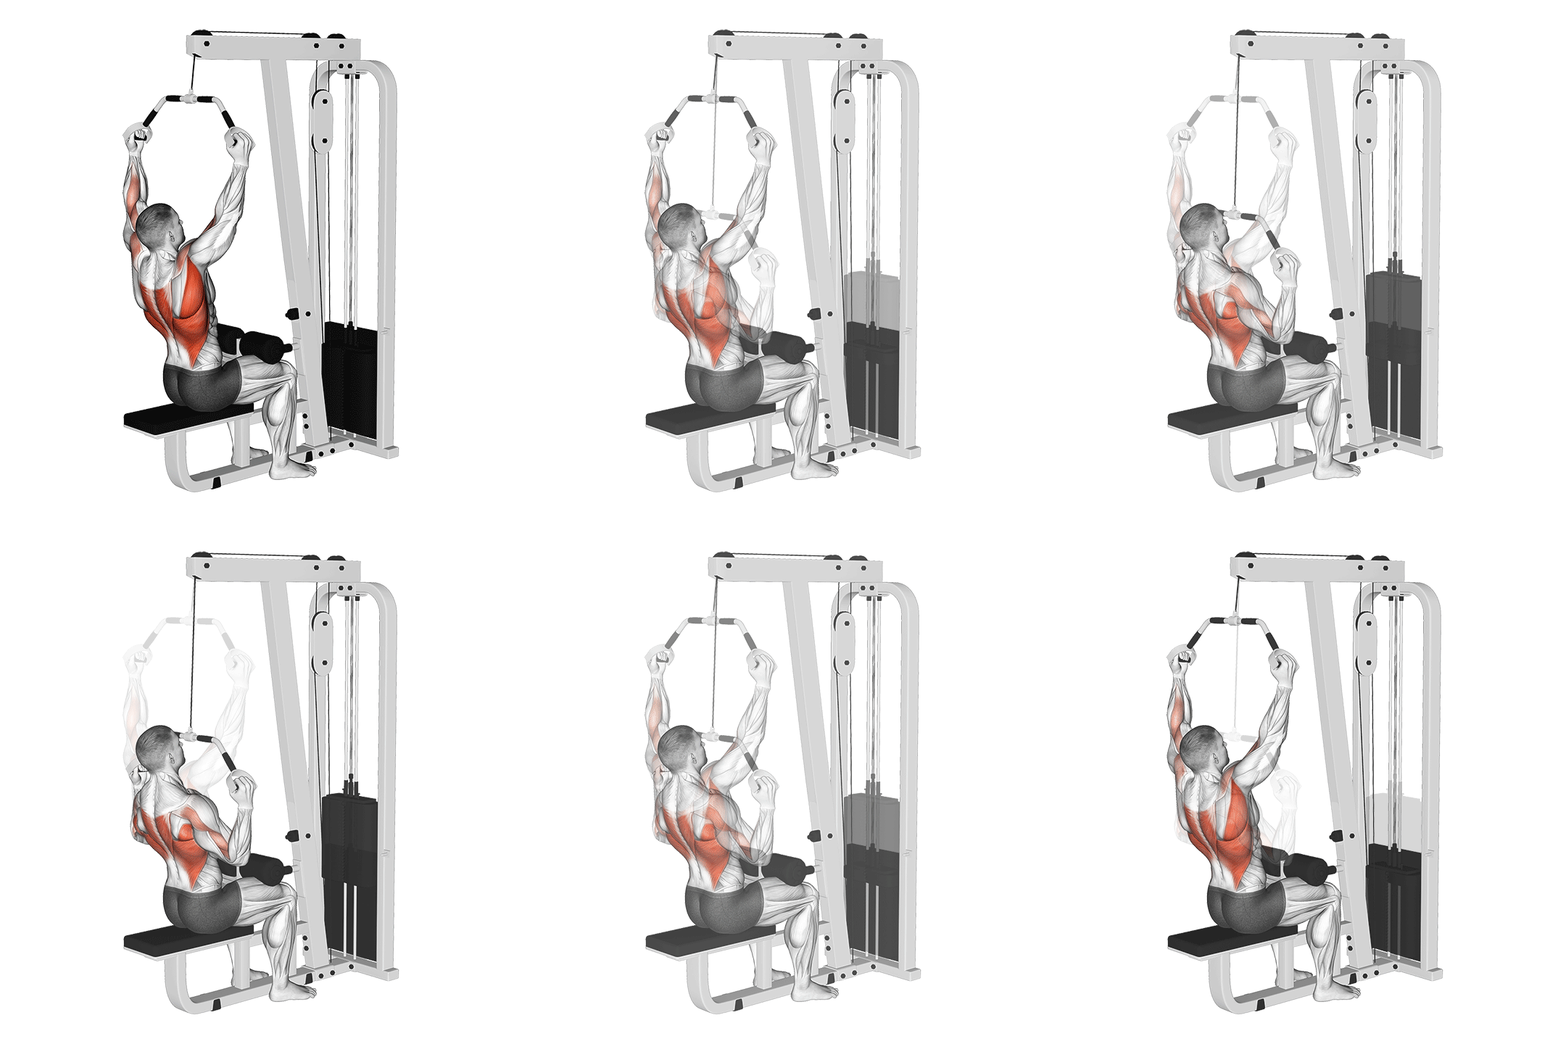
Cable Neutral Grip Lat Pulldown
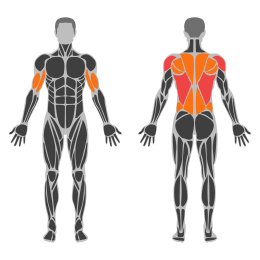
The Cable Wide Neutral Grip Lat Pulldown targets the latissimus dorsi muscles, along with the biceps, shoulders, and upper back. This exercise is performed using a cable machine with a wide neutral grip attachment, allowing for a natural hand position that reduces strain on the wrists and shoulders while effectively engaging the back muscles.
Muscle focus
Step-by-step cues
- Sit at a cable pulldown machine and adjust the knee pad to secure your legs.
- Attach a wide neutral grip handle to the high pulley.
- Grasp the handle with palms facing each other, arms fully extended overhead.
- Lean back slightly at the hips, keeping your chest up and core engaged.
- Pull the handle down towards your upper chest by driving your elbows down and back.
- Squeeze your shoulder blades together at the bottom of the movement.
- Slowly extend your arms back to the starting position under control.
- Repeat for the desired number of repetitions.
Technical tips
- Maintain a slight arch in your lower back throughout the exercise to protect your spine.
- Focus on pulling with your elbows rather than your hands to better engage the lats.
- Avoid using momentum; control the movement both on the way down and up.
- Keep your shoulders down and away from your ears to prevent unnecessary tension.
- Ensure a full range of motion by fully extending your arms at the top of each rep.
- Breathe out as you pull down and inhale as you return to the starting position.
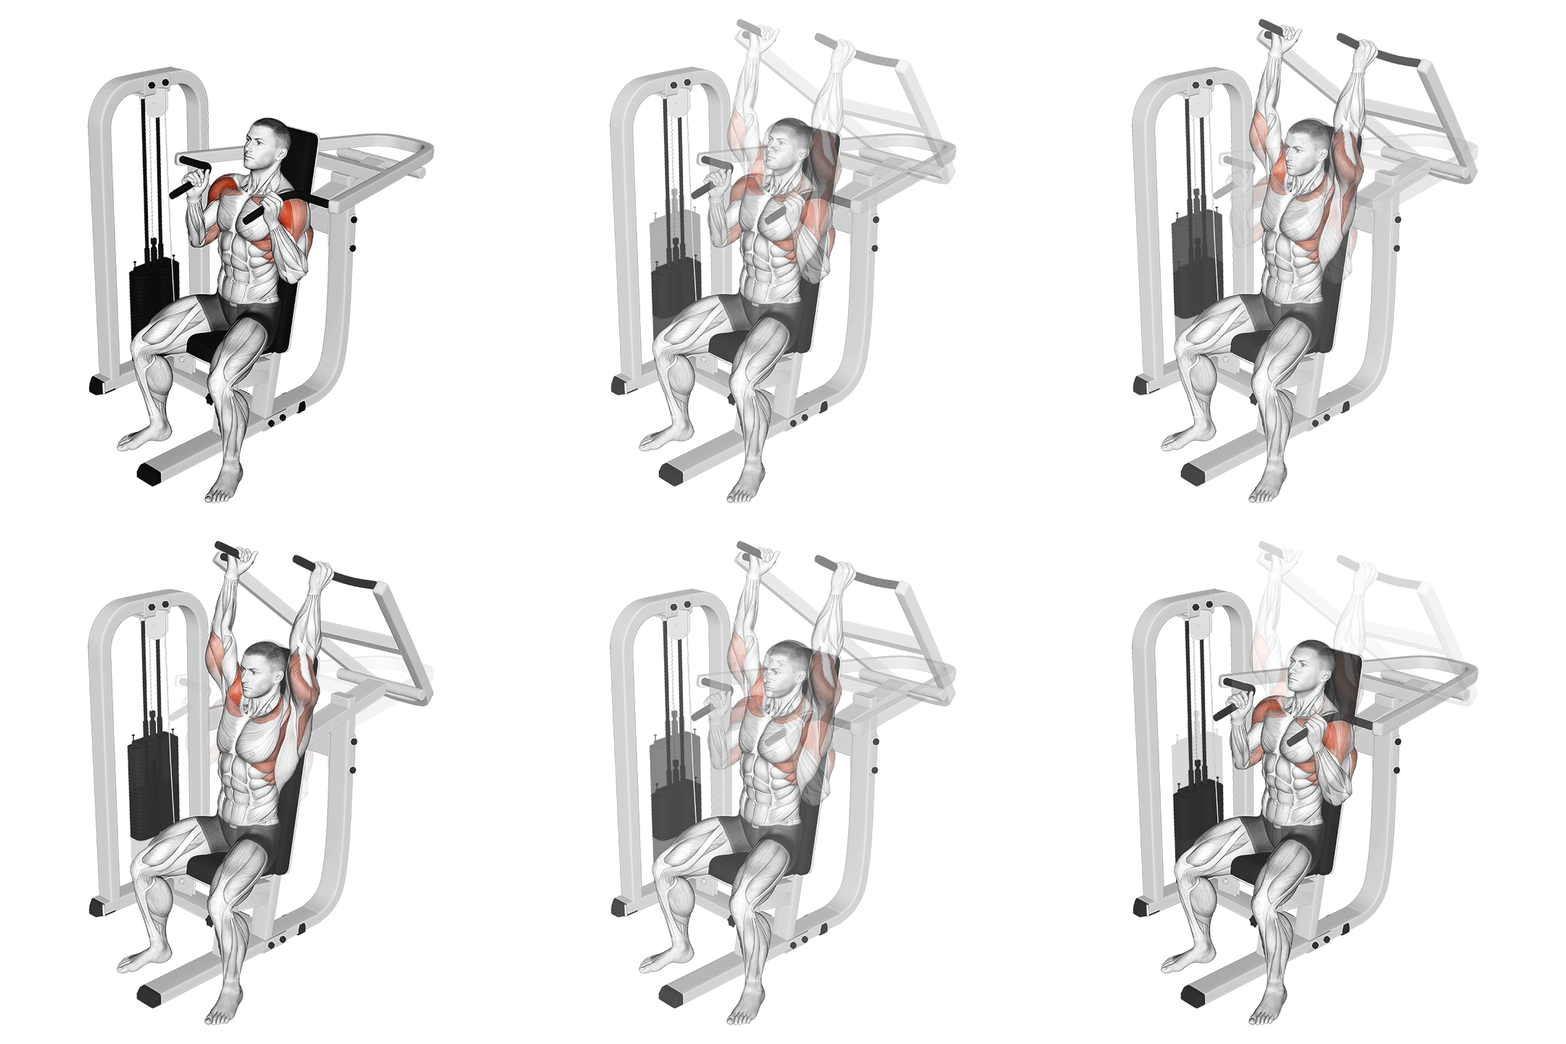
Lever Seated Hammer Grip Shoulder Press
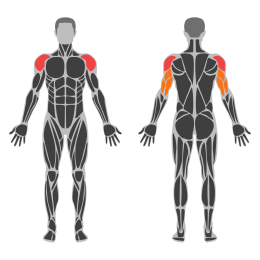
The Lever Seated Hammer Grip Shoulder Press is a machine-based exercise targeting the deltoid muscles, particularly the anterior and lateral heads. It involves pressing weights upward using a neutral grip, which can reduce strain on the shoulder joints compared to traditional grips. This exercise is beneficial for building shoulder strength and muscle mass.
Muscle focus
Step-by-step cues
- Adjust the seat height so that the handles are at shoulder level when seated.
- Sit down and firmly plant your feet on the ground, maintaining a slight arch in your lower back.
- Grasp the handles with a neutral grip (palms facing each other).
- Engage your core and press the handles upward by extending your elbows until your arms are fully extended but not locked.
- Pause briefly at the top of the movement, ensuring not to shrug your shoulders.
- Slowly lower the handles back to the starting position with control.
- Repeat for the desired number of repetitions.
Technical tips
- Keep your core engaged throughout the exercise to maintain stability.
- Avoid locking your elbows at the top of the movement to reduce joint stress.
- Focus on a slow and controlled descent to maximize muscle engagement.
- Ensure your wrists remain in a neutral position to prevent strain.
- Maintain a steady breathing pattern; exhale while pressing up and inhale while lowering.
- Adjust the weight appropriately to ensure proper form is maintained throughout all repetitions.
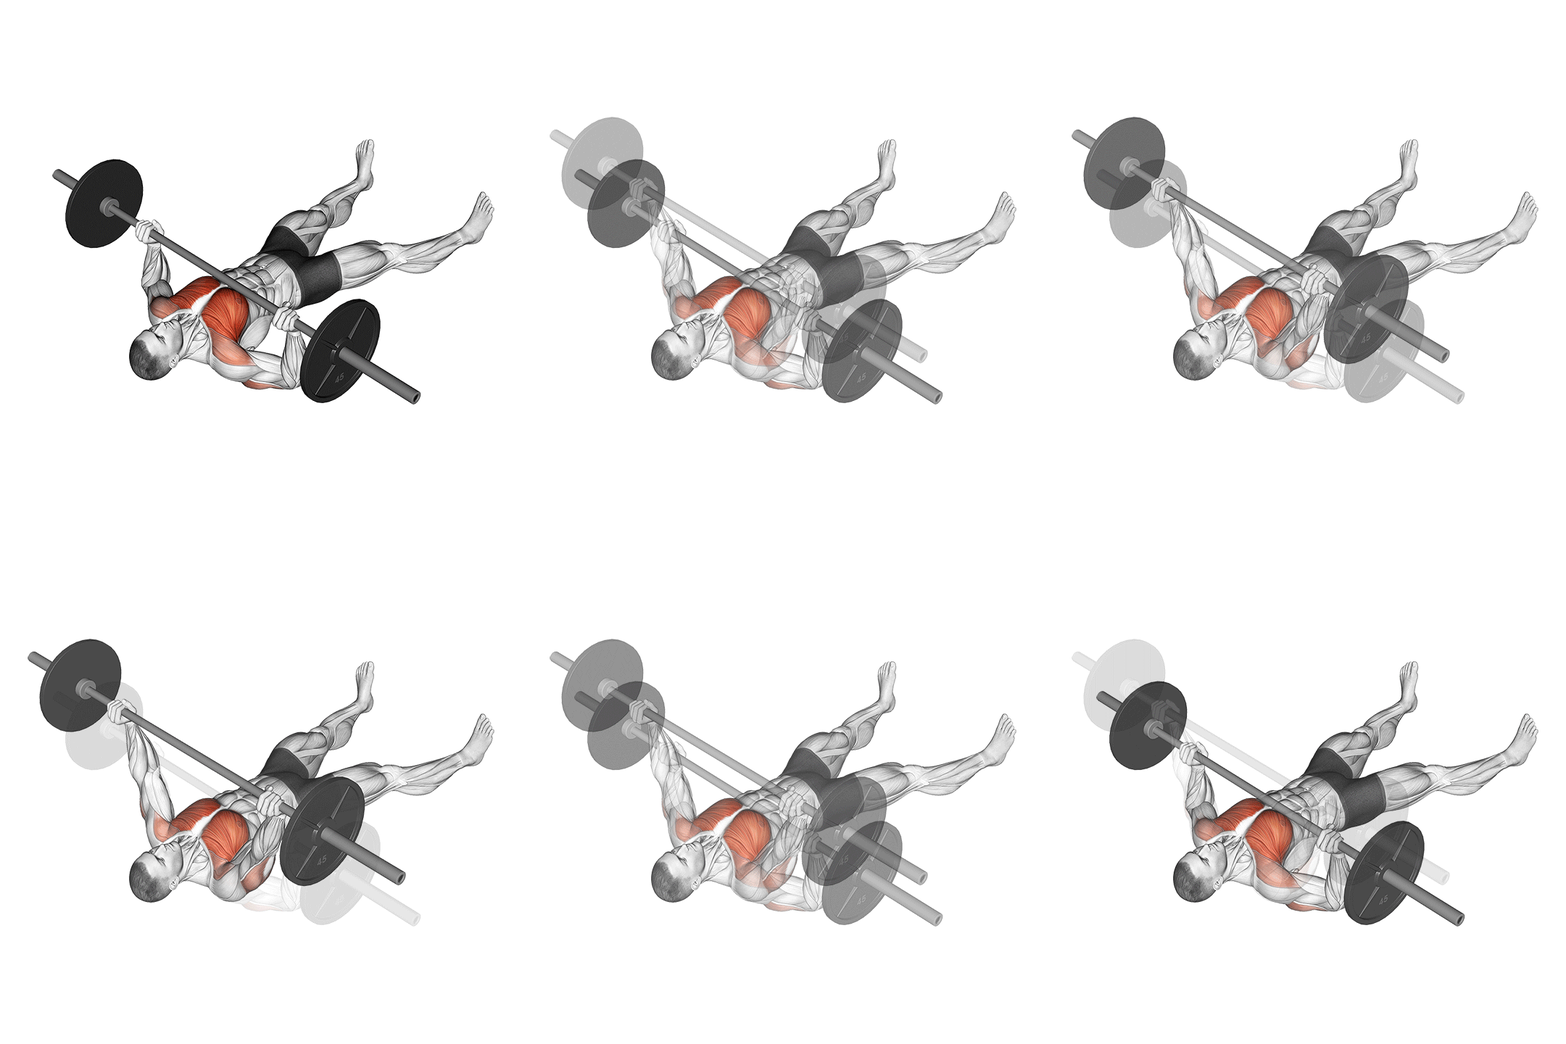
Barbell Floor Press
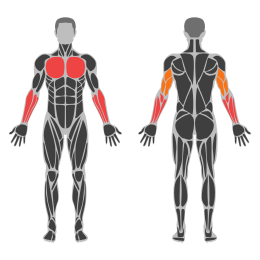
The Barbell Floor Press is a compound upper body exercise that targets the chest, triceps, and shoulders. It is performed by lying on the floor and pressing a barbell from chest level to arm's length above the torso. This exercise minimizes shoulder strain and emphasizes tricep engagement due to the limited range of motion.
Muscle focus
Step-by-step cues
- Lie on your back on the floor with your legs bent and feet flat.
- Position the barbell over your chest, gripping it slightly wider than shoulder-width apart.
- Engage your core and press your upper back into the floor.
- Lower the barbell until your upper arms touch the floor, keeping elbows at a 45-degree angle to your body.
- Pause briefly, then press the barbell back up to the starting position by extending your arms.
- Repeat for the desired number of repetitions.
Technical tips
- Keep your core tight throughout the movement to stabilize your body.
- Ensure your wrists remain straight and aligned with your forearms to avoid strain.
- Focus on controlled movements; avoid bouncing the barbell off the floor.
- Maintain a consistent grip width to ensure balanced muscle activation.
- Use a spotter if lifting heavy to ensure safety during the exercise.
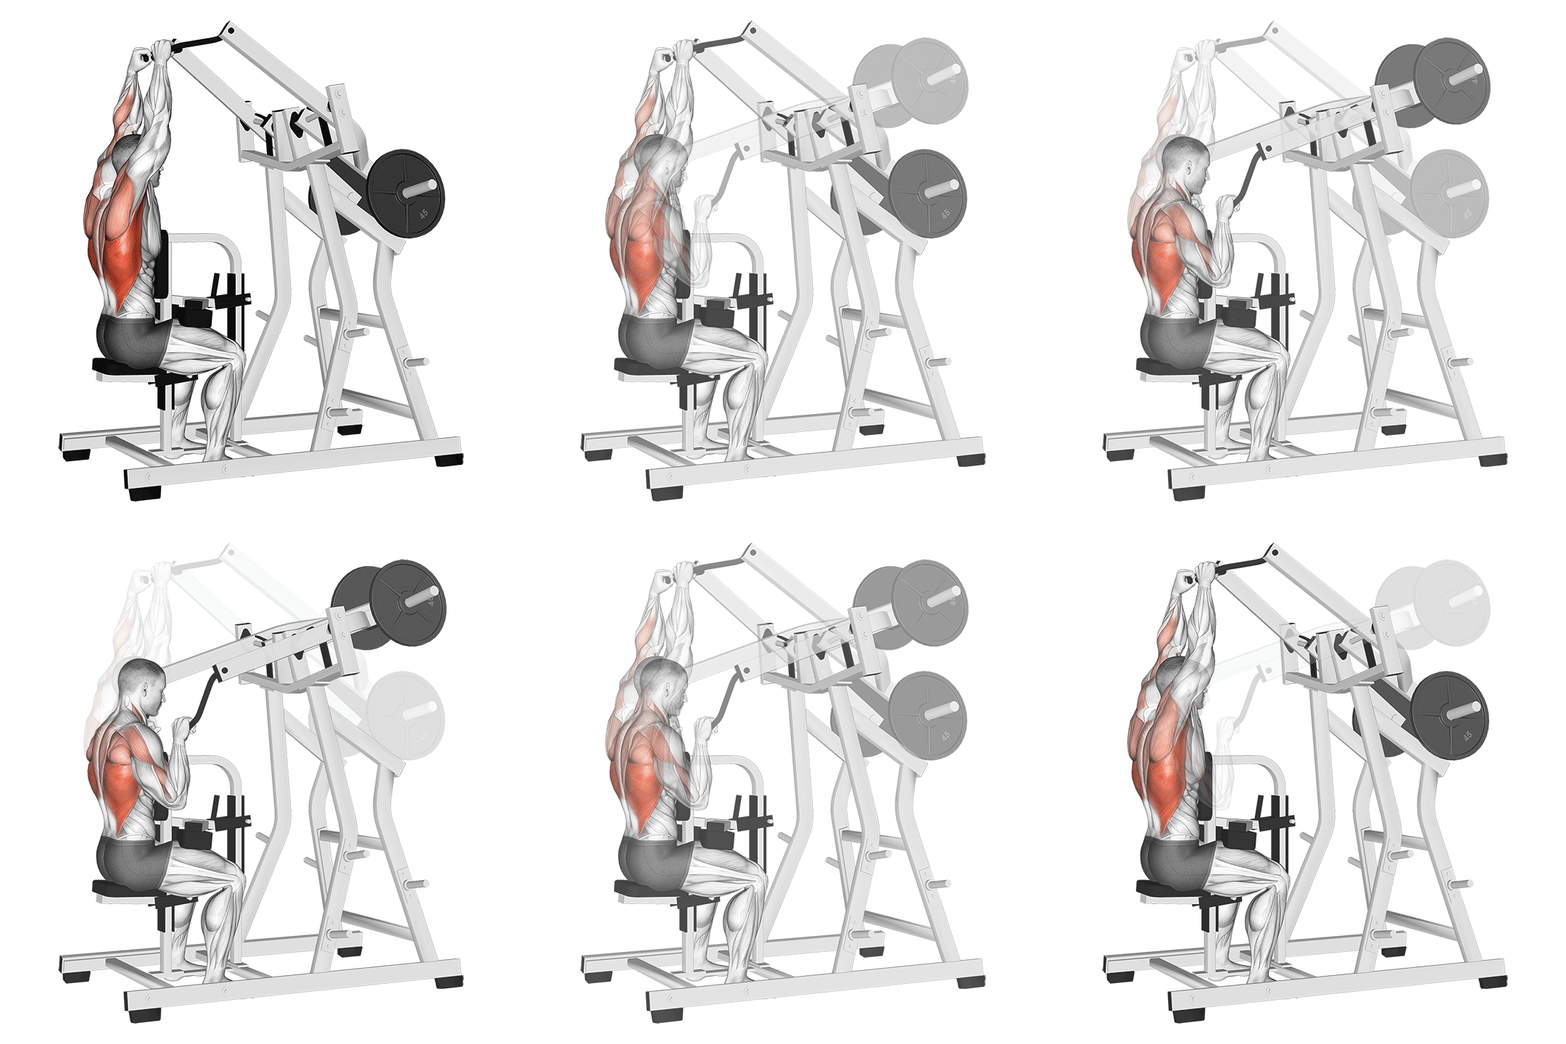
Lat Pulldown Machine
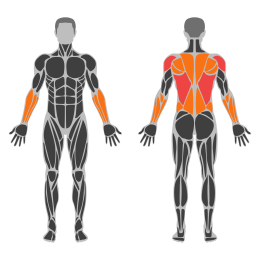
The Lat Pulldown Machine is designed to target the latissimus dorsi muscles in the back, along with secondary engagement of the biceps, shoulders, and upper back. It is a seated exercise where you pull a bar down towards your chest, simulating a pull-up motion.
Muscle focus
Step-by-step cues
- Adjust the seat height so that your feet are flat on the floor and your thighs are secured under the thigh pads.
- Select an appropriate weight on the machine.
- Grasp the bar with a wide overhand grip, slightly wider than shoulder-width apart.
- Sit down with your back straight and chest up, positioning yourself directly under the bar.
- Pull the bar down towards your upper chest while keeping your elbows pointed down and back.
- Pause briefly at the bottom of the movement, ensuring full contraction of the lats.
- Slowly release the bar back to the starting position with controlled movement.
- Repeat for the desired number of repetitions.
Technical tips
- Keep your core engaged throughout the exercise to maintain stability and proper form.
- Avoid using momentum; focus on controlled movements to maximize muscle engagement.
- Ensure your shoulders are relaxed and not hunched during the exercise to prevent strain.
- Exhale as you pull the bar down and inhale as you return to the starting position.
- If you experience discomfort in your shoulders or wrists, adjust your grip or consult a trainer.
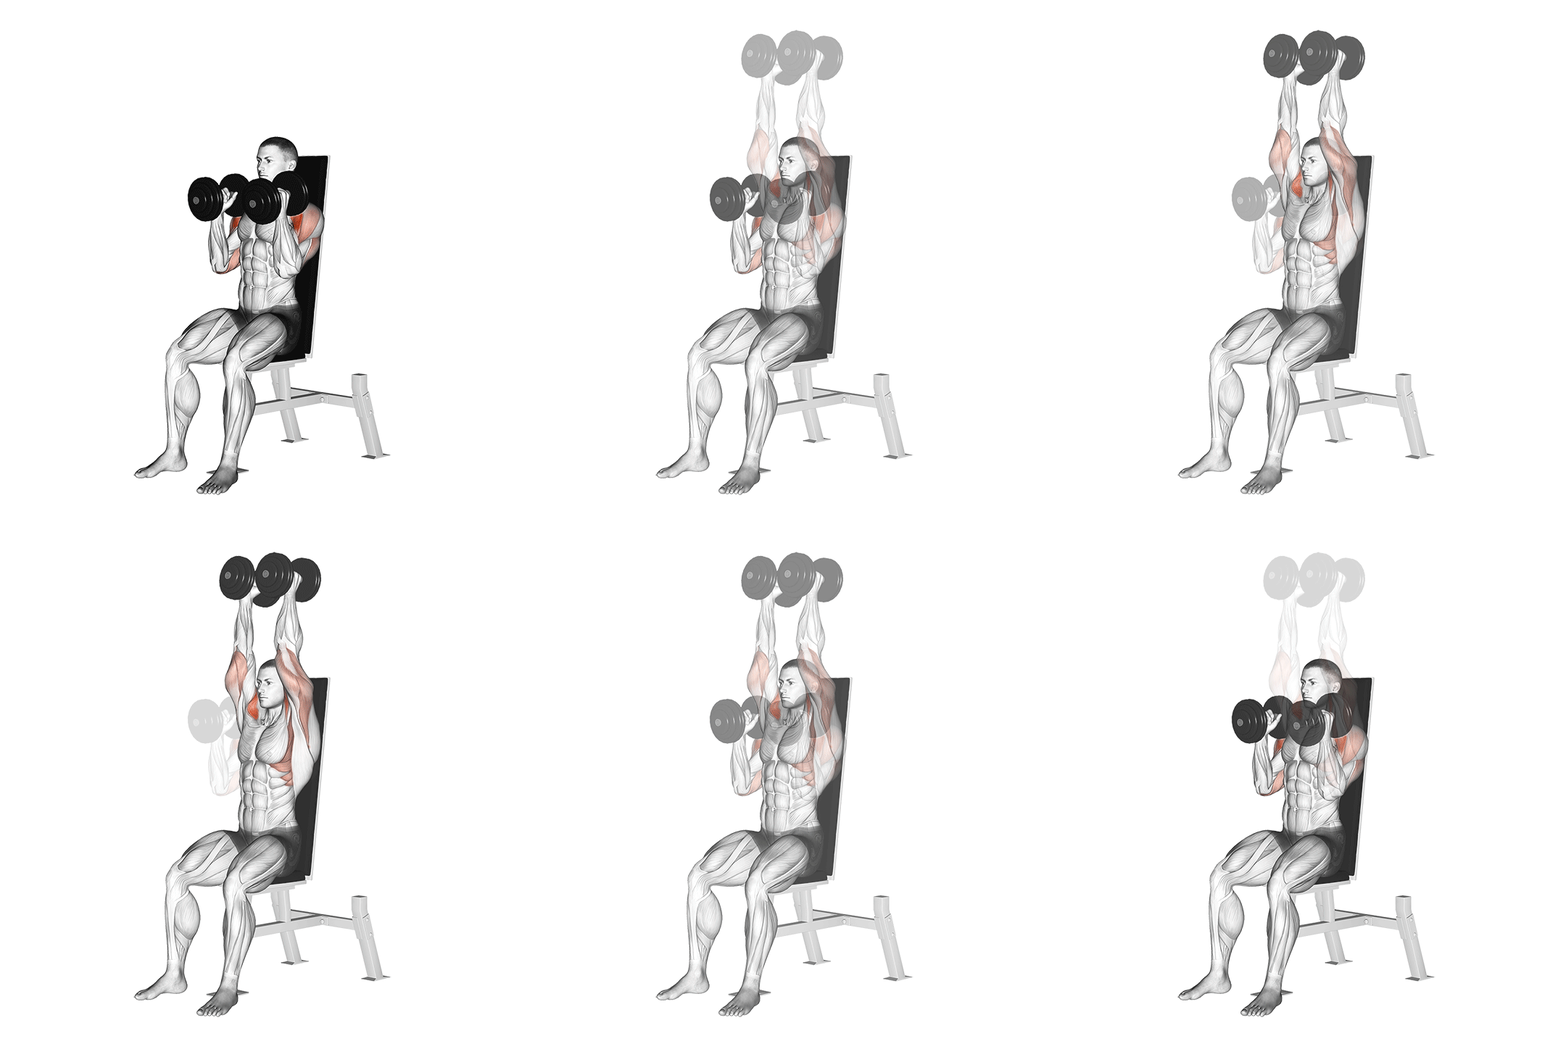
Seated Shoulder Press Neutral Grip
The Seated Shoulder Press Neutral Grip is an upper body exercise targeting the deltoid muscles, particularly the anterior and lateral heads, as well as engaging the triceps and upper chest. This exercise is performed using a pair of dumbbells or a specialized machine, with a neutral grip to reduce stress on the shoulder joints and enhance stability.
Muscle focus
Step-by-step cues
- Sit on a bench with back support, ensuring your feet are flat on the floor and your back is straight.
- Hold a dumbbell in each hand with a neutral grip (palms facing each other) at shoulder height.
- Engage your core to stabilize your torso and keep your elbows slightly in front of your body.
- Press the dumbbells upward until your arms are fully extended but not locked out.
- Pause briefly at the top of the movement, maintaining control.
- Slowly lower the dumbbells back to the starting position at shoulder height.
- Repeat for the desired number of repetitions.
Technical tips
- Keep your core engaged throughout the exercise to maintain stability and prevent arching of the lower back.
- Use a controlled motion to avoid using momentum, which can reduce effectiveness and increase injury risk.
- Ensure that your elbows remain slightly in front of your body to maintain proper shoulder alignment.
- Avoid locking out your elbows at the top to keep tension on the muscles and protect your joints.
- Start with lighter weights to master form before progressing to heavier loads.
Wednesday
Zone 2 Recovery
Use easy cycling, rowing or walking for 35-50 minutes.
Thursday
Full Body Power
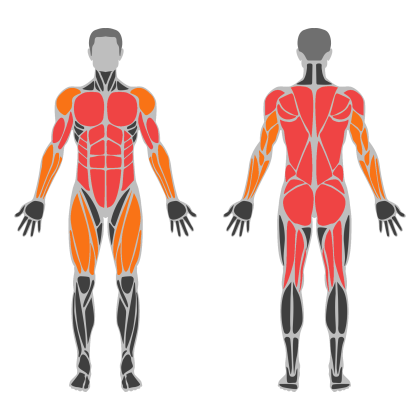
Full Body Power muscle focus
Red marks the primary training focus. Orange marks supporting muscle groups used throughout this session.
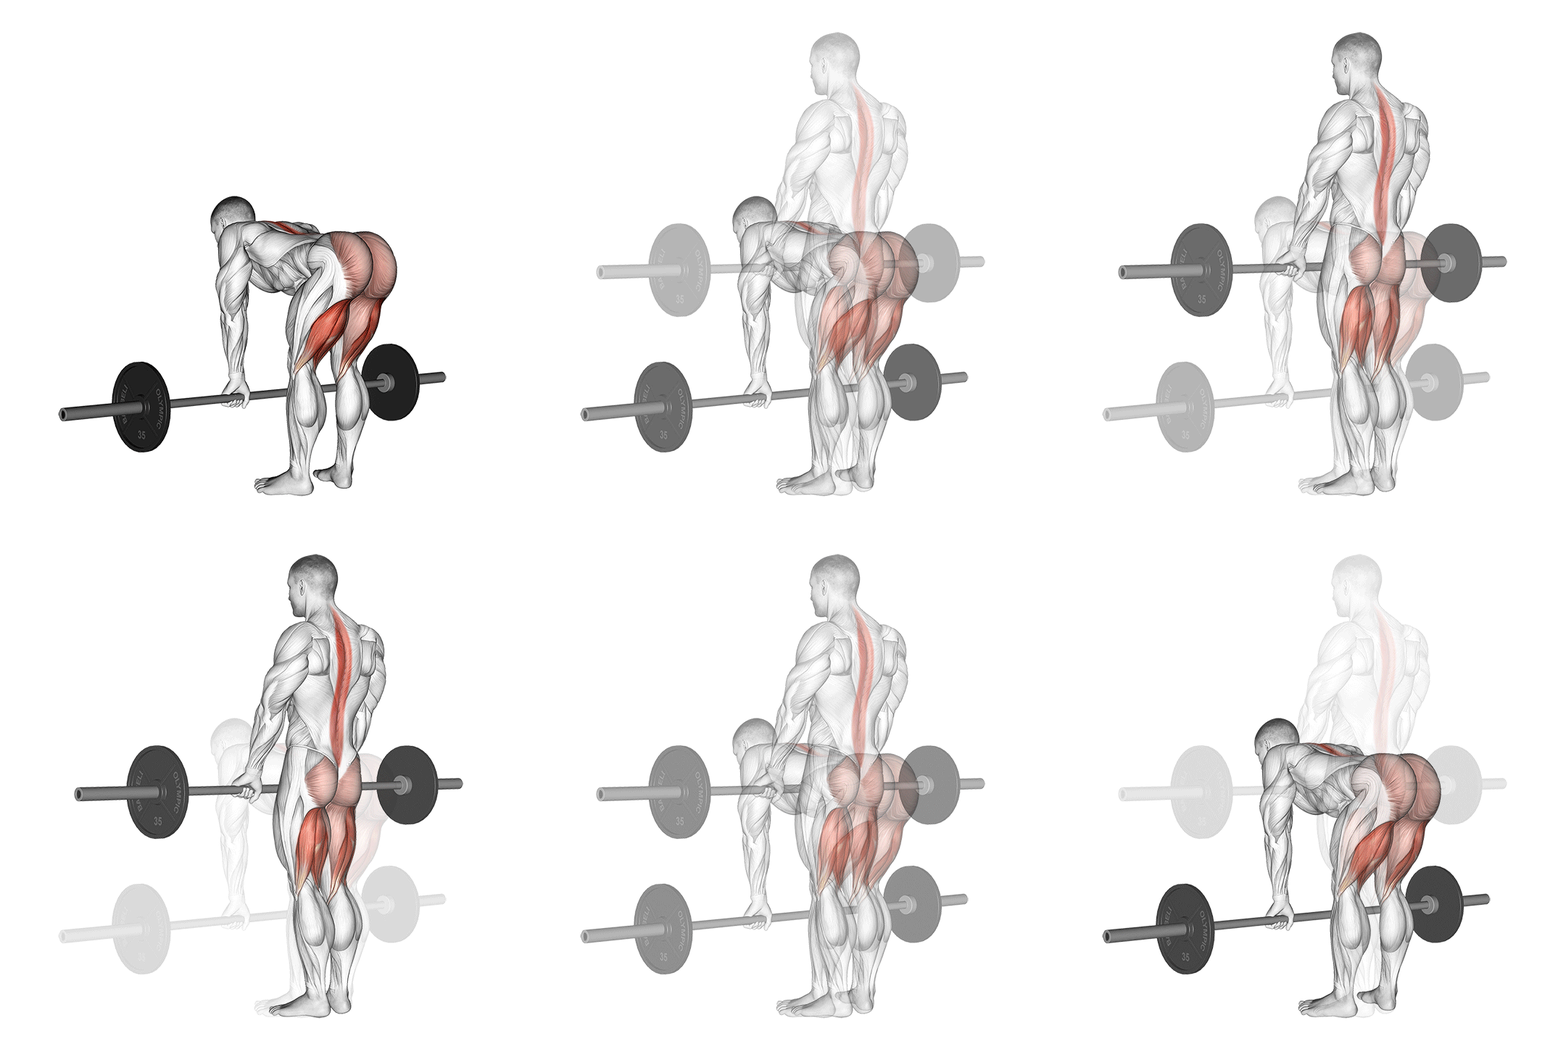
Barbell Straight Leg Deadlift
The Barbell Straight Leg Deadlift is a compound exercise targeting the hamstrings, glutes, and lower back. It involves lifting a barbell from the floor with straight legs, focusing on hip hinge movement while maintaining a neutral spine. This exercise enhances posterior chain strength and flexibility.
Muscle focus
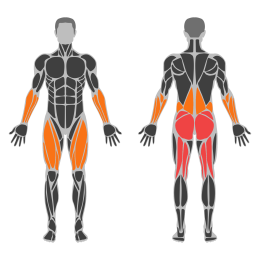
Step-by-step cues
- Stand with feet hip-width apart, toes pointing forward, and the barbell over your mid-foot.
- Grip the barbell with an overhand grip, hands slightly wider than shoulder-width apart.
- Keep your legs straight but not locked, and engage your core.
- Hinge at the hips by pushing them back while keeping your back straight and chest up.
- Lower the barbell along your legs until you feel a stretch in your hamstrings.
- Pause briefly at the bottom, then drive your hips forward to return to the starting position.
- Maintain a neutral spine throughout the movement and avoid rounding your back.
Technical tips
- Focus on hinging at the hips rather than bending at the waist to protect your lower back.
- Keep the barbell close to your body to maintain balance and control.
- Engage your core muscles to stabilize your torso during the lift.
- Avoid locking your knees; keep them slightly bent to reduce strain on the joints.
- Control the descent of the barbell to maximize muscle engagement and prevent injury.
- Ensure your shoulders are retracted and not rounded forward during the lift.
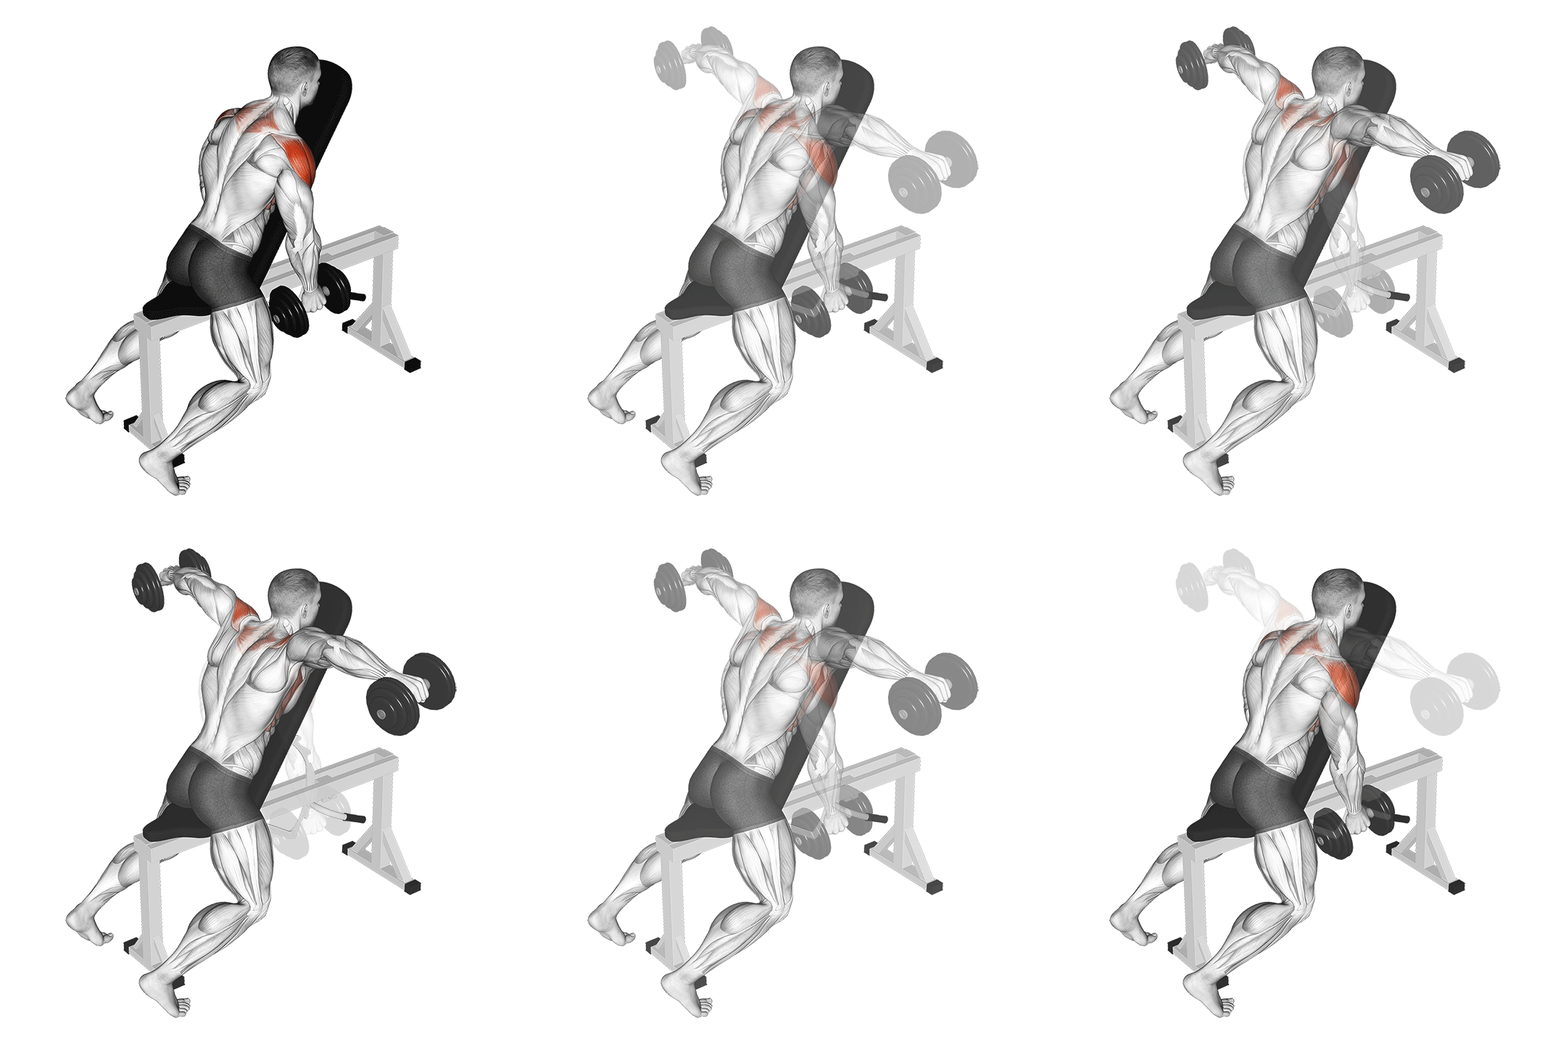
Dumbbell Incline Chest Supported Lateral Raises
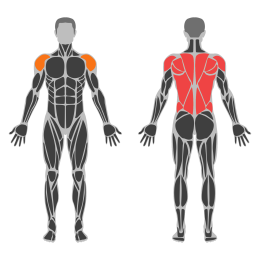
The Dumbbell Incline Chest Supported Lateral Raise is an isolation exercise targeting the lateral deltoids. It involves lying face down on an incline bench, which provides support and stability, minimizing momentum and maximizing shoulder engagement. This exercise is effective for building shoulder width and improving overall shoulder aesthetics.
Muscle focus
Step-by-step cues
- Set an incline bench to a 30-45 degree angle.
- Hold a dumbbell in each hand with a neutral grip (palms facing each other).
- Lie face down on the bench with your chest supported and feet firmly planted on the ground.
- Extend your arms down towards the floor, keeping a slight bend in your elbows.
- Engage your core and lift the dumbbells out to the sides until your arms are parallel to the floor.
- Pause briefly at the top of the movement, focusing on squeezing your shoulder blades together.
- Slowly lower the dumbbells back to the starting position.
- Repeat for the desired number of repetitions.
Technical tips
- Keep your neck in a neutral position to avoid strain.
- Focus on controlled movements to maximize muscle engagement.
- Avoid using momentum; lift with your shoulders, not your back or arms.
- Maintain a slight bend in the elbows throughout the exercise to protect your joints.
- Exhale as you lift the weights and inhale as you lower them.
- Start with lighter weights to ensure proper form before progressing to heavier dumbbells.
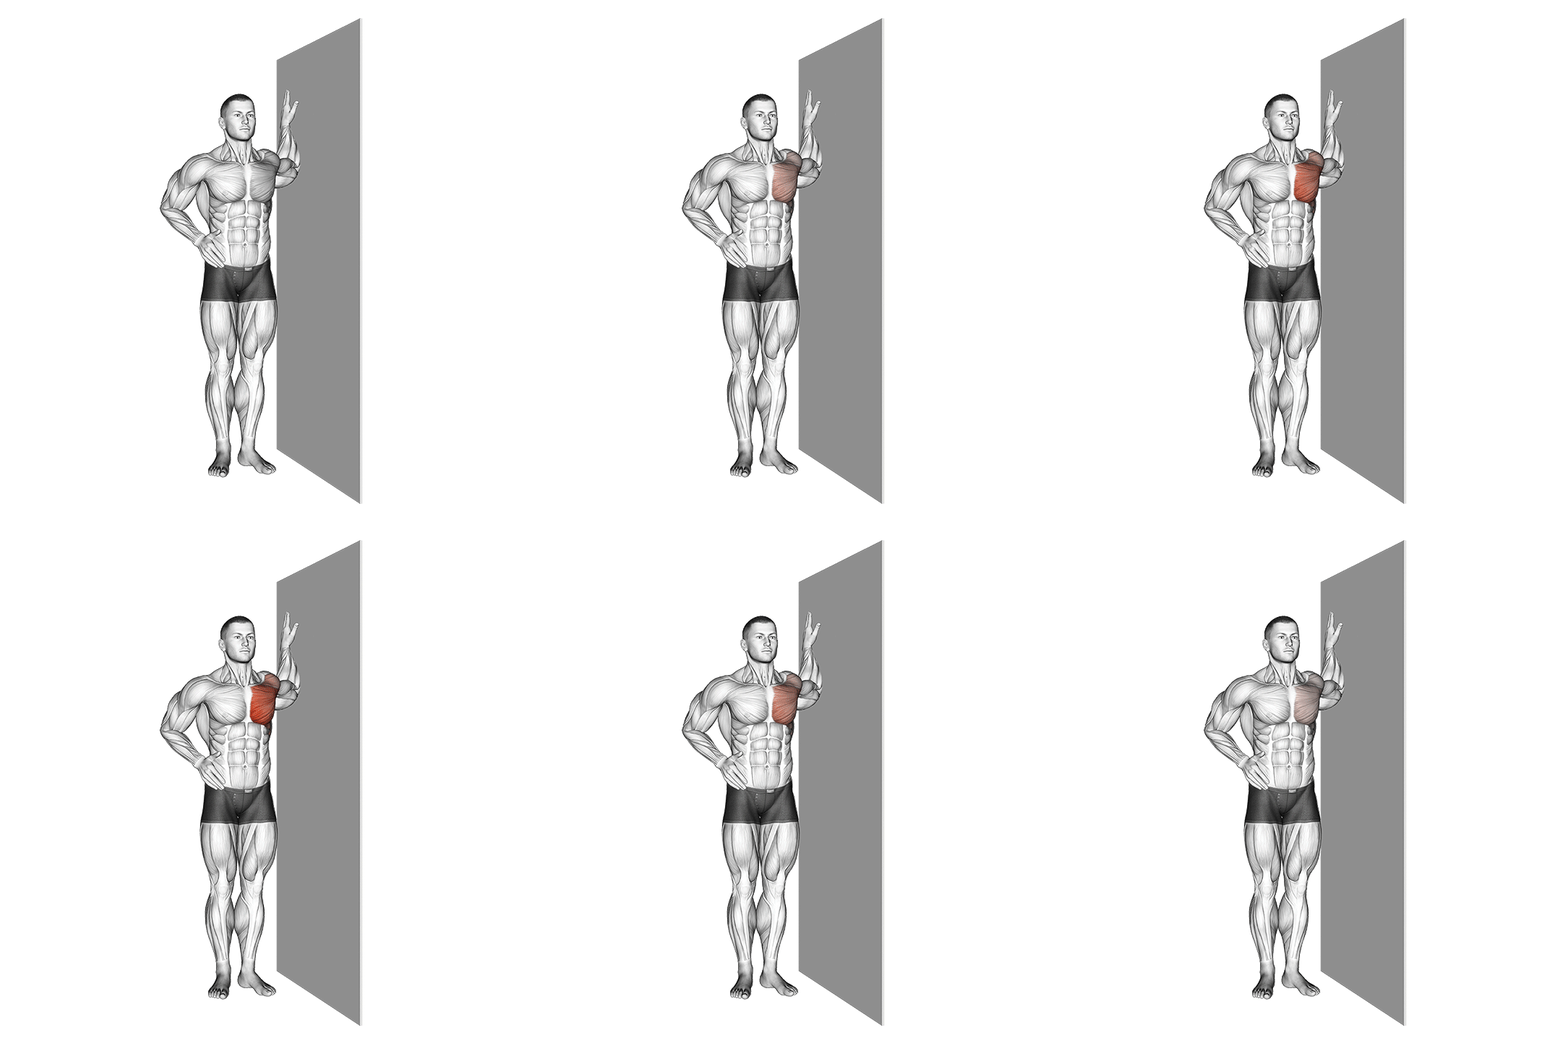
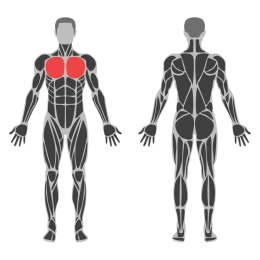
Bent Arm Chest Stretch
Muscle focus
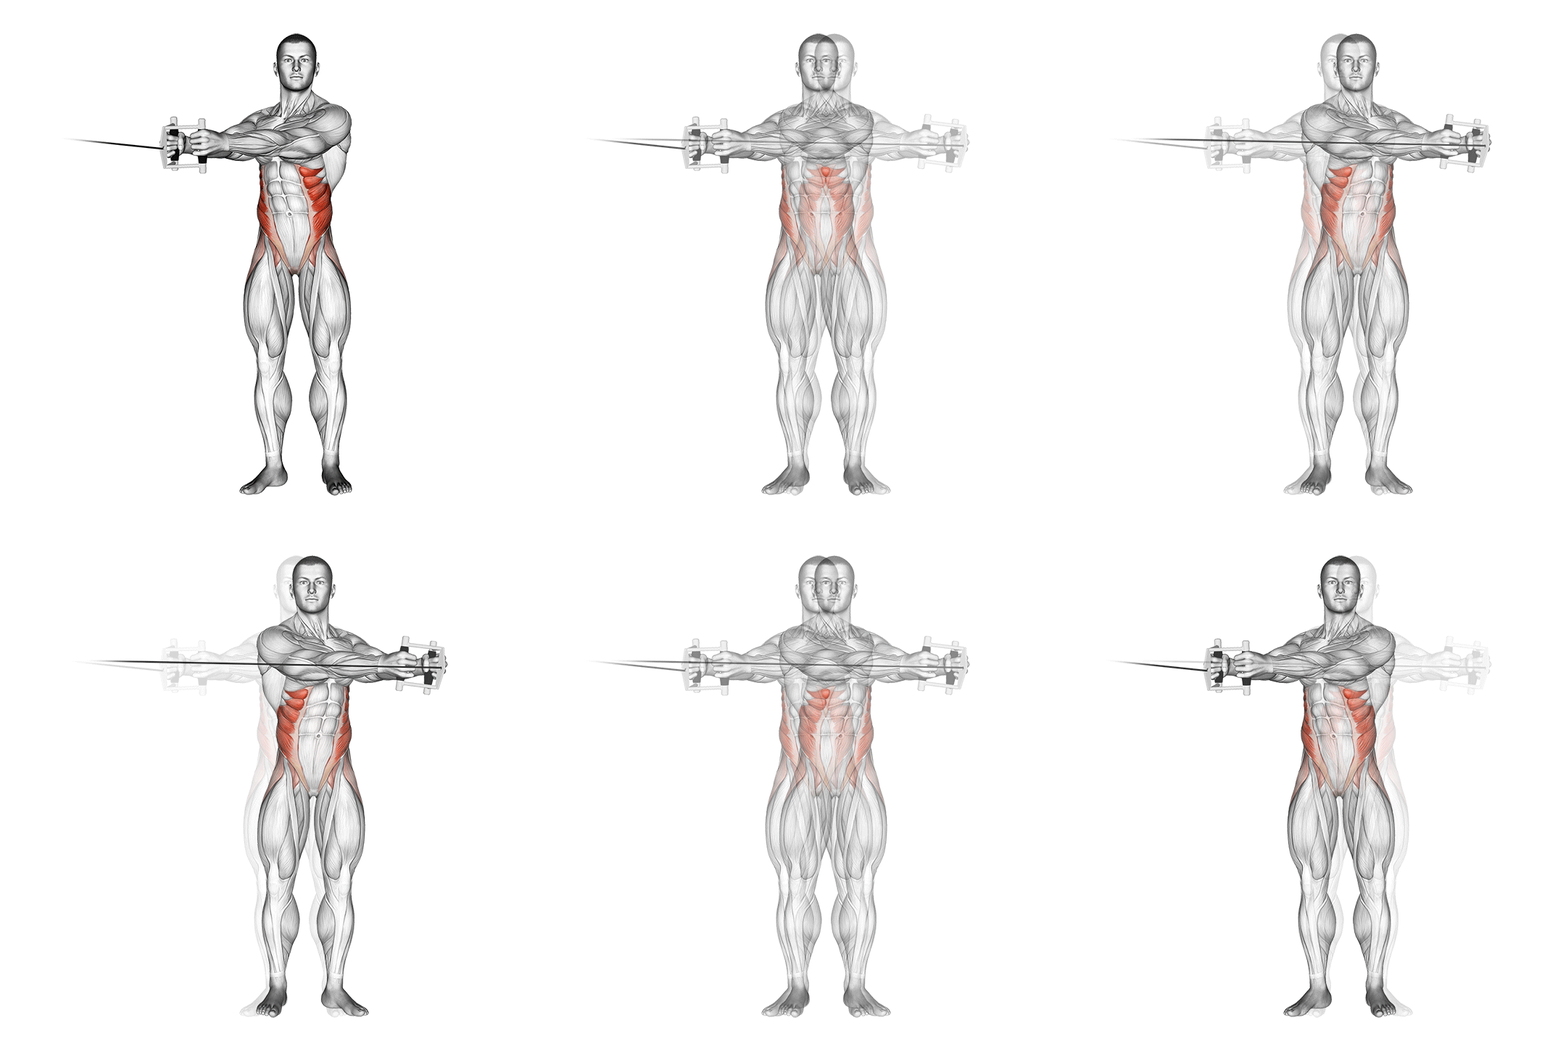
Cable Twist (horizontal)
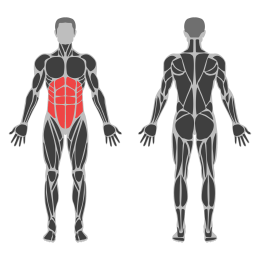
The Cable Twist (horizontal) is an exercise targeting the oblique muscles of the core. It involves rotating the torso against resistance, promoting strength and stability in the core and improving rotational power. This exercise is performed using a cable machine, which allows for adjustable resistance and a consistent tension throughout the movement.
Muscle focus
Step-by-step cues
- Set the cable machine to chest height and attach a single handle.
- Stand sideways to the machine with feet shoulder-width apart, grasping the handle with both hands.
- Extend your arms fully in front of you, keeping them parallel to the floor.
- Engage your core muscles and rotate your torso away from the machine, keeping your arms extended.
- Rotate until your torso faces away from the machine, then slowly return to the starting position.
- Perform the desired number of repetitions and switch sides.
Technical tips
- Keep your knees slightly bent to maintain balance and stability.
- Focus on rotating through your torso rather than using your arms to pull.
- Engage your core throughout the movement to protect your lower back.
- Control the movement speed to maximize muscle engagement and prevent injury.
- Exhale as you rotate away from the machine and inhale as you return to the starting position.
- Ensure that your shoulders remain level and do not shrug during the exercise.
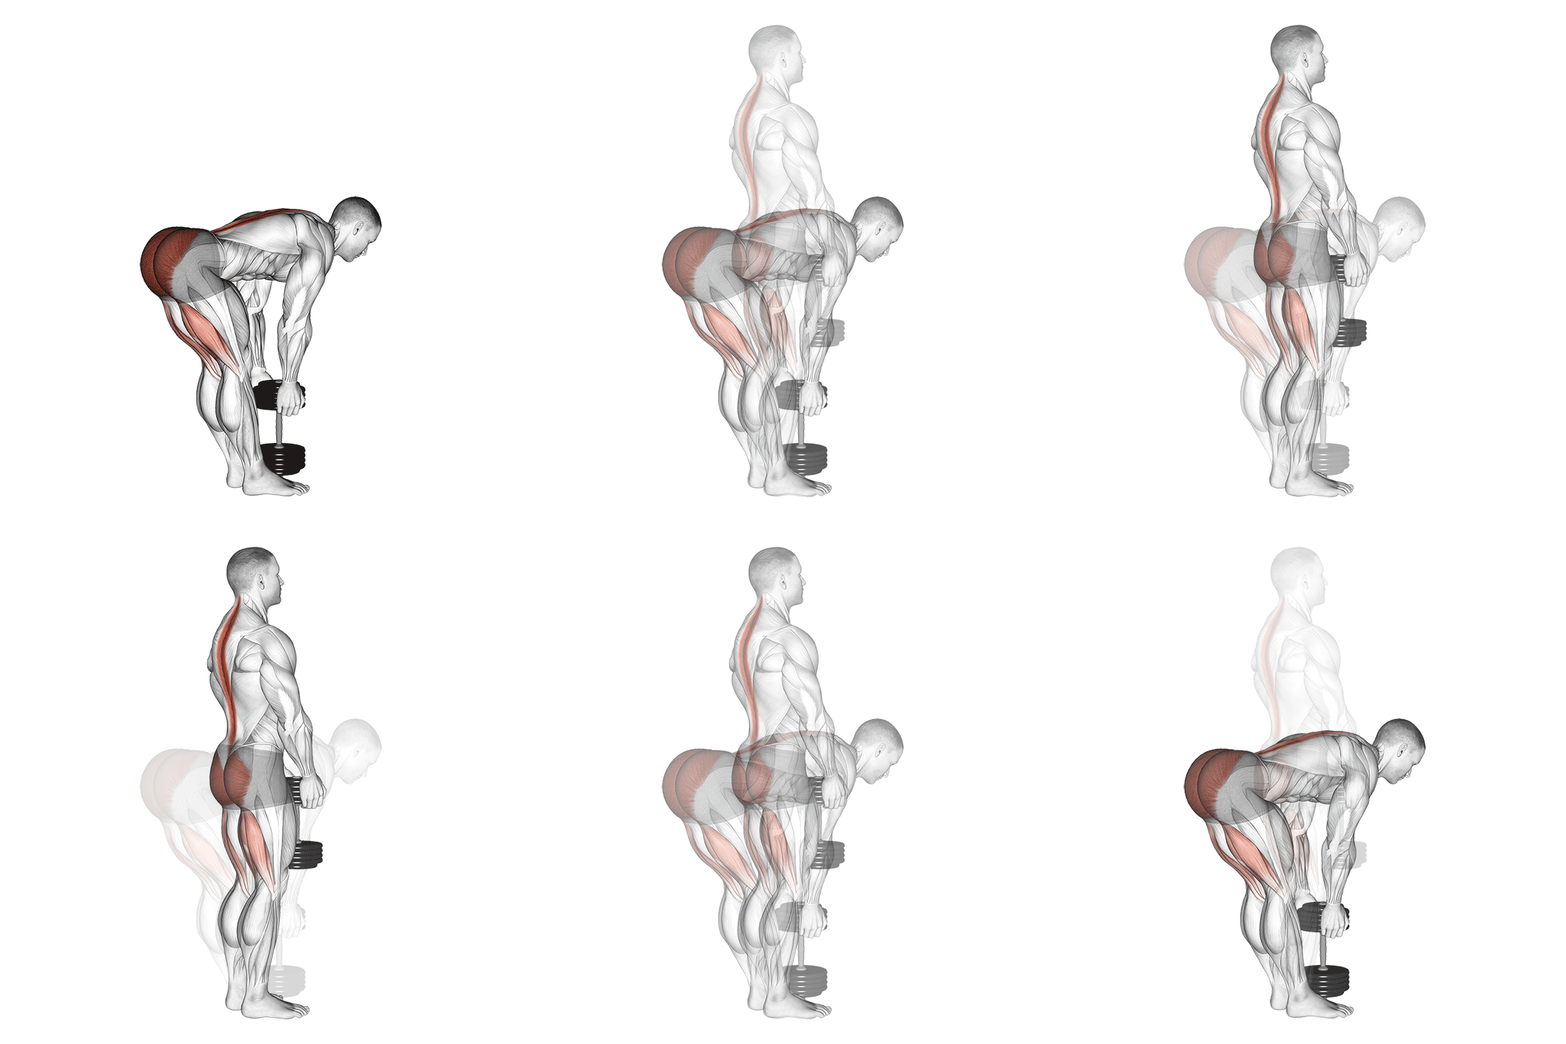
Dumbbell Straight Leg Deadlift
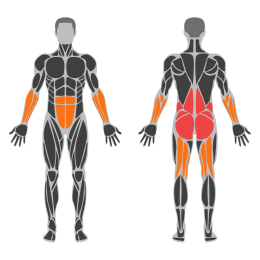
The Dumbbell Straight Leg Deadlift is a compound exercise targeting the hamstrings, glutes, and lower back. It involves lifting weights with a straight leg posture, emphasizing the stretch and contraction of the posterior chain muscles.
Muscle focus
Step-by-step cues
- Stand upright with feet hip-width apart, holding a dumbbell in each hand with an overhand grip.
- Keep your knees slightly bent and maintain a neutral spine throughout the movement.
- Hinge at the hips to lower the dumbbells towards the floor, keeping them close to your legs.
- Lower until you feel a stretch in your hamstrings, ensuring your back remains straight.
- Engage your glutes and hamstrings to return to the starting position by thrusting your hips forward.
- Repeat for the desired number of repetitions.
Technical tips
- Focus on hinging at the hips rather than bending at the waist to protect your lower back.
- Keep the dumbbells close to your body throughout the movement to maintain balance and control.
- Maintain a slight bend in your knees to reduce strain on your joints.
- Engage your core muscles to stabilize your spine and prevent rounding of the back.
- Start with lighter weights to master the form before progressing to heavier loads.
- Breathe in as you lower the dumbbells and exhale as you lift them back up.
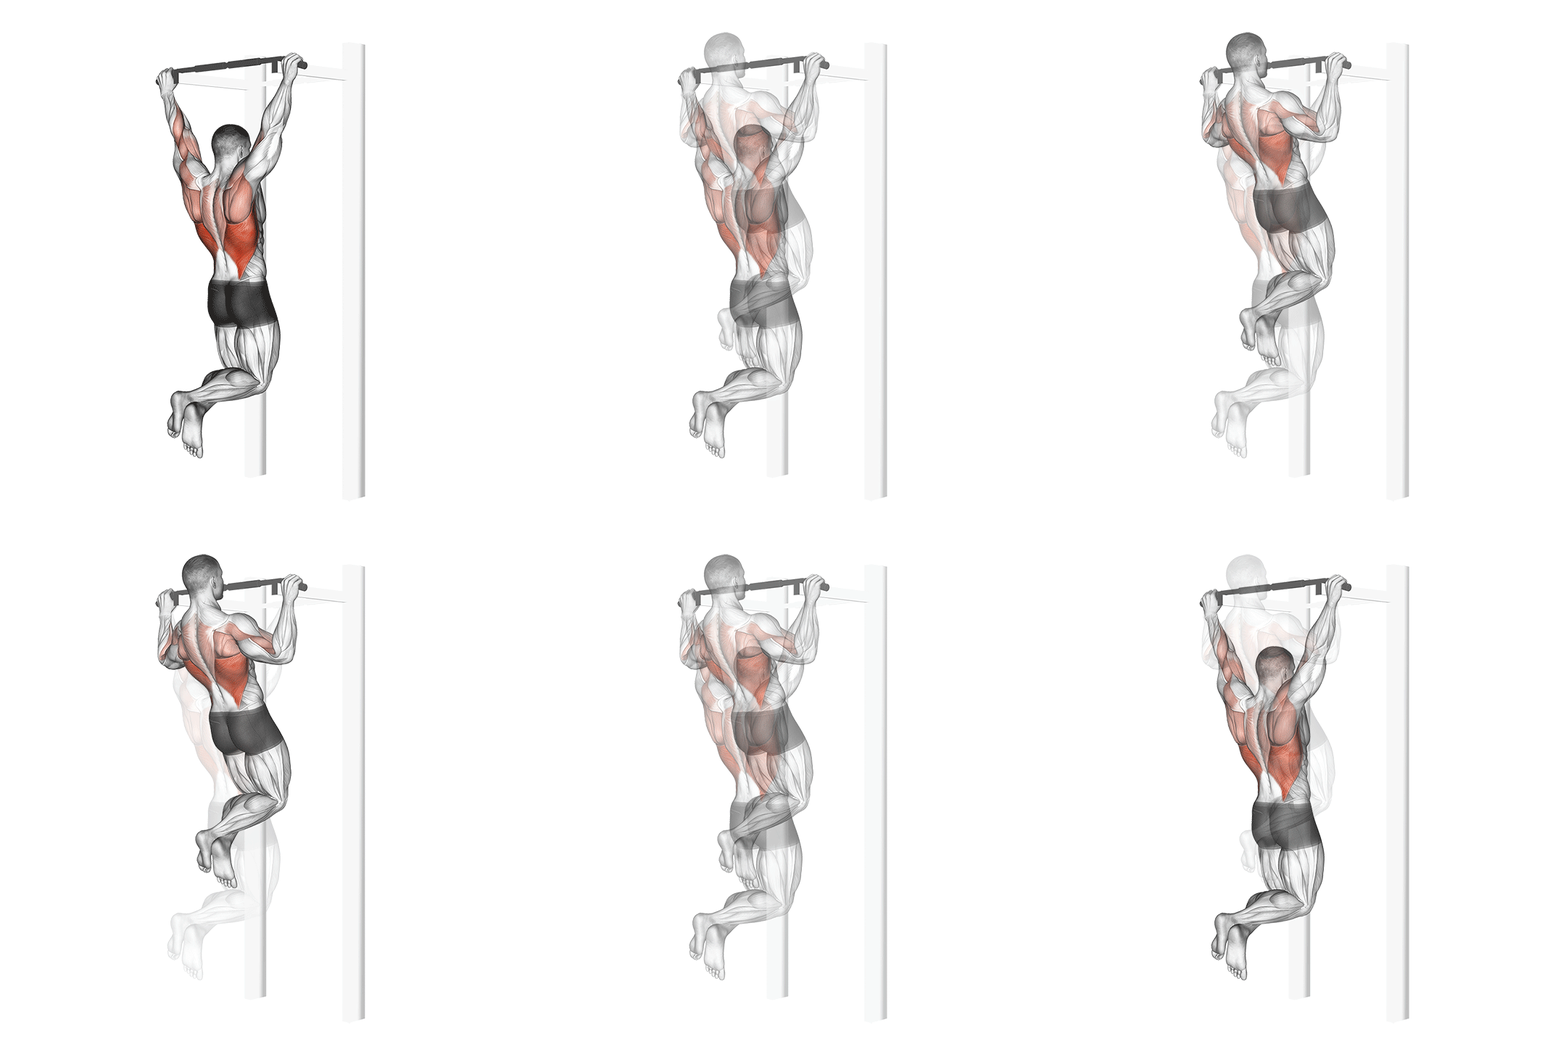
Pull-Up
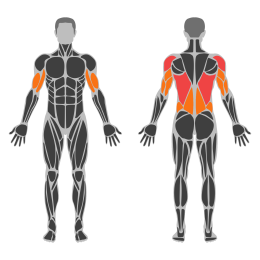
The pull-up is a compound upper-body exercise that primarily targets the latissimus dorsi muscles in the back, along with the biceps, forearms, shoulders, and core. It involves pulling your body up towards a bar until your chin is above it, using an overhand grip.
Muscle focus
Step-by-step cues
- Stand under a pull-up bar and reach up to grasp it with an overhand grip, hands slightly wider than shoulder-width apart.
- Engage your core and keep your body straight as you hang from the bar with your arms fully extended.
- Initiate the movement by pulling your shoulder blades down and back, then pull your body upwards by bending your elbows.
- Continue pulling until your chin is above the bar, keeping your chest open and shoulders away from your ears.
- Pause briefly at the top of the movement, then slowly lower yourself back to the starting position with control.
- Repeat for the desired number of repetitions.
Technical tips
- Focus on engaging your back muscles rather than relying solely on your arms to pull yourself up.
- Maintain a tight core throughout the exercise to prevent swinging or arching of the back.
- If you're unable to perform a full pull-up, start with assisted variations using resistance bands or an assisted pull-up machine.
- Avoid using momentum; perform each repetition in a controlled manner for maximum muscle engagement.
- Ensure that you breathe out as you pull yourself up and inhale as you lower yourself down.
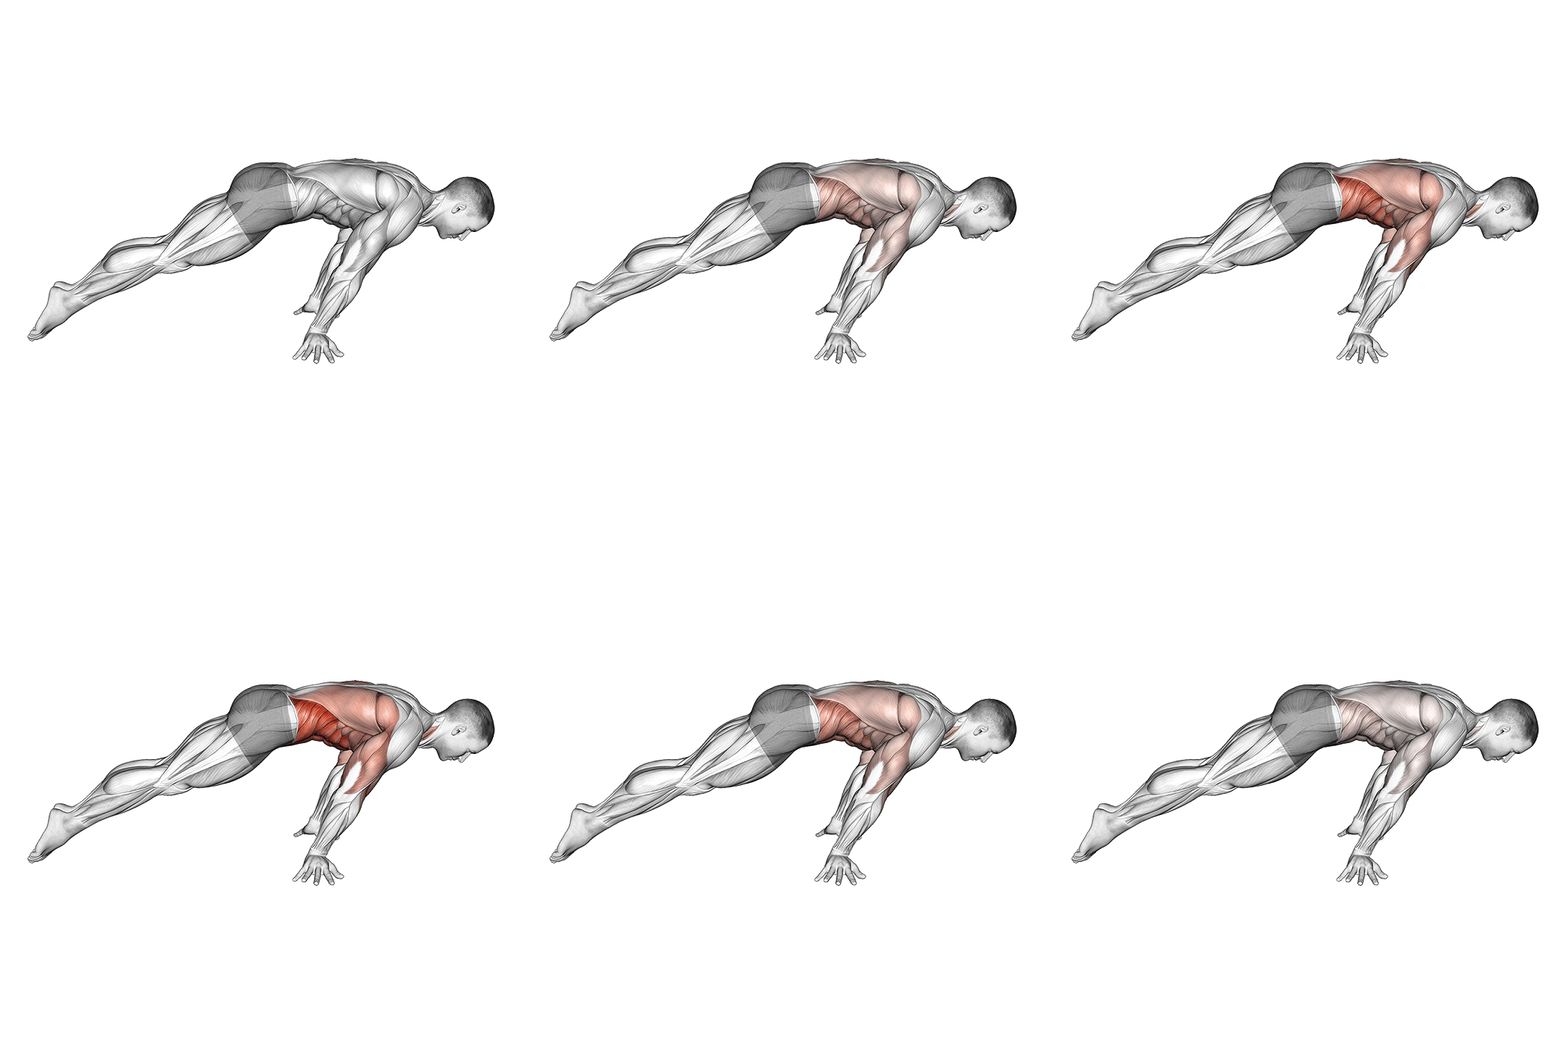
Lean Planche
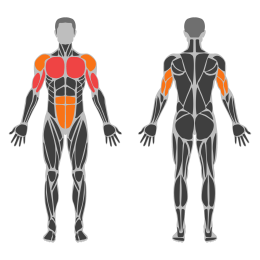
The Lean Planche is an advanced bodyweight exercise that targets the shoulders, chest, and core. It requires significant strength and balance, as it involves holding the body parallel to the ground with only the hands touching the floor. This exercise is a progression towards the full planche, emphasizing shoulder strength and core stability.
Muscle focus
Step-by-step cues
- Begin in a push-up position with your hands shoulder-width apart and fingers pointing forward.
- Lean your body forward by shifting your weight onto your hands, keeping your arms straight.
- Engage your core and glutes to maintain a straight line from head to heels.
- Keep your feet together and lift them slightly off the ground, balancing on your hands.
- Hold this position for as long as possible, maintaining control and stability.
- Slowly return to the starting position by reversing the movement.
Technical tips
- Focus on engaging your core muscles to maintain stability throughout the exercise.
- Start with short holds and gradually increase the duration as you build strength.
- Ensure your shoulders are protracted and depressed to protect them from injury.
- Practice leaning forward incrementally to find your balance point without overextending.
- Use parallettes or yoga blocks if wrist flexibility is a limiting factor.
- Incorporate wrist strengthening exercises into your routine to support this movement.
Friday
Mobility
Complete 20 minutes of full-body mobility and relaxed walking.
Saturday
Conditioning Circuit
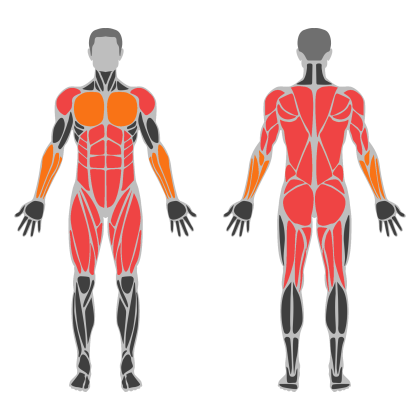
Conditioning Circuit muscle focus
Red marks the primary training focus. Orange marks supporting muscle groups used throughout this session.
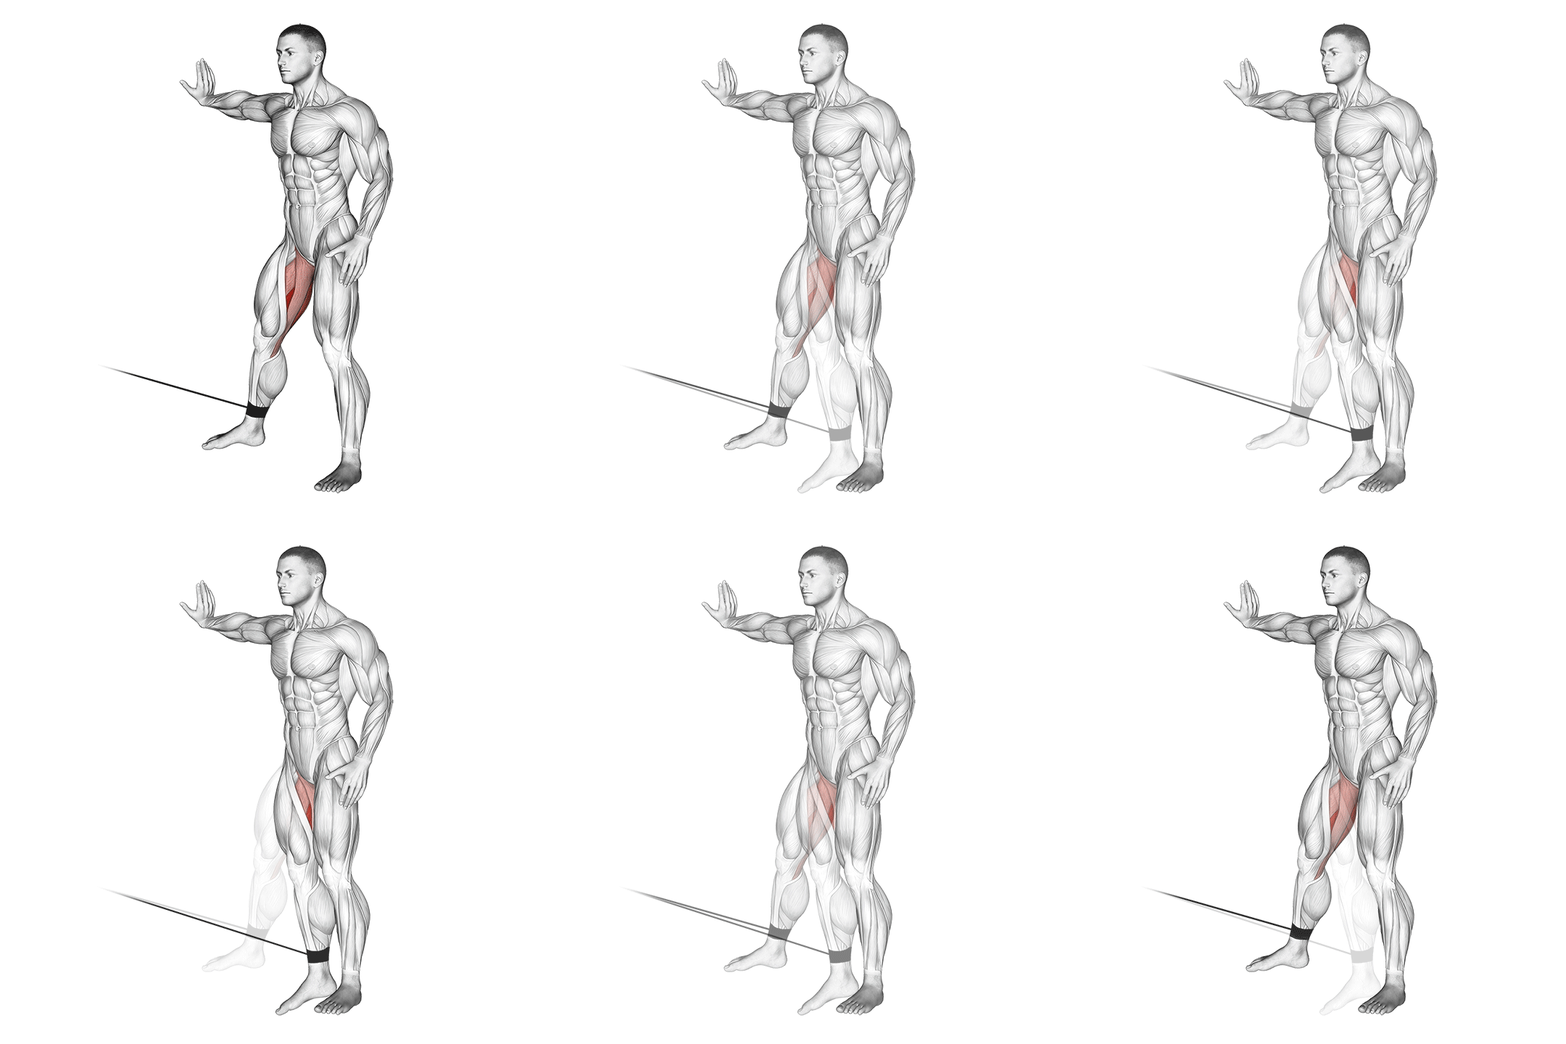
Cable Hip Adduction
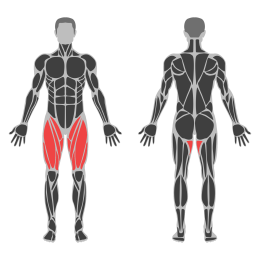
Cable Hip Adduction is an isolation exercise targeting the adductor muscles of the inner thigh. It involves using a cable machine to provide resistance while moving the leg across the body's midline. This exercise helps in strengthening and toning the inner thighs, improving balance and stability.
Muscle focus
Step-by-step cues
- Attach an ankle strap to a low pulley on a cable machine.
- Secure the strap around your ankle and stand sideways to the machine.
- Position yourself so that the working leg is closest to the machine.
- Hold onto the machine or a stable surface for support.
- Start with your working leg extended out to the side.
- Slowly bring your leg across your body, keeping it straight.
- Pause briefly at the end of the movement, feeling the contraction in your inner thigh.
- Return to the starting position in a controlled manner.
- Repeat for the desired number of repetitions before switching legs.
Technical tips
- Maintain an upright posture throughout the exercise to avoid strain on your back.
- Focus on using your inner thigh muscles to move your leg, rather than swinging it.
- Keep your core engaged to maintain balance and stability during the movement.
- Start with a light weight to master the form before increasing resistance.
- Ensure that movements are slow and controlled, especially when returning to the starting position.
- Avoid locking your knee; keep it slightly bent to reduce joint stress.
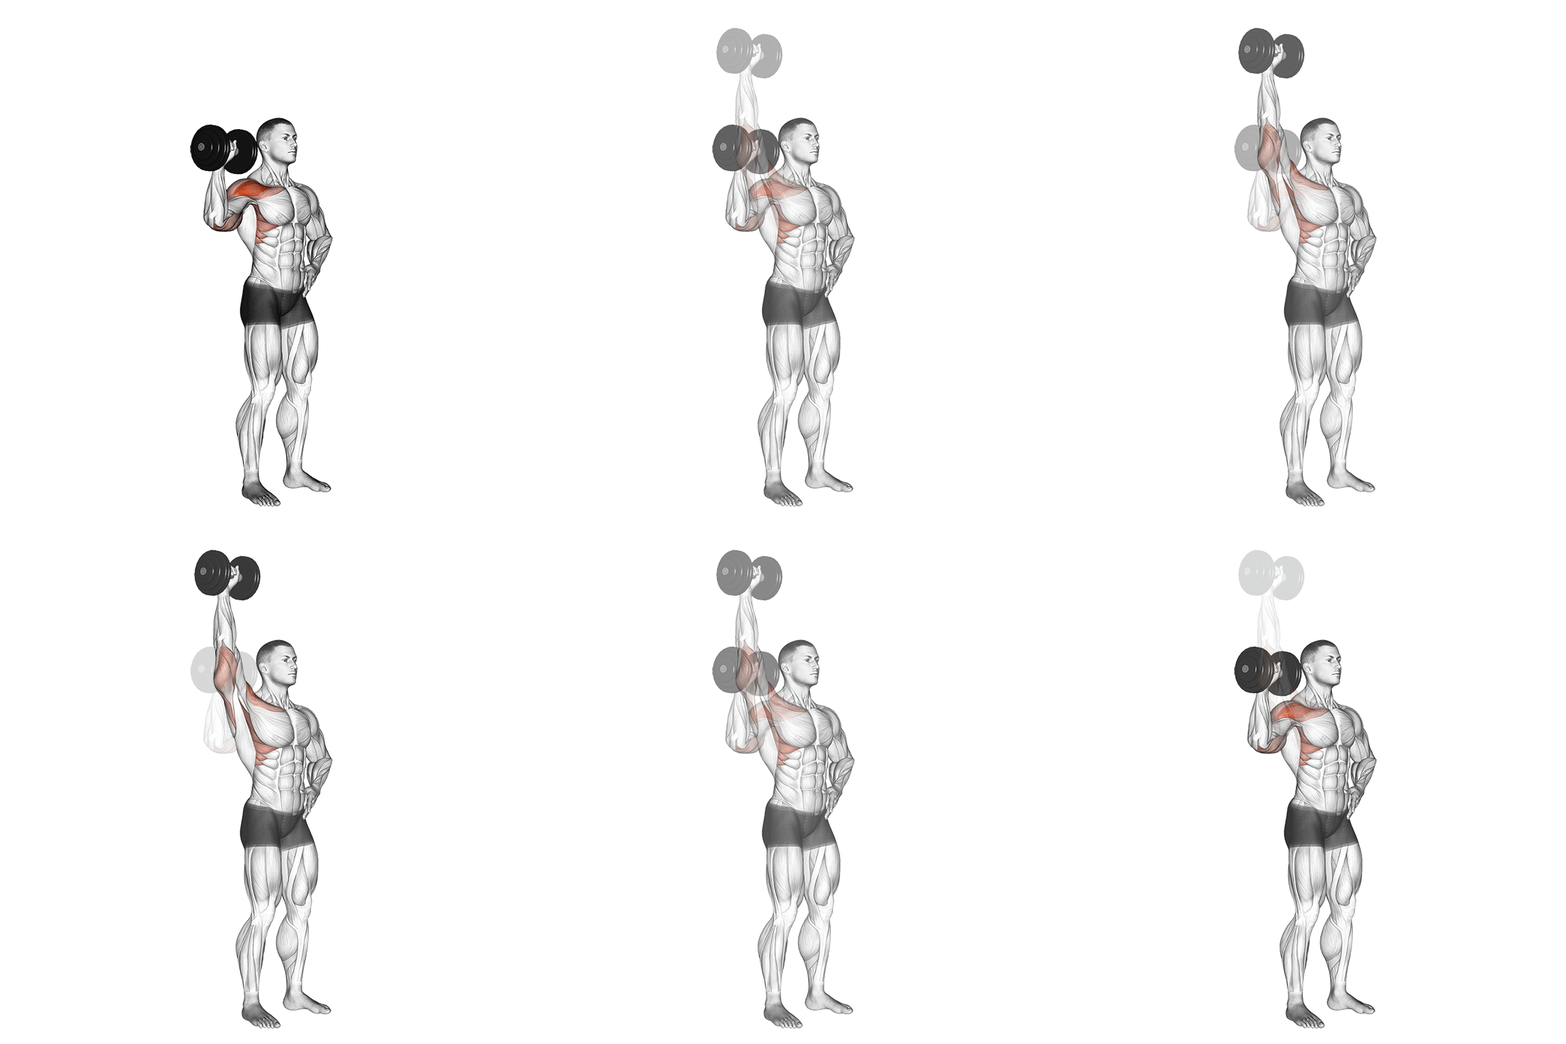
One-Arm Shoulder Press Dumbbell
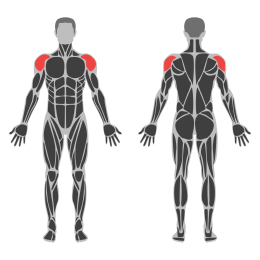
The standing one-arm dumbbell press is a compound exercise targeting the shoulders, specifically the deltoid muscles. It also engages the core for stabilization. This exercise helps in developing unilateral strength and improving balance.
Muscle focus
Step-by-step cues
- Stand with your feet shoulder-width apart, holding a dumbbell in one hand at shoulder height with your palm facing forward.
- Engage your core and keep your back straight throughout the movement.
- Press the dumbbell overhead by extending your elbow until your arm is fully extended.
- Pause briefly at the top of the movement, ensuring your arm is straight but not locked.
- Slowly lower the dumbbell back to the starting position at shoulder height.
- Repeat for the desired number of repetitions before switching to the other arm.
Technical tips
- Maintain a neutral spine and avoid leaning to one side during the press.
- Keep your wrist straight and aligned with your forearm to prevent strain.
- Engage your core muscles to stabilize your body and prevent swaying.
- Focus on controlled movements, both when pressing up and lowering the dumbbell.
- Start with a lighter weight to master form before progressing to heavier weights.
- Breathe out as you press the dumbbell up and inhale as you lower it.
Muscle-up
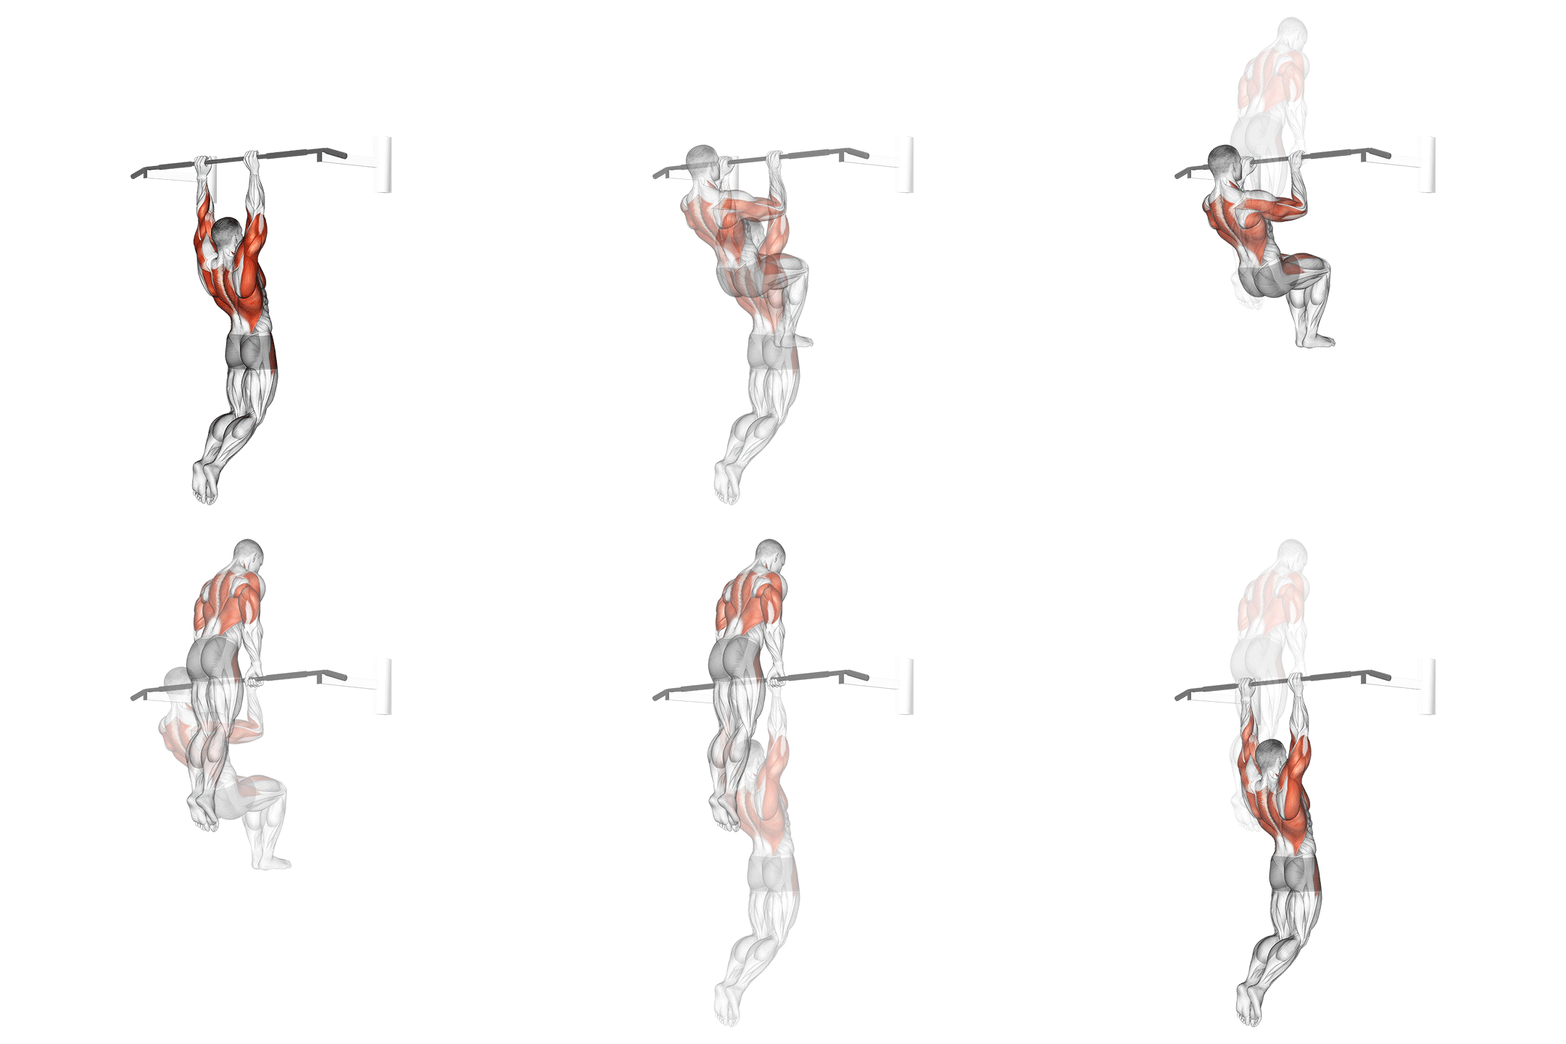
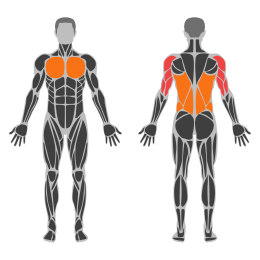
The muscle-up is an advanced compound exercise that combines a pull-up with a dip, requiring significant upper body strength and coordination. It primarily targets the latissimus dorsi, biceps, triceps, pectorals, and core muscles. The exercise begins with a pull-up motion to get the chin above the bar, followed by a transition to a dip position to push the body above the bar.
Muscle focus
Step-by-step cues
- Start by hanging from a pull-up bar with an overhand grip, hands shoulder-width apart.
- Engage your core and initiate a pull-up by pulling your chest towards the bar.
- As your chest approaches the bar, lean slightly forward and begin transitioning your wrists over the bar.
- Push down on the bar to extend your arms fully, bringing your torso above the bar in a dip position.
- Reverse the movement by lowering yourself back to the starting hanging position in a controlled manner.
Technical tips
- Ensure your grip is firm and secure before starting the movement.
- Engage your core throughout to maintain stability and control.
- Use a slight kip or swing if necessary to help initiate the upward momentum.
- Focus on a smooth transition from the pull-up phase to the dip phase for efficiency.
- Practice negative muscle-ups by slowly lowering from the top position to build strength if you cannot perform a full muscle-up yet.
Hanging Half Windmill
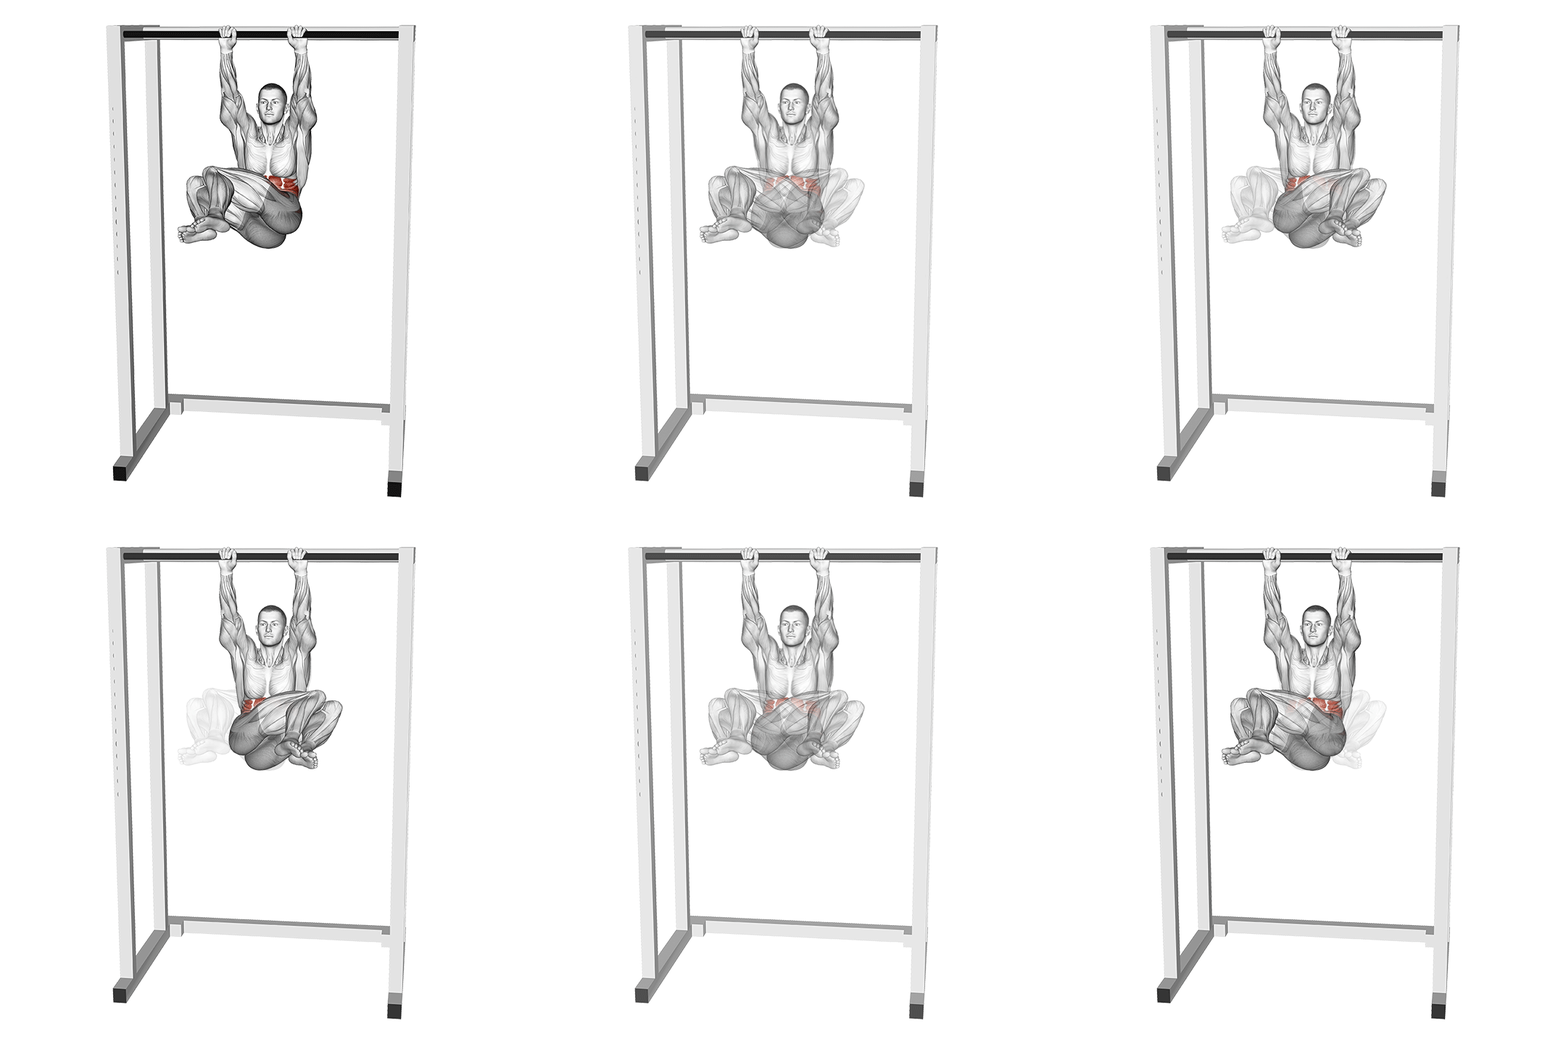
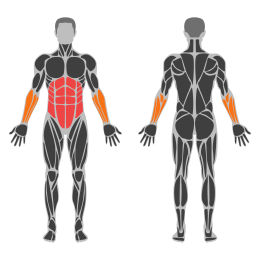
The Hanging Half Windmill is an advanced core exercise that targets the obliques, lower back, and hip flexors. It involves hanging from a bar and rotating the legs in a controlled manner to engage the core muscles effectively. This exercise requires significant upper body strength and core stability.
Muscle focus
Step-by-step cues
- Begin by hanging from a pull-up bar with an overhand grip, hands shoulder-width apart.
- Engage your core and lift your legs to a 90-degree angle, so your body forms an 'L' shape.
- Slowly rotate your legs to one side while keeping them straight, aiming to bring them parallel to the ground.
- Pause briefly at the end of the rotation, maintaining control and tension in your core.
- Return your legs to the center position in a controlled manner.
- Repeat the movement on the opposite side.
- Perform the desired number of repetitions, ensuring even distribution on both sides.
Technical tips
- Ensure your grip is secure before starting to prevent slipping.
- Focus on slow and controlled movements to maximize core engagement.
- Keep your shoulders engaged and avoid swinging or using momentum.
- Breathe steadily throughout the exercise, exhaling as you rotate your legs.
- If you're unable to keep your legs straight, slightly bend your knees to reduce difficulty.
- Start with fewer repetitions and gradually increase as you build strength and stability.
Jefferson Curl
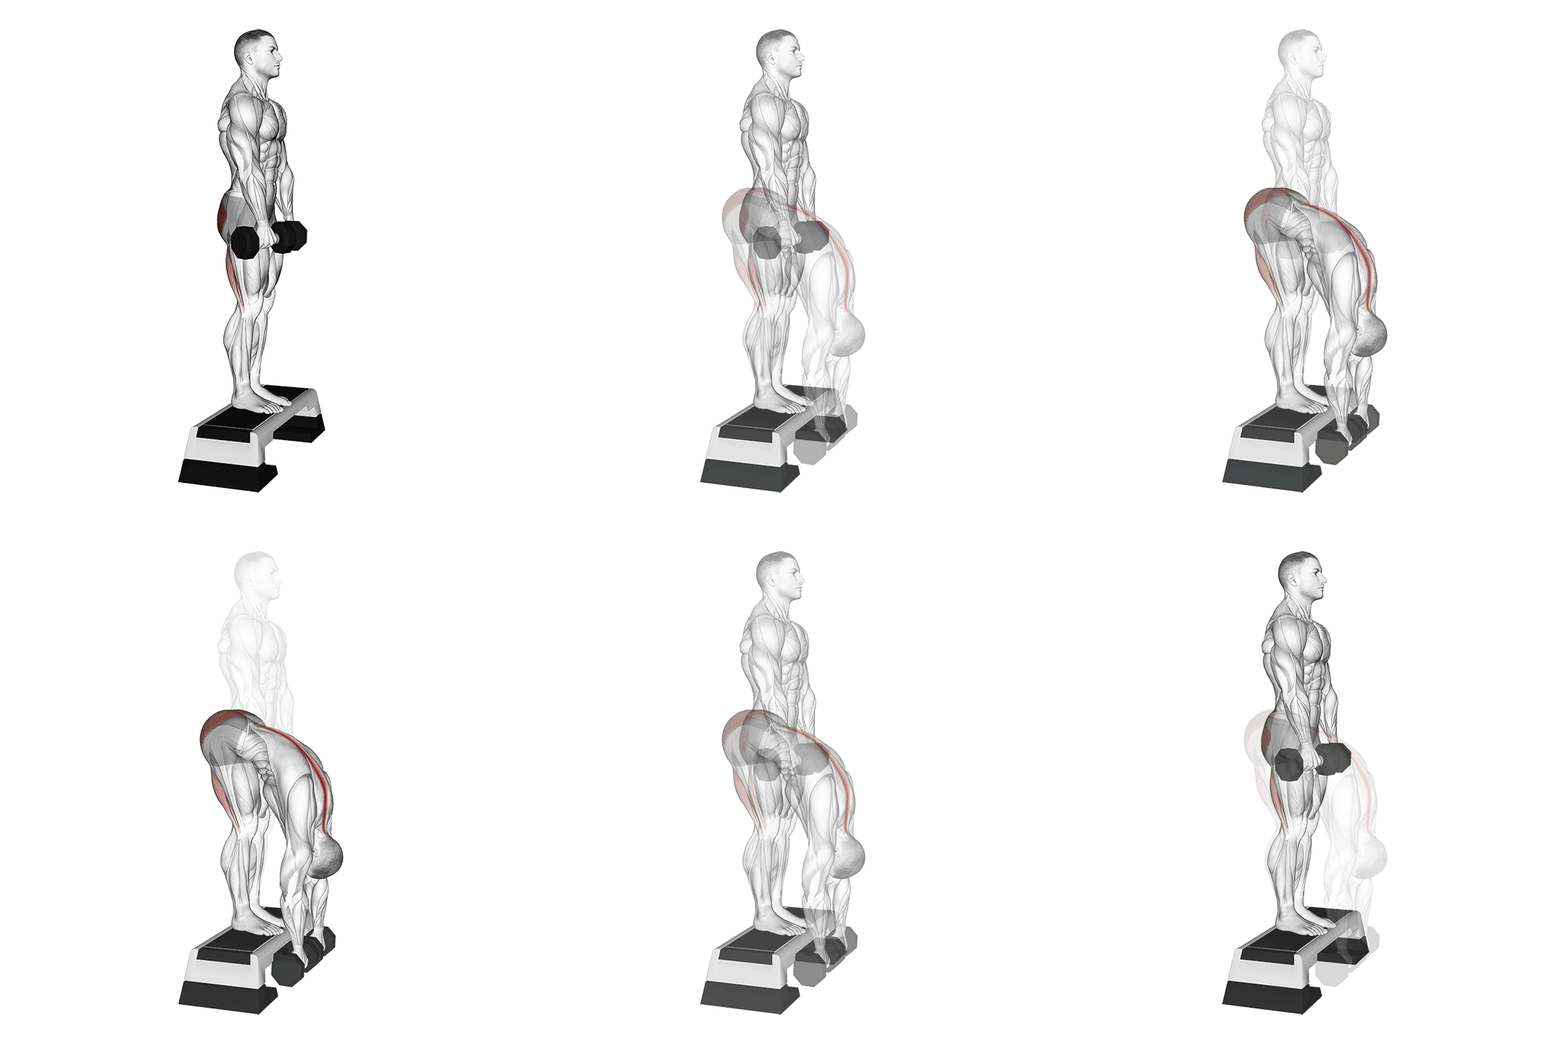
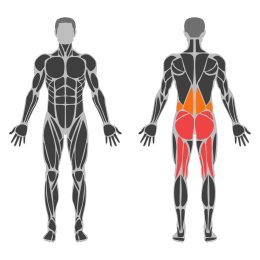
The Jefferson Curl is a mobility and flexibility exercise targeting the posterior chain, particularly the hamstrings, lower back, and spinal erectors. It involves a controlled, weighted spinal flexion from a standing position, promoting spinal articulation and flexibility.
Muscle focus
Step-by-step cues
- Begin by standing on an elevated surface with feet hip-width apart, holding a light barbell or dumbbell with both hands.
- Keep your arms straight and let the weight hang in front of you.
- Slowly tuck your chin to your chest and begin to roll down through your spine, vertebra by vertebra.
- Allow your upper back to round as you continue to lower the weight towards the floor.
- Keep your knees slightly bent and focus on maintaining control throughout the movement.
- Once you reach your maximum comfortable range of motion, pause briefly.
- Reverse the movement by slowly rolling up through your spine, vertebra by vertebra, until you return to the starting position.
Technical tips
- Start with a very light weight to ensure proper form and control.
- Focus on moving slowly and deliberately to maximize spinal articulation.
- Maintain a slight bend in the knees to reduce strain on the lower back.
- Engage your core throughout the movement for stability.
- Breathe steadily; exhale as you roll down and inhale as you roll up.
- Avoid forcing the range of motion; only go as far as is comfortable.
Cable Rear Delt Fly (Reverse Fly)
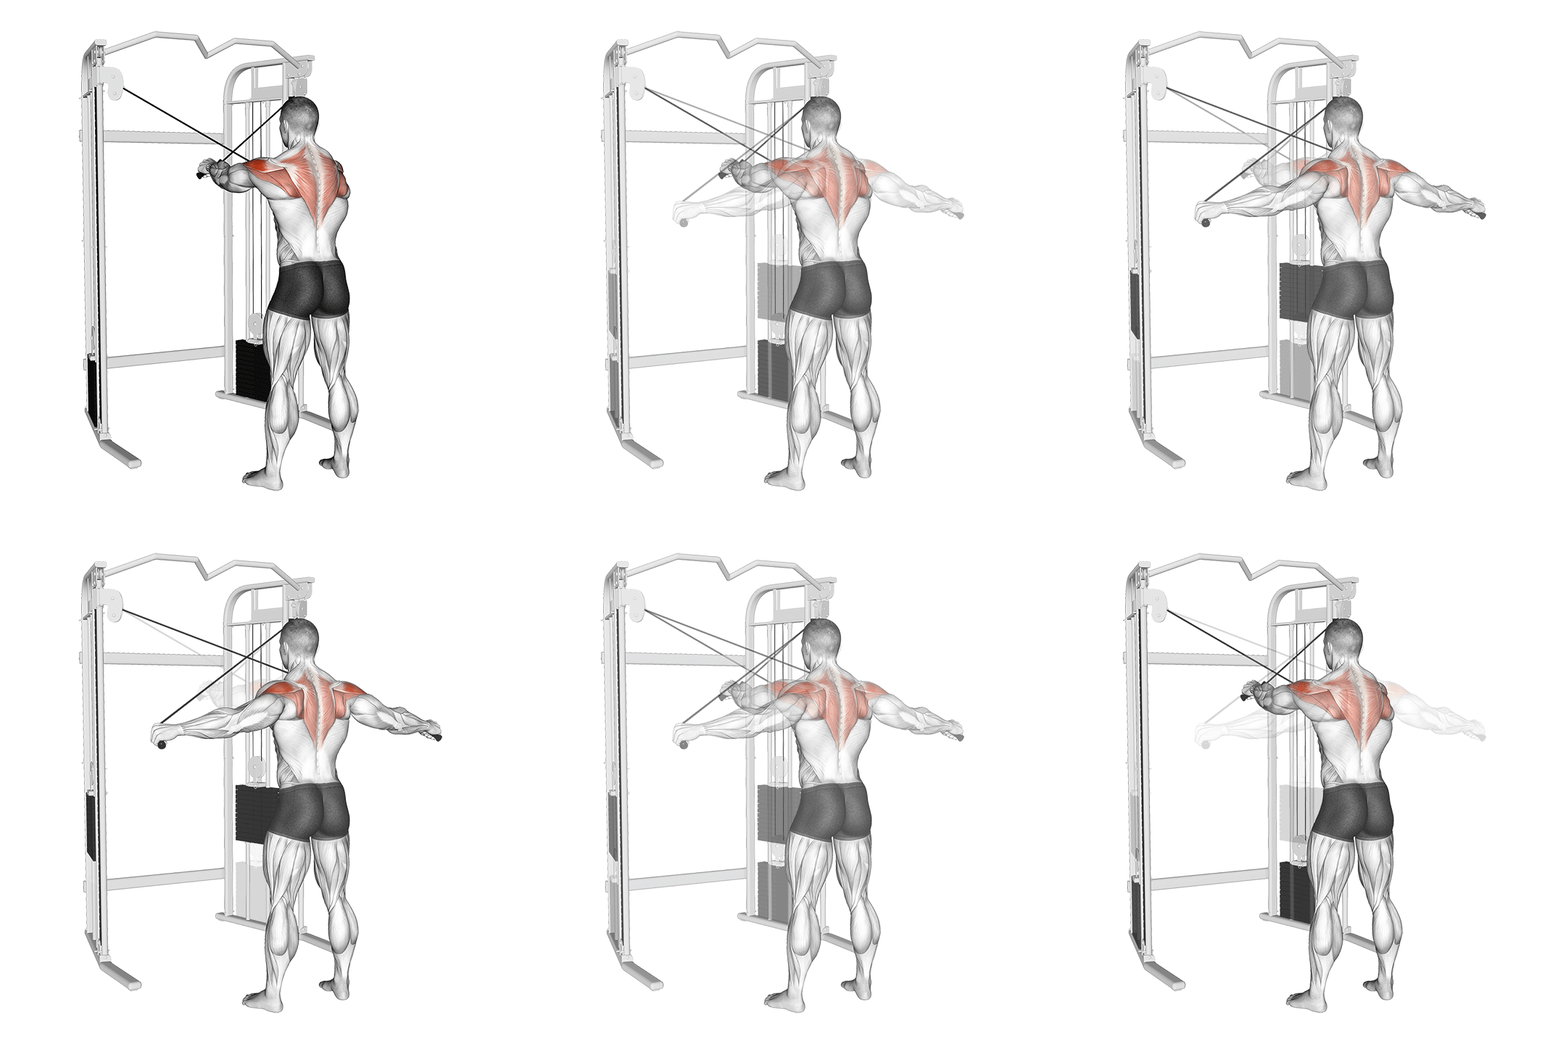
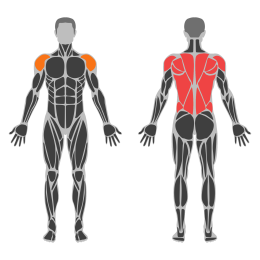
The Cable Rear Delt Fly, also known as the Reverse Fly, is an isolation exercise targeting the rear deltoid muscles of the shoulders. It involves using a cable machine to provide constant tension throughout the movement, promoting muscle engagement and growth. This exercise is effective for improving shoulder stability and posture.
Muscle focus
Step-by-step cues
- Set the cable machine to a low position and attach single handles to each side.
- Stand in the center of the machine with feet shoulder-width apart, facing away from the machine.
- Grab each handle with opposite hands, crossing them in front of your body.
- With a slight bend in your elbows, pull the handles outward and backward in an arc motion until your arms are parallel to the floor.
- Squeeze your shoulder blades together at the peak of the movement.
- Slowly return to the starting position with control.
- Repeat for the desired number of repetitions.
Technical tips
- Keep your core engaged throughout the exercise to maintain stability.
- Avoid using momentum; focus on controlled movements to maximize muscle activation.
- Maintain a slight bend in your elbows to reduce strain on your joints.
- Ensure your shoulders are down and back to prevent neck strain.
- Focus on squeezing your shoulder blades together at the top of the movement for maximum contraction.
- Start with a lighter weight to perfect your form before increasing resistance.
Sunday
Full Rest
Recover fully and review sleep, soreness and training quality.
Four-week progression
Nutrition guidance

- Start near maintenance calories and adjust slowly using training performance, hunger and body-weight trends.
- Target roughly 1.6-2.0 g of protein per kg of body weight per day across three to five meals.
- Use carbohydrates around training and include vegetables, fruit and healthy fats every day.
- Hydrate consistently and avoid treating one meal or one day as success or failure.
Use these numbers as practical starting ranges, not medical prescriptions. Adjust for your health, body size and activity, and consult a qualified professional when needed.