4-Week Athletic Conditioning and Strength Plan: Progression Cycle 10
A progressive plan combining strength, athletic conditioning, core work and controlled recovery.
How to use this plan
Follow the days in order, log every working set, and finish each set with one to three good repetitions still available. Use the exercise animations to learn the movement and open the video when you need a full demonstration.
Monday
Lower Strength
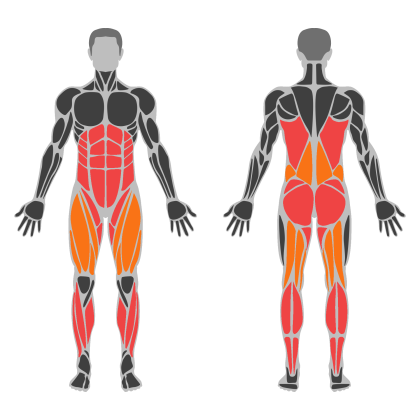
Lower Strength muscle focus
Red marks the primary training focus. Orange marks supporting muscle groups used throughout this session.
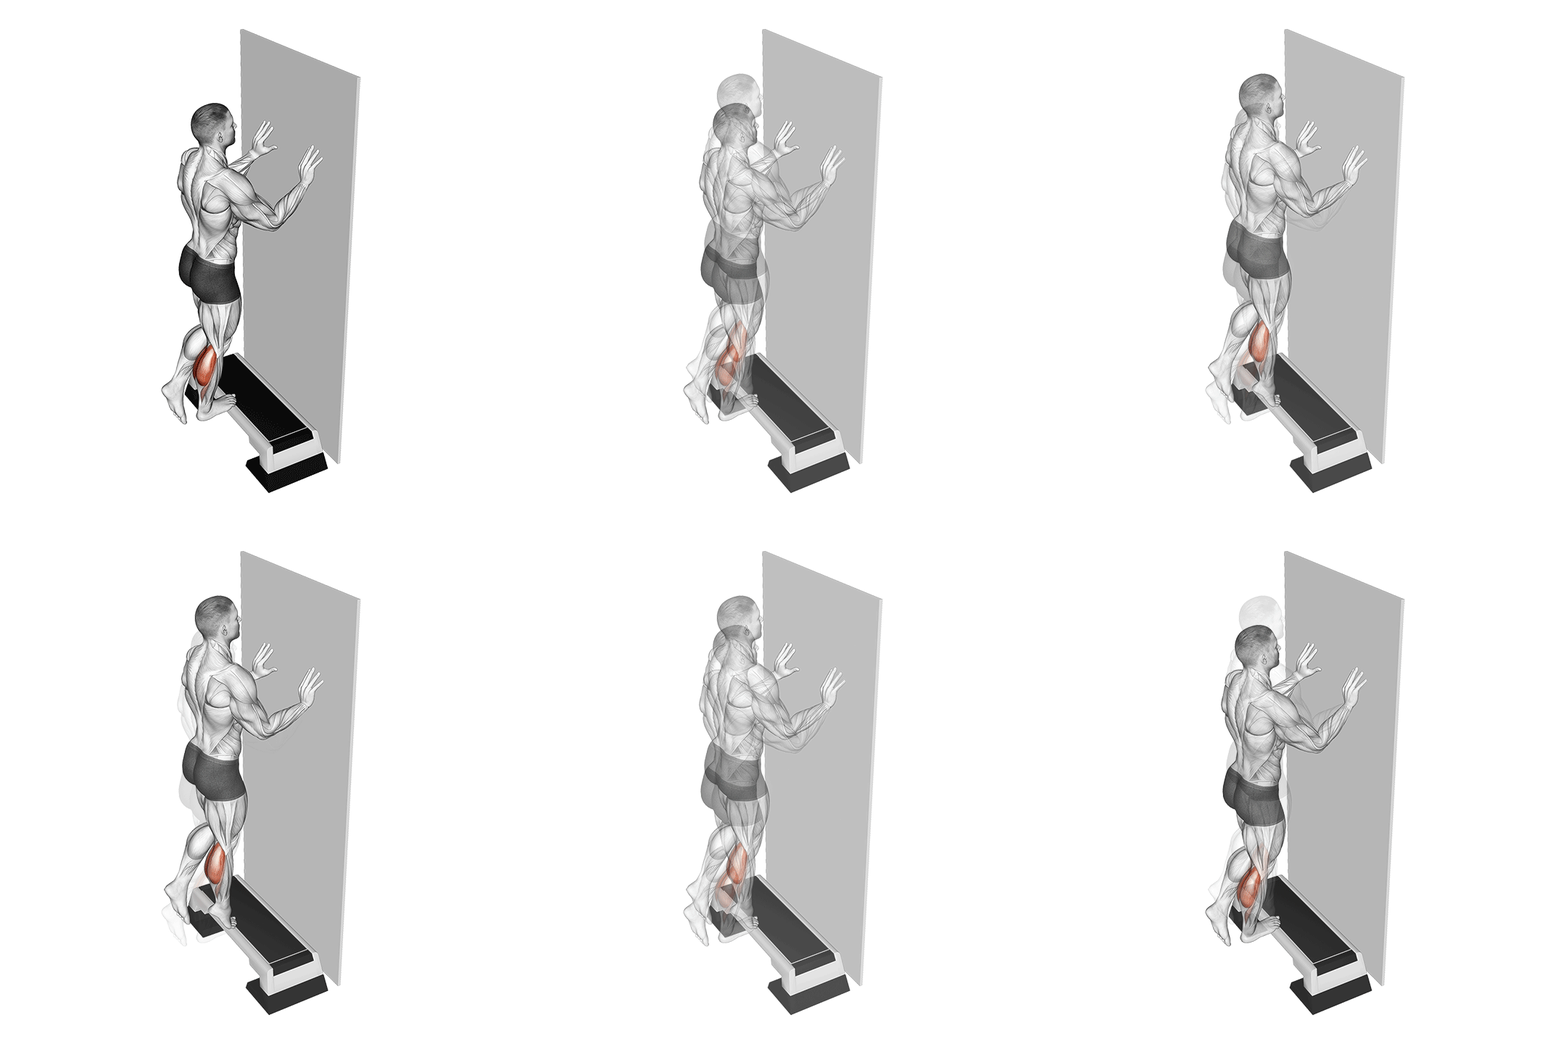
Single-Leg Calf Raise
The Standing Single Leg Calf Raise is an isolation exercise targeting the calf muscles, specifically the gastrocnemius and soleus. This exercise is performed by standing on one leg and raising the heel to engage the calf muscles, enhancing balance and muscular endurance.
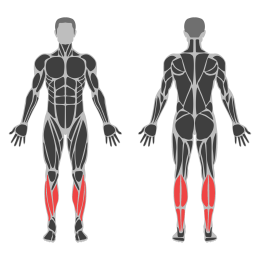
Muscle focus
Step-by-step cues
- Stand upright with your feet hip-width apart, using a wall or sturdy object for balance if necessary.
- Shift your weight onto one leg, lifting the other foot slightly off the ground.
- Engage your core and maintain a straight posture throughout the movement.
- Slowly raise your heel off the ground as high as possible, keeping your knee straight.
- Pause briefly at the top of the movement, feeling the contraction in your calf muscle.
- Lower your heel back to the starting position in a controlled manner.
- Complete the desired number of repetitions before switching to the other leg.
Technical tips
- Focus on maintaining balance by engaging your core muscles throughout the exercise.
- Perform the movement slowly to maximize muscle engagement and control.
- Ensure that your knee remains straight but not locked during the exercise.
- Use a full range of motion for optimal calf muscle activation.
- If balance is challenging, use a wall or chair for support without relying too heavily on it.
- Start with body weight and gradually add resistance, such as dumbbells, as you become more comfortable with the movement.
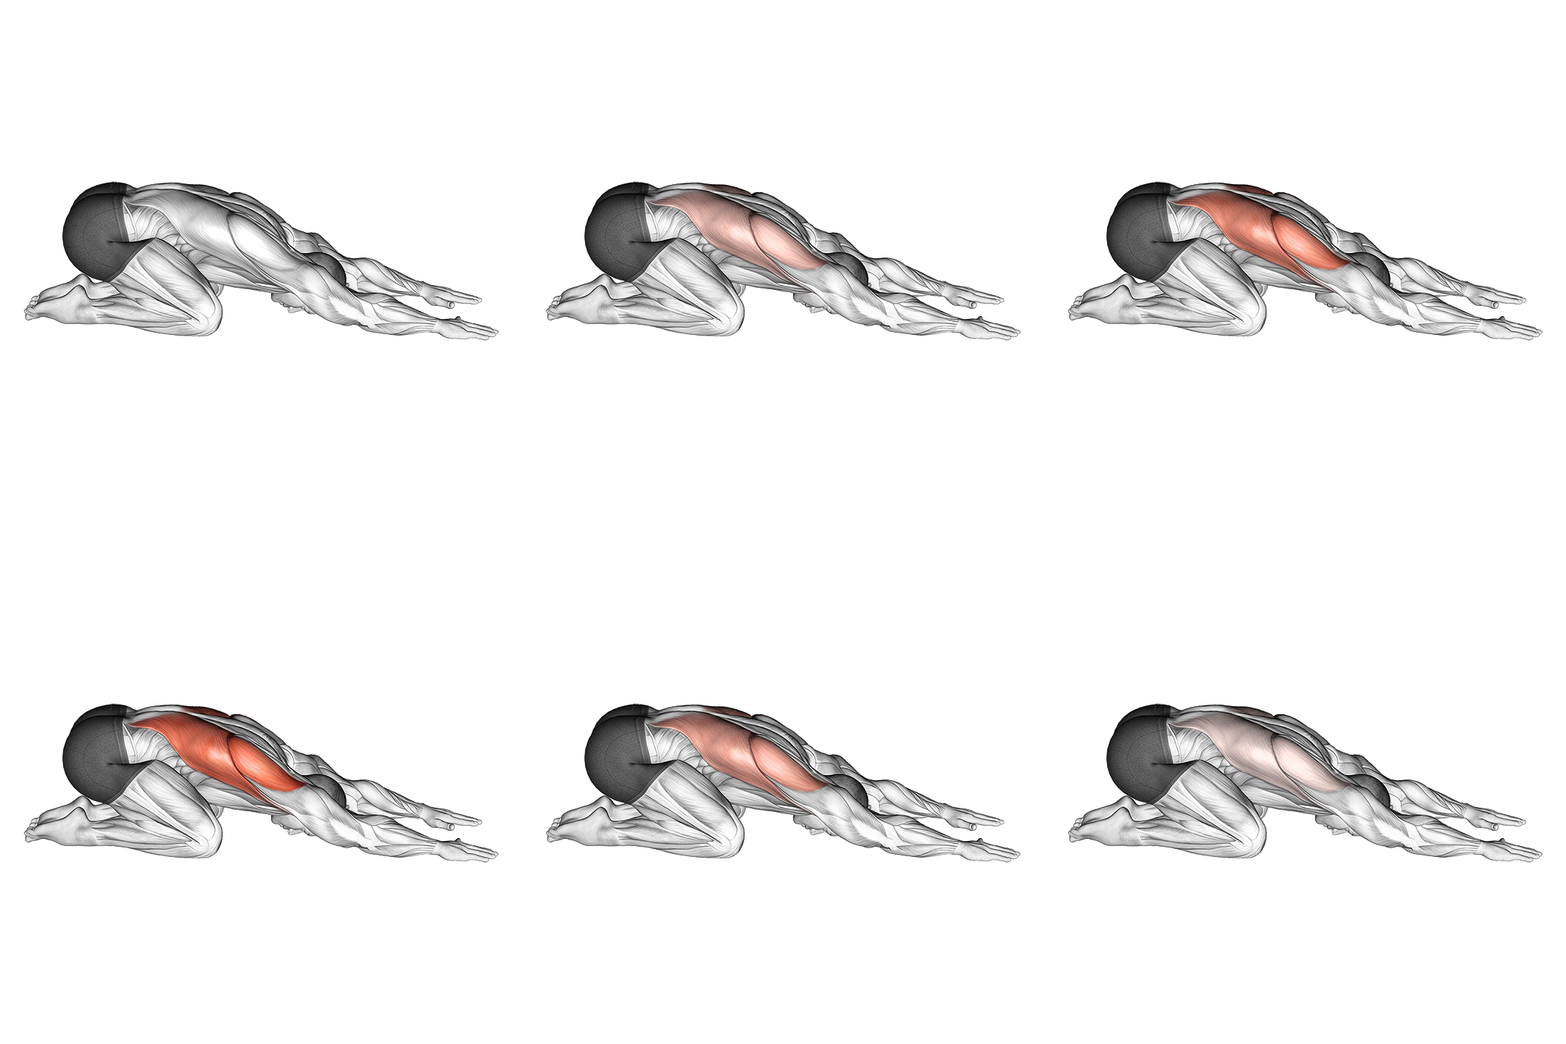
Child’s Pose
Child’s Pose, or Balasana, is a resting yoga posture that gently stretches the hips, thighs, and ankles while calming the mind and relieving stress. It is often used as a counterpose to more strenuous exercises or as a resting position during a workout.
Muscle focus
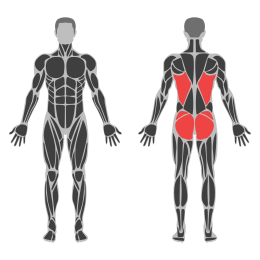
Step-by-step cues
- Begin by kneeling on the floor with your big toes touching and knees spread apart about hip-width.
- Sit back on your heels and slowly bend forward, extending your arms in front of you on the floor.
- Lower your torso between your thighs and rest your forehead on the mat.
- Keep your arms extended forward with palms facing down or alongside your body with palms facing up.
- Hold the position for several breaths, focusing on deep, even breathing.
Technical tips
- If you have tight hips, keep your knees closer together for comfort.
- To deepen the stretch in your shoulders, keep your arms extended forward.
- Use a cushion or folded blanket under your torso or forehead for added support if needed.
- Focus on relaxing your entire body and breathing deeply to enhance the calming effects of the pose.
- If you experience discomfort in your knees, place a rolled towel behind them for additional support.
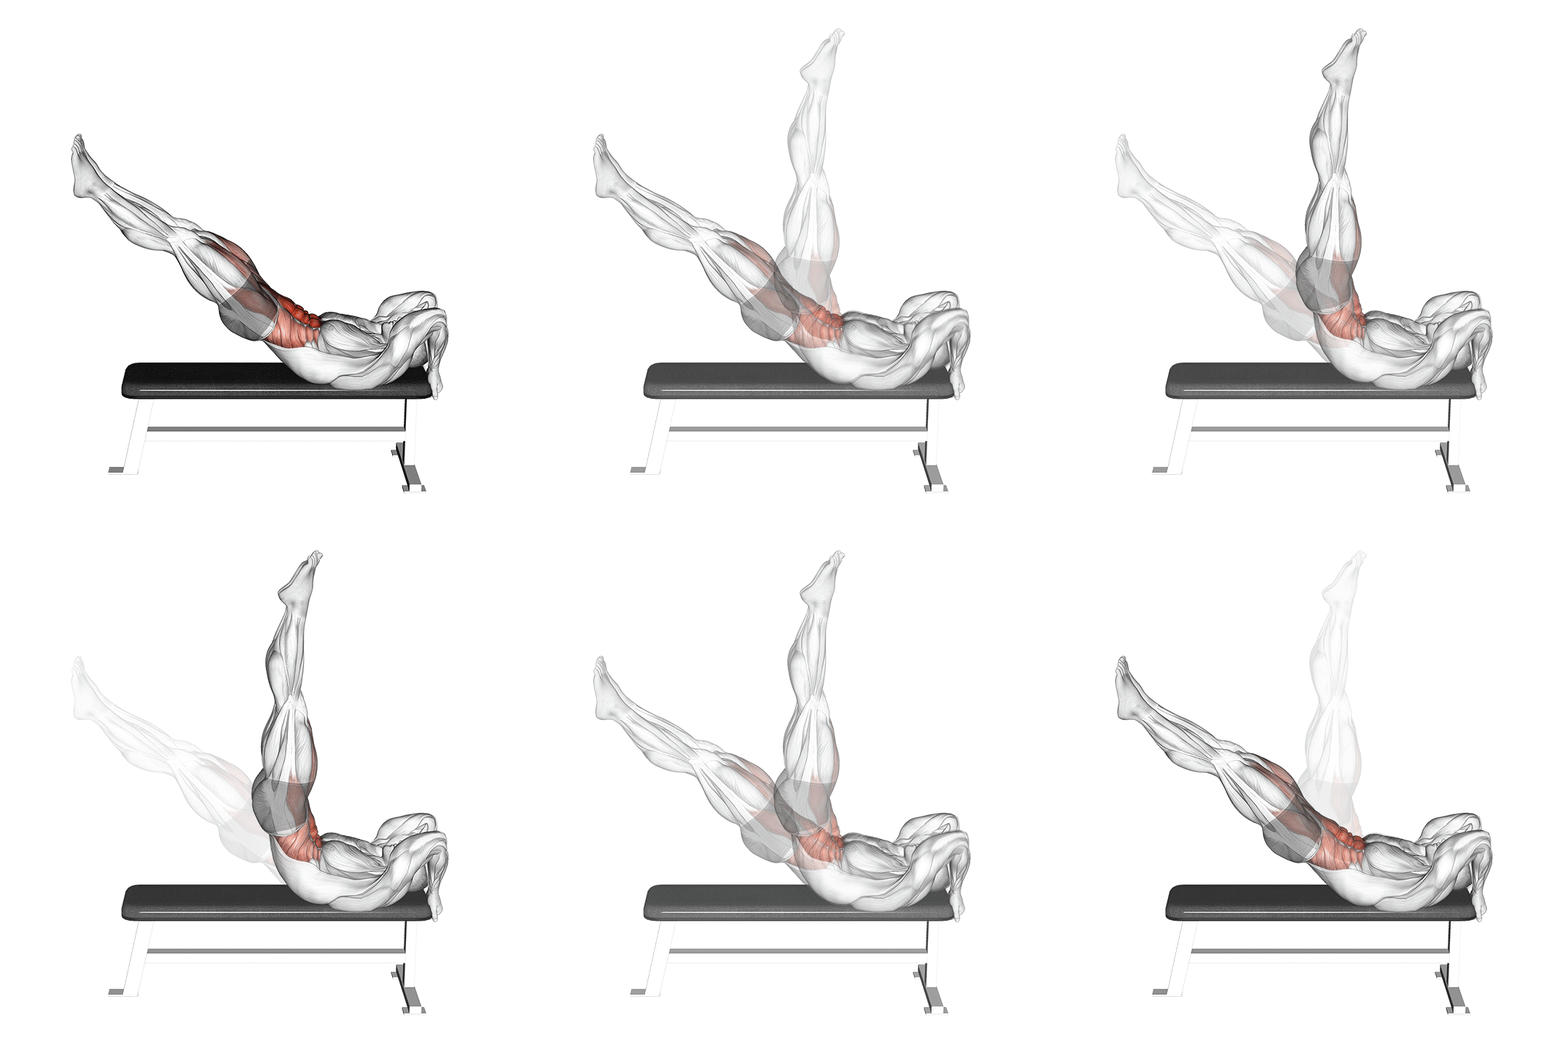
Dragon Flag
The Dragon Flag is an advanced core exercise that primarily targets the rectus abdominis, obliques, and hip flexors. It requires significant strength and control, as it involves maintaining a straight body position while lowering and raising the legs from a supine position. This exercise also engages the lats, shoulders, and glutes for stabilization.
Muscle focus
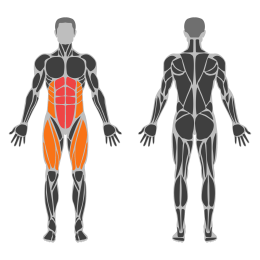
Step-by-step cues
- Lie flat on a bench or the floor with your head near the edge. Grip the sides of the bench or anchor your hands behind your head for support.
- Engage your core and lift your legs and hips off the bench, keeping your body straight from shoulders to toes.
- Maintain a rigid body position as you slowly lower your legs towards the bench without letting your back arch.
- Pause just above the bench, then raise your legs back to the starting position using controlled movements.
- Repeat for the desired number of repetitions while maintaining form.
Technical tips
- Focus on keeping your body as straight as possible to maximize core engagement.
- Control is key; perform each repetition slowly to avoid using momentum.
- Keep your shoulders pressed into the bench to stabilize your upper body.
- If you're new to this exercise, start with partial range of motion and gradually increase as you build strength.
- Engage your glutes and lats to help maintain a stable position throughout the movement.
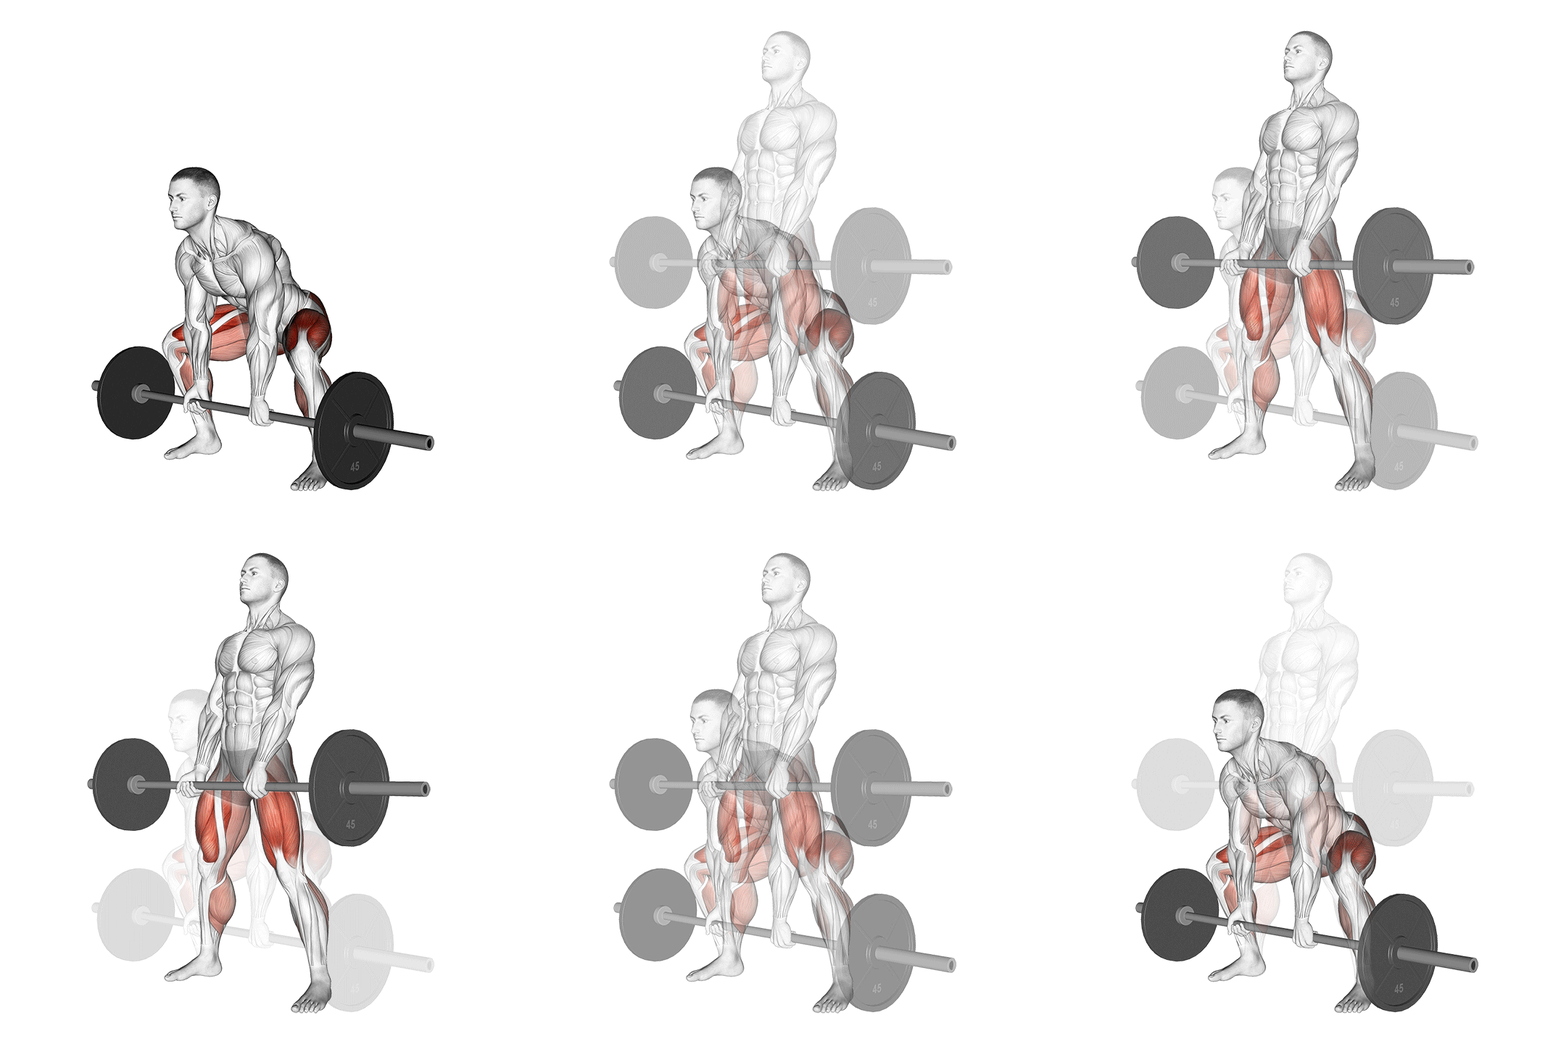
Sumo Deadlift
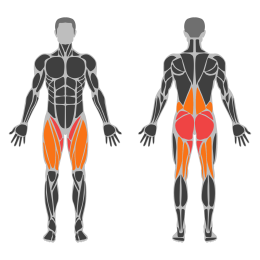
The Sumo Deadlift is a compound exercise that primarily targets the muscles of the posterior chain, including the glutes, hamstrings, and lower back, while also engaging the quadriceps and adductors. This variation of the deadlift involves a wider stance and a more upright torso compared to the conventional deadlift, which can reduce stress on the lower back and allow for greater emphasis on hip mobility and strength.
Muscle focus
Step-by-step cues
- Stand with your feet wider than shoulder-width apart, toes pointing slightly outward.
- Position yourself close to the barbell so that it is over the middle of your feet.
- Bend at the hips and knees to lower your body, keeping your chest up and back straight.
- Grip the barbell with both hands inside your knees, using a double overhand or mixed grip.
- Engage your core and pull your shoulders back before initiating the lift.
- Push through your heels and extend your hips and knees to lift the barbell, keeping it close to your body.
- Stand fully upright with shoulders back at the top of the lift.
- Lower the barbell back to the ground in a controlled manner by bending at the hips and knees.
Technical tips
- Focus on keeping your chest up and back straight throughout the movement to prevent injury.
- Ensure that your knees track in line with your toes as you lift to maintain proper form.
- Engage your core muscles before lifting to stabilize your spine and improve power transfer.
- Start with lighter weights to master form before progressing to heavier loads.
- Use a mixed grip if necessary to improve grip strength and control over heavier weights.
- Maintain a neutral head position by looking forward or slightly down during the lift.
Donkey Kick
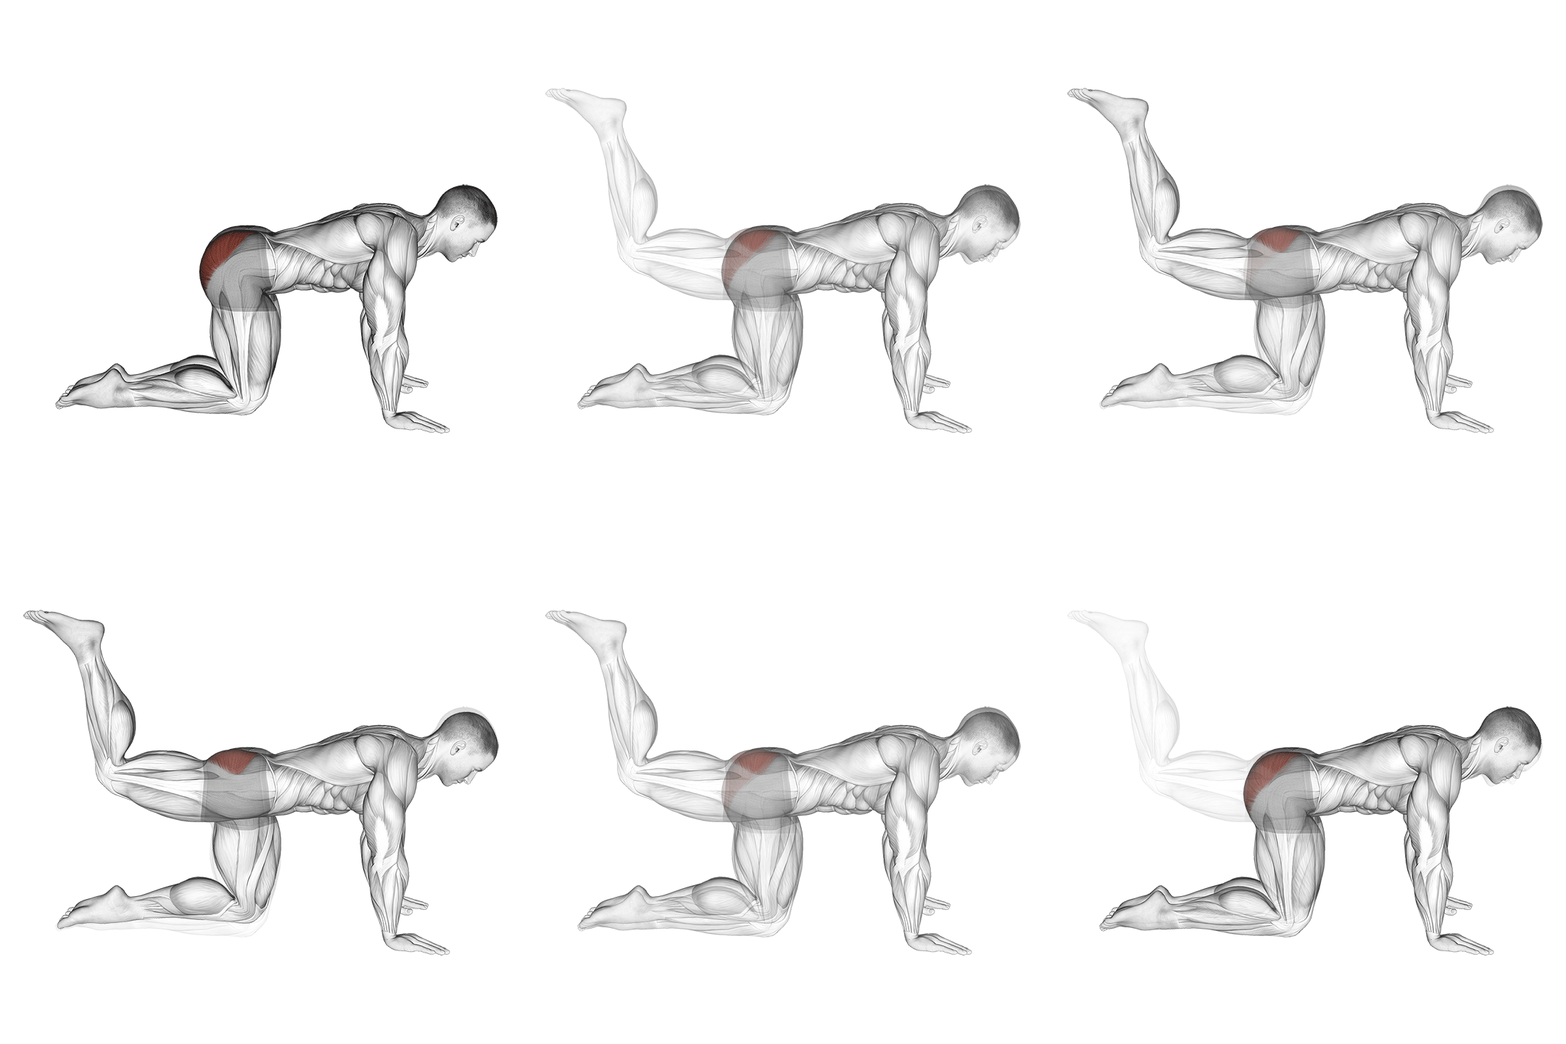
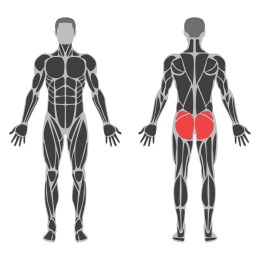
The Donkey Kick is a lower body exercise targeting the gluteus maximus, designed to enhance strength, stability, and muscle tone. It primarily engages the glutes while also activating the core and hamstrings. This exercise is performed on all fours, making it accessible for various fitness levels.
Muscle focus
Step-by-step cues
- Begin on all fours with your hands directly under your shoulders and knees under your hips.
- Engage your core to maintain a neutral spine throughout the movement.
- Lift one leg, keeping the knee bent at 90 degrees, and drive the sole of your foot towards the ceiling.
- Squeeze your glutes at the top of the movement and hold for a brief moment.
- Lower your leg back to the starting position with control.
- Repeat for the desired number of repetitions before switching to the other leg.
Technical tips
- Keep your core engaged to prevent lower back arching.
- Focus on squeezing your glutes at the top of each repetition for maximum activation.
- Maintain a steady pace and avoid using momentum to lift your leg.
- Ensure your neck remains in line with your spine by looking down at the floor.
- For added resistance, consider using ankle weights or a resistance band around your thighs.
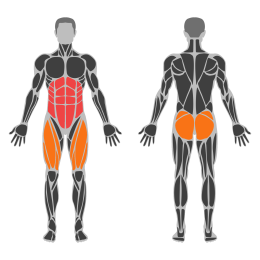
Mountain climber
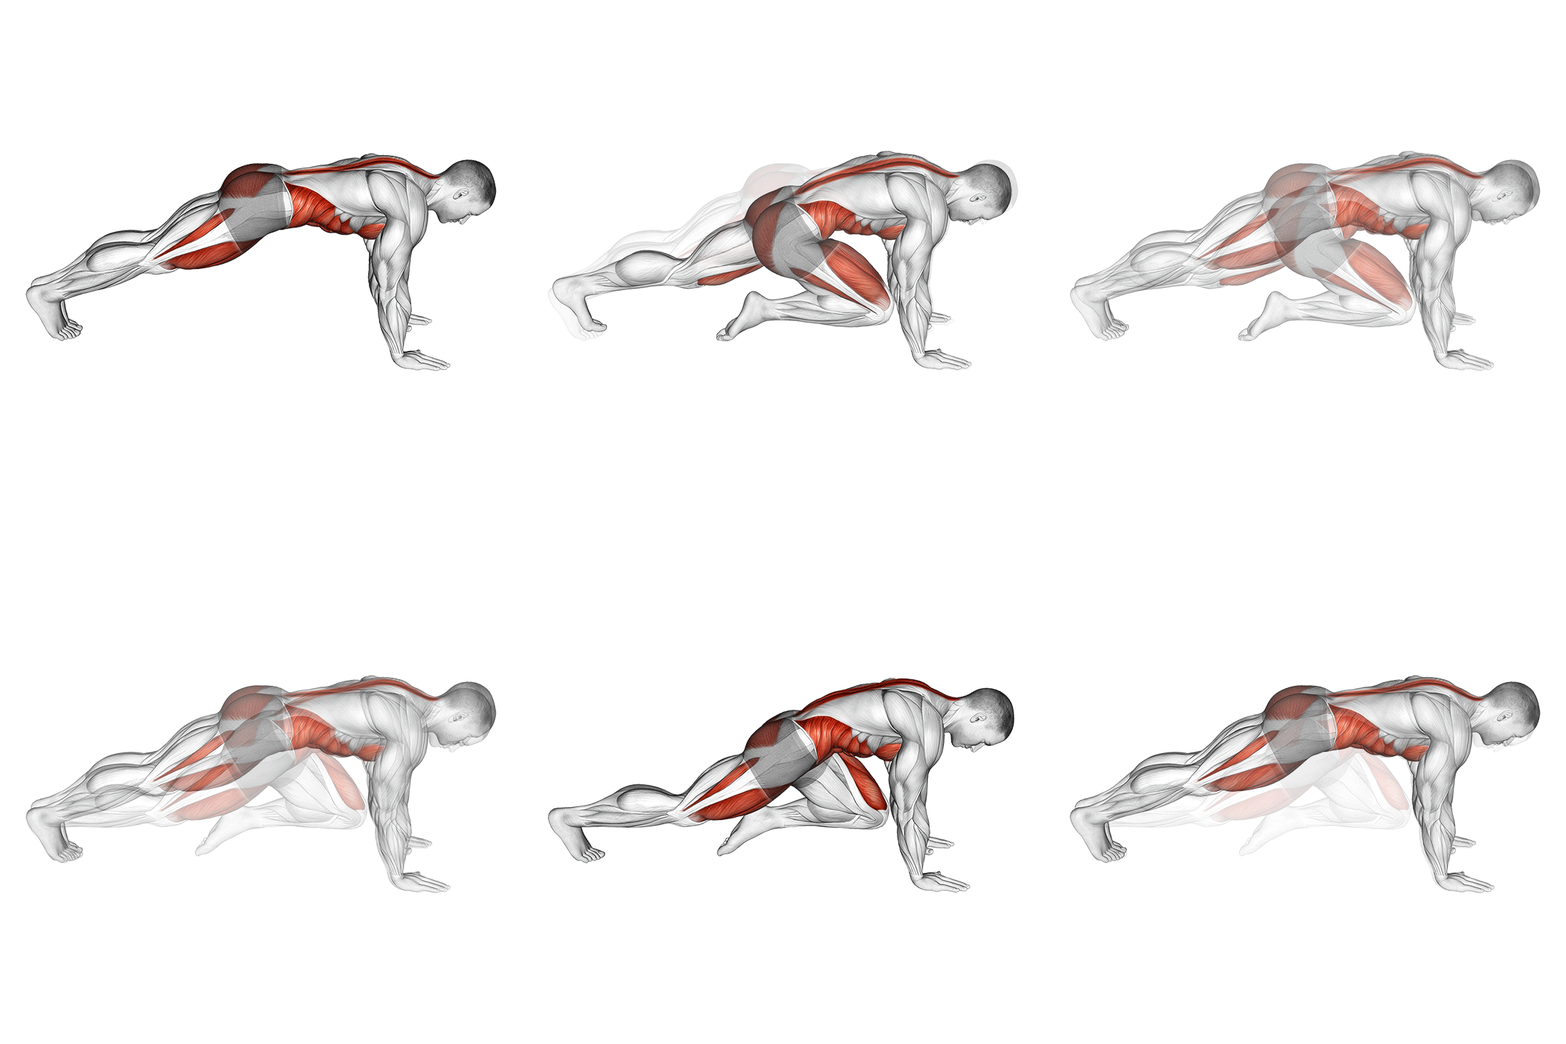
The mountain climber is a bodyweight exercise that targets the core muscles, as well as the shoulders, arms, and legs. It combines a plank position with a running motion, providing both strength and cardiovascular benefits.
Muscle focus
Step-by-step cues
- Start in a high plank position with your hands placed shoulder-width apart directly under your shoulders.
- Keep your body in a straight line from head to heels, engaging your core muscles.
- Drive your right knee towards your chest while keeping your left leg extended.
- Quickly switch legs, bringing your left knee towards your chest as you extend your right leg back.
- Continue alternating legs at a quick pace, maintaining the plank position throughout the exercise.
- Breathe steadily and maintain a consistent rhythm.
Technical tips
- Ensure your hands are directly under your shoulders to maintain proper alignment and reduce strain on the wrists.
- Engage your core throughout the exercise to prevent your hips from sagging or lifting too high.
- Keep your movements controlled; avoid bouncing or letting your feet slam into the ground.
- Focus on maintaining a steady breathing pattern to support endurance during the exercise.
- If you're new to this exercise, start slowly to ensure proper form before increasing speed.
- To increase intensity, try performing the exercise for a longer duration or at a faster pace.
Tuesday
Upper Strength
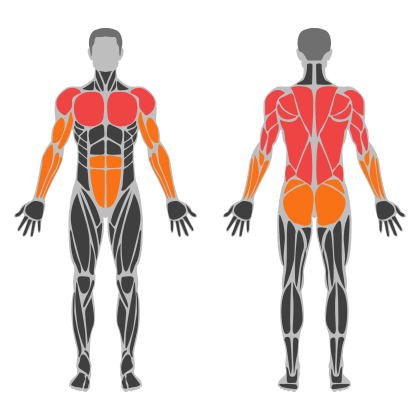
Upper Strength muscle focus
Red marks the primary training focus. Orange marks supporting muscle groups used throughout this session.
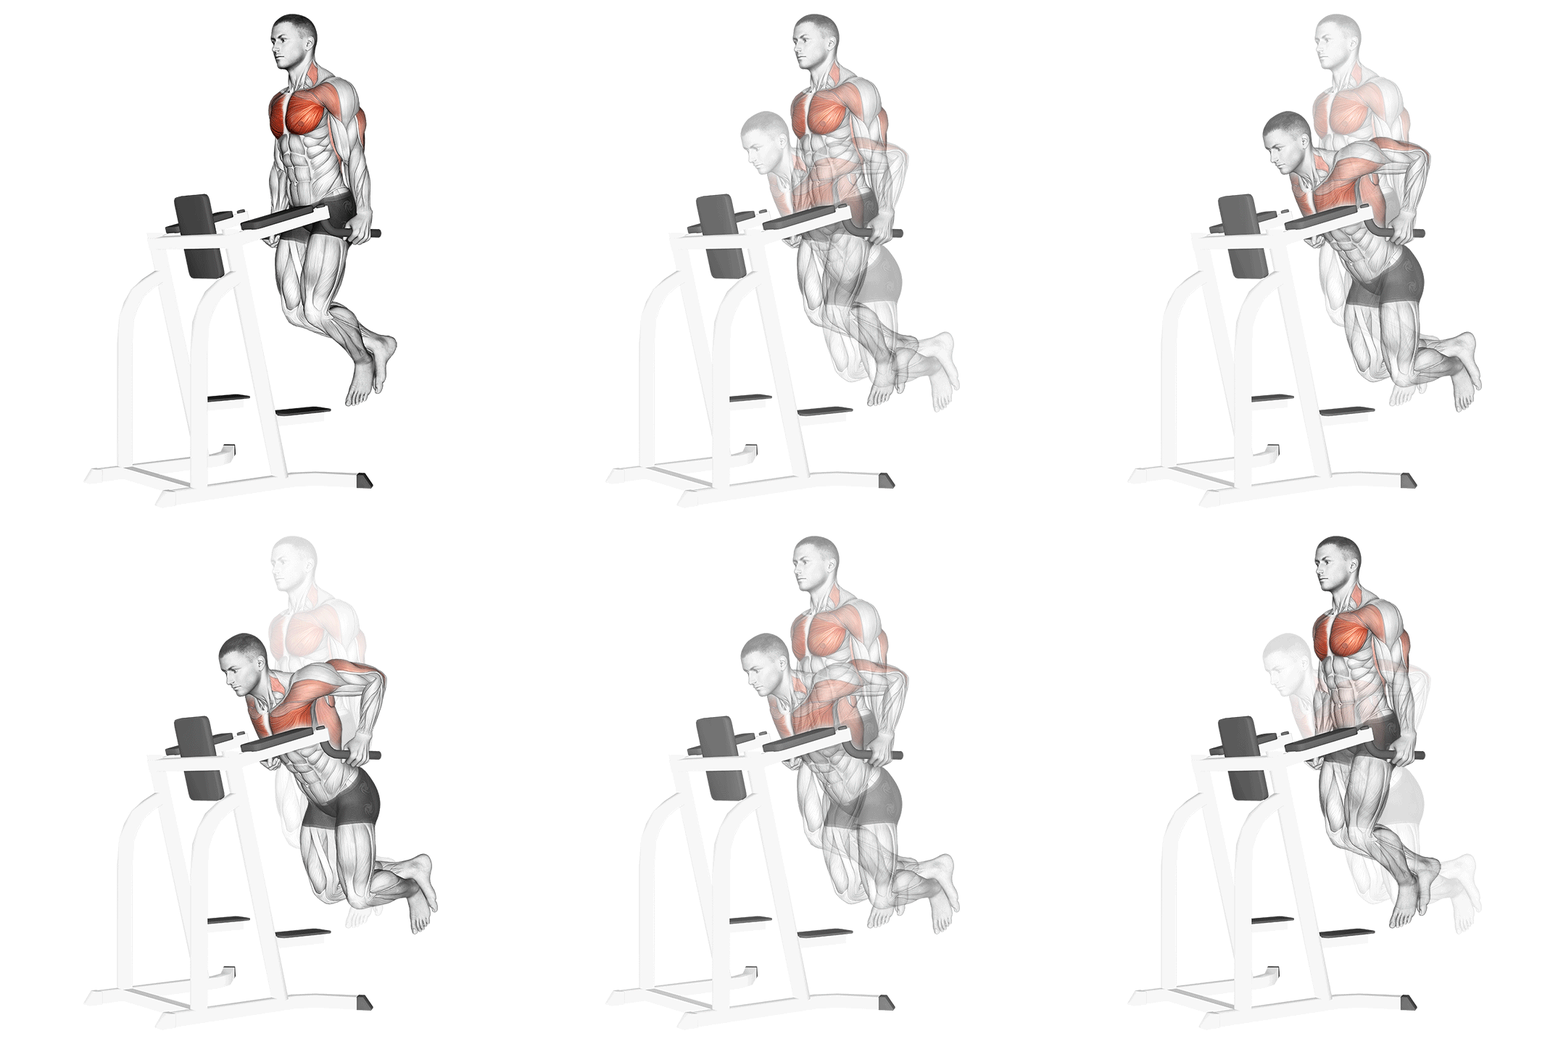
Chest Dips
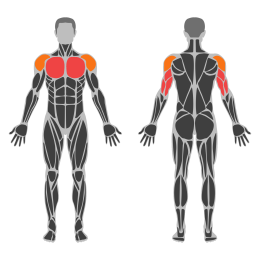
Dips on parallel bars target the chest, triceps, and shoulders. This compound exercise emphasizes the lower part of the pectoral muscles and helps in building upper body strength and mass. Proper form is crucial to maximize effectiveness and prevent injury.
Muscle focus
Step-by-step cues
- Begin by gripping the parallel bars with your palms facing inward and arms fully extended.
- Lift your body off the ground by straightening your arms, keeping your torso slightly leaning forward.
- Bend your elbows to lower your body until your upper arms are parallel to the ground or slightly below.
- Pause briefly at the bottom of the movement, then push through your palms to extend your arms and return to the starting position.
- Maintain a controlled motion throughout the exercise, avoiding any swinging or jerking movements.
Technical tips
- Keep your core engaged to maintain stability and control during the exercise.
- Leaning forward slightly will emphasize chest activation over triceps.
- Avoid locking out your elbows at the top to maintain tension on the muscles.
- Breathe in as you lower yourself and exhale as you push back up.
- If you're new to this exercise, consider using an assisted dip machine or resistance bands for support.
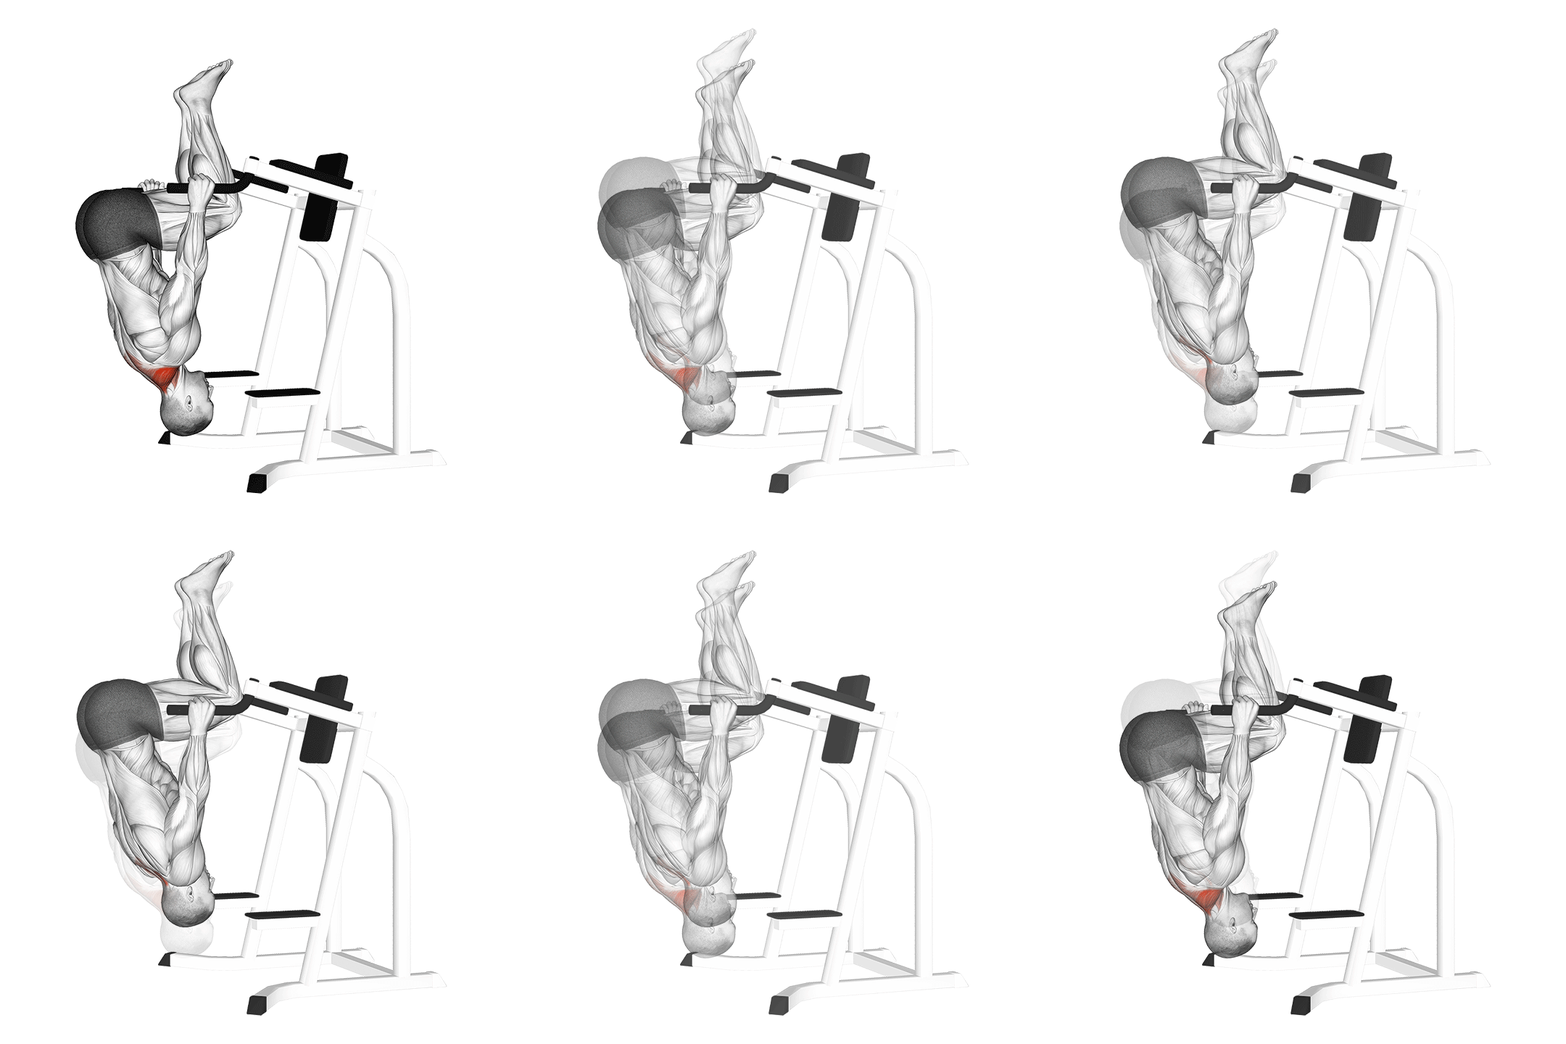
Inverted Shrug
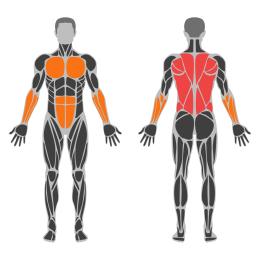
The Inverted Shrug is an exercise primarily targeting the trapezius muscles, particularly the lower traps. It involves hanging from a bar and using shoulder depression to lift your body slightly, engaging the upper back and shoulders. This exercise helps improve shoulder stability and posture.
Muscle focus
Step-by-step cues
- Begin by hanging from a pull-up bar with an overhand grip, hands shoulder-width apart.
- Engage your core and keep your body straight, avoiding any swinging.
- Depress your shoulders by pulling them down away from your ears, lifting your body slightly upward.
- Hold the top position for a moment, focusing on squeezing the lower trapezius muscles.
- Slowly relax your shoulders back to the starting position.
- Repeat for the desired number of repetitions.
Technical tips
- Ensure your grip is secure on the bar to maintain stability throughout the exercise.
- Focus on moving only at the shoulders; avoid bending your elbows or using momentum.
- Keep your core engaged to prevent swinging and maintain proper form.
- Breathe steadily, exhaling as you depress your shoulders and inhaling as you return to the start.
- Start with a few repetitions to master the form before increasing volume.
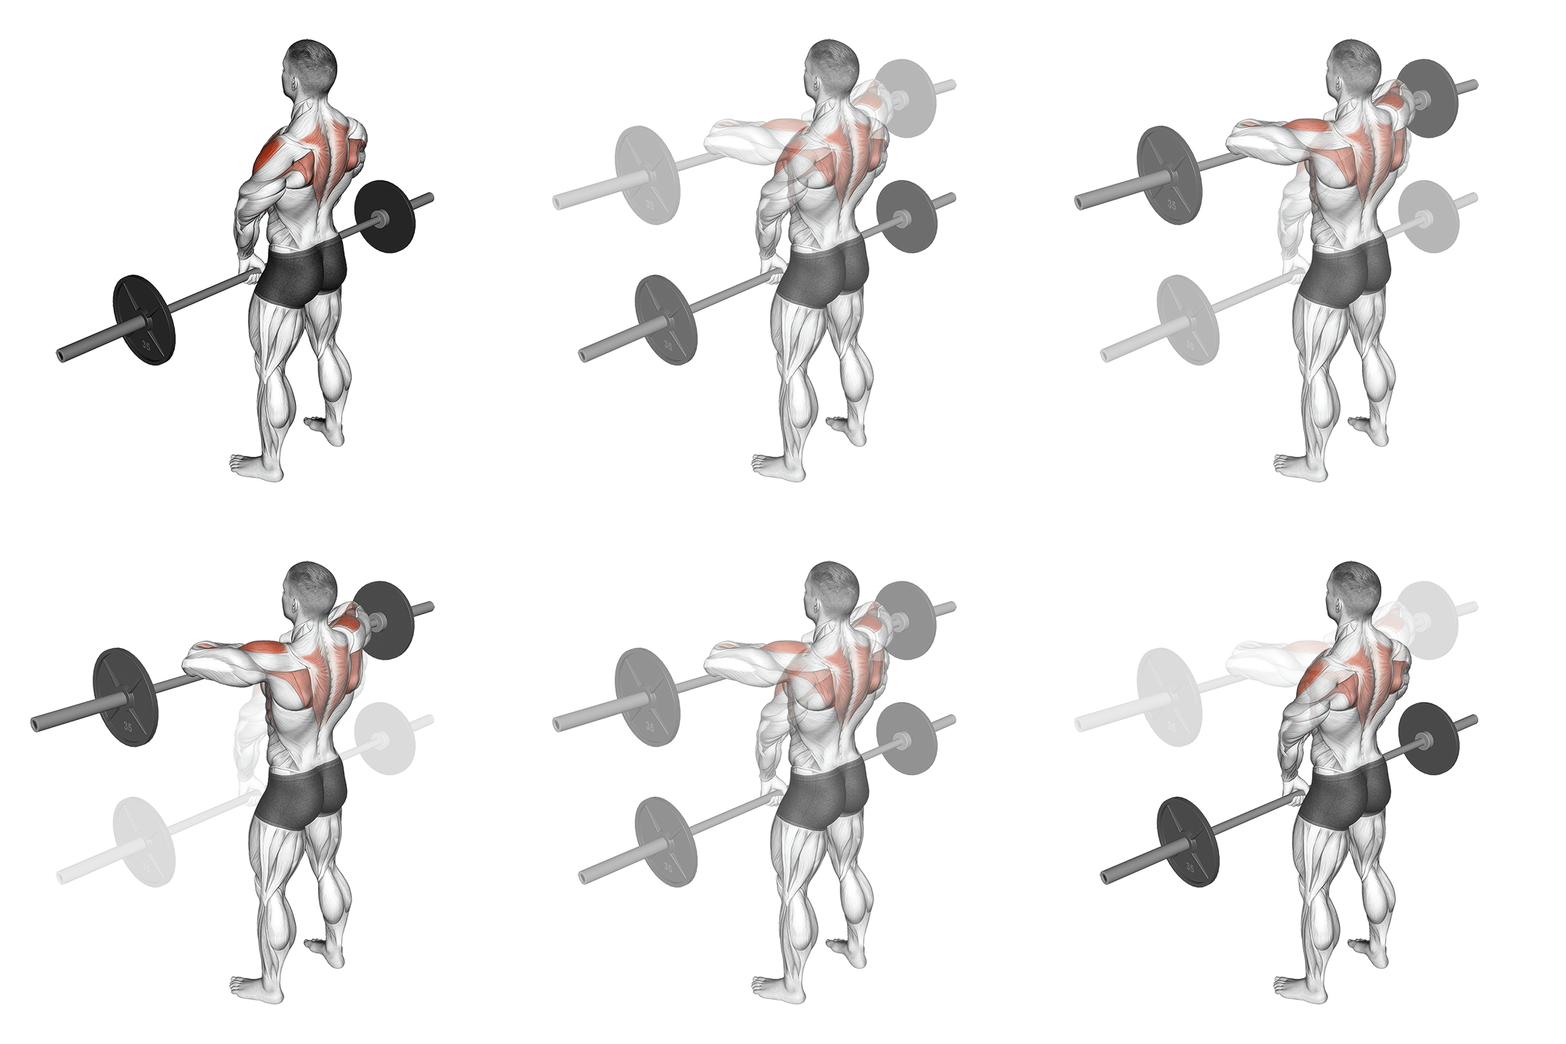
Barbell Narrow Grip Upright Row
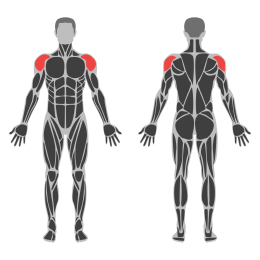
The Barbell Narrow Grip Upright Row is a compound exercise targeting the shoulders and upper back, with secondary engagement of the biceps and forearms. It involves lifting a barbell vertically along the front of your body using a narrow grip, emphasizing the deltoids and trapezius muscles.
Muscle focus
Step-by-step cues
- Stand with your feet shoulder-width apart, holding a barbell with an overhand grip, hands positioned close together.
- Keep your back straight and core engaged throughout the movement.
- Lift the barbell vertically along your body, leading with your elbows until they are at shoulder height.
- Pause briefly at the top of the movement, ensuring your elbows are higher than your wrists.
- Lower the barbell back to the starting position in a controlled manner.
- Repeat for the desired number of repetitions.
Technical tips
- Maintain a narrow grip to maximize shoulder and upper back engagement.
- Focus on lifting with your elbows rather than your hands to target the correct muscles.
- Avoid swinging or using momentum; keep the movement controlled and steady.
- Keep your shoulders relaxed at the start to prevent unnecessary tension in the neck.
- Exhale as you lift the barbell and inhale as you lower it for optimal breathing technique.
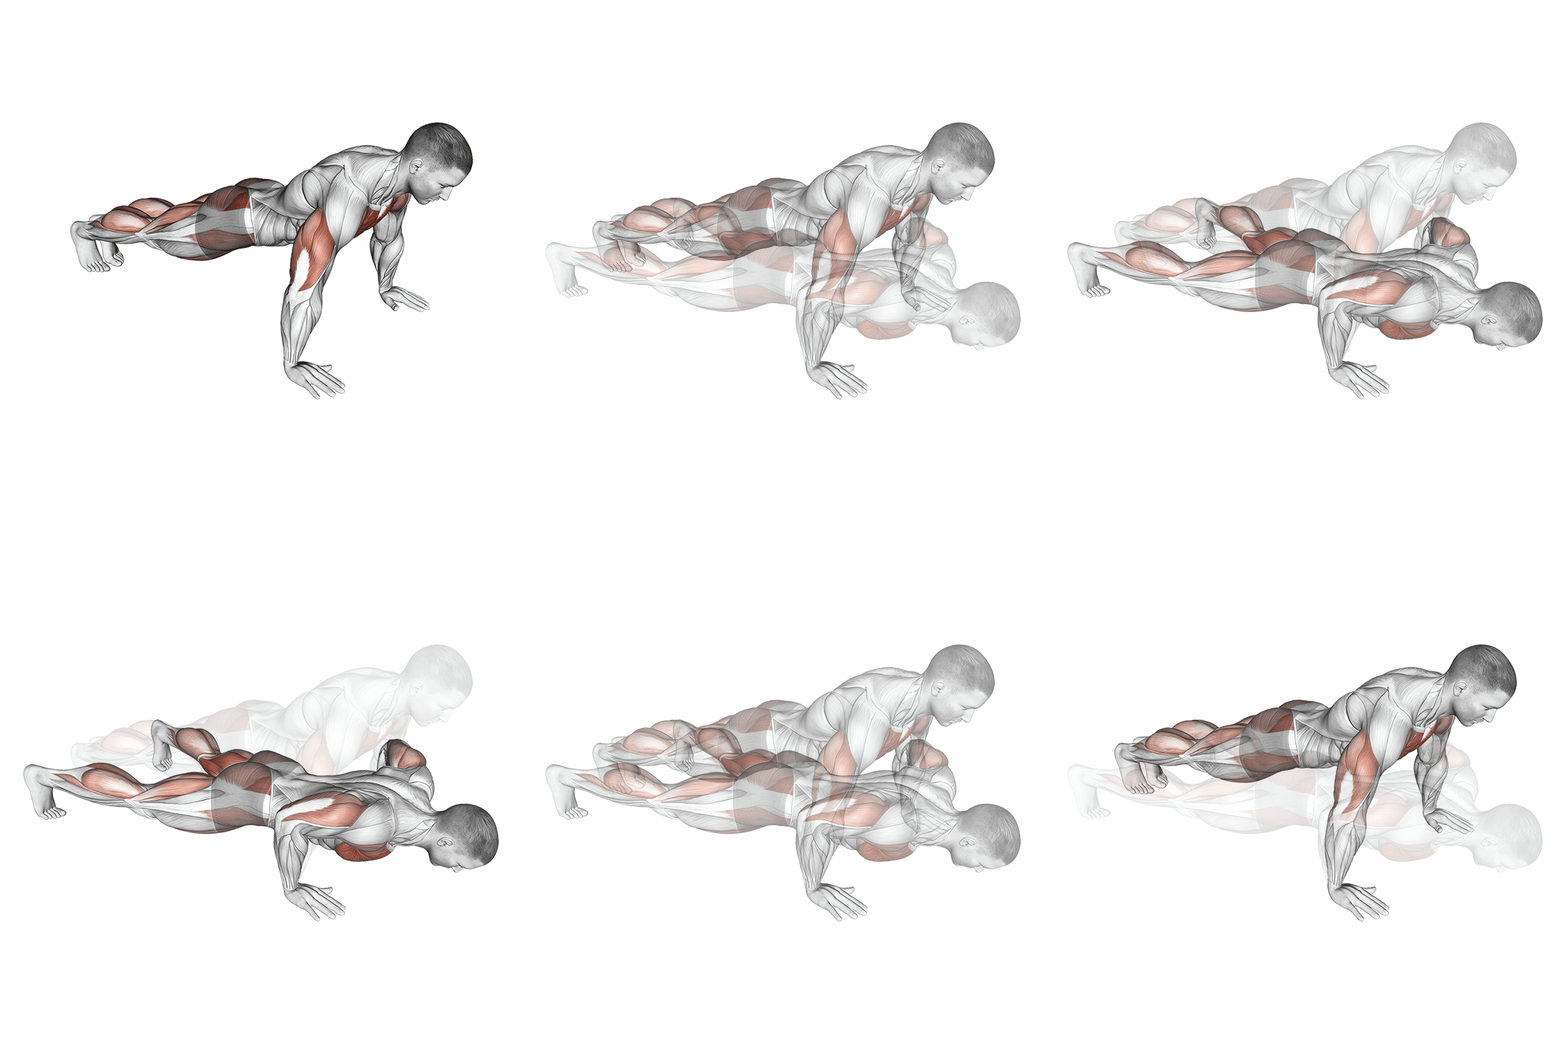
Jack Push-Up
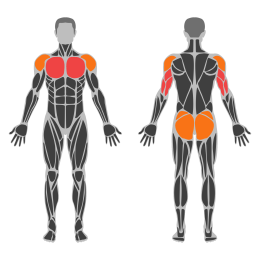
The Push Up Jack is a dynamic exercise that combines the traditional push-up with a jumping jack motion. It targets the chest, shoulders, triceps, and core muscles while also providing cardiovascular benefits. This exercise enhances upper body strength, endurance, and coordination.
Muscle focus
Step-by-step cues
- Start in a high plank position with your hands placed slightly wider than shoulder-width apart and your feet together.
- Engage your core and keep your body in a straight line from head to heels.
- Lower your chest towards the floor by bending your elbows, keeping them at about a 45-degree angle to your body.
- As you push back up to the starting position, jump your feet out to the sides wider than hip-width apart.
- Immediately jump your feet back together as you lower into the next push-up repetition.
- Continue alternating between push-ups and jumping jack motions for the desired number of repetitions.
Technical tips
- Maintain a strong core throughout the exercise to prevent sagging hips.
- Focus on controlled movements rather than speed to ensure proper form.
- Keep your elbows slightly tucked in during the push-up to protect your shoulders.
- Breathe out as you push up and jump, and inhale as you lower down.
- If you're new to this exercise, start with modified push-ups on your knees before progressing to full push-up jacks.
- Ensure that your hands are positioned correctly to avoid wrist strain.
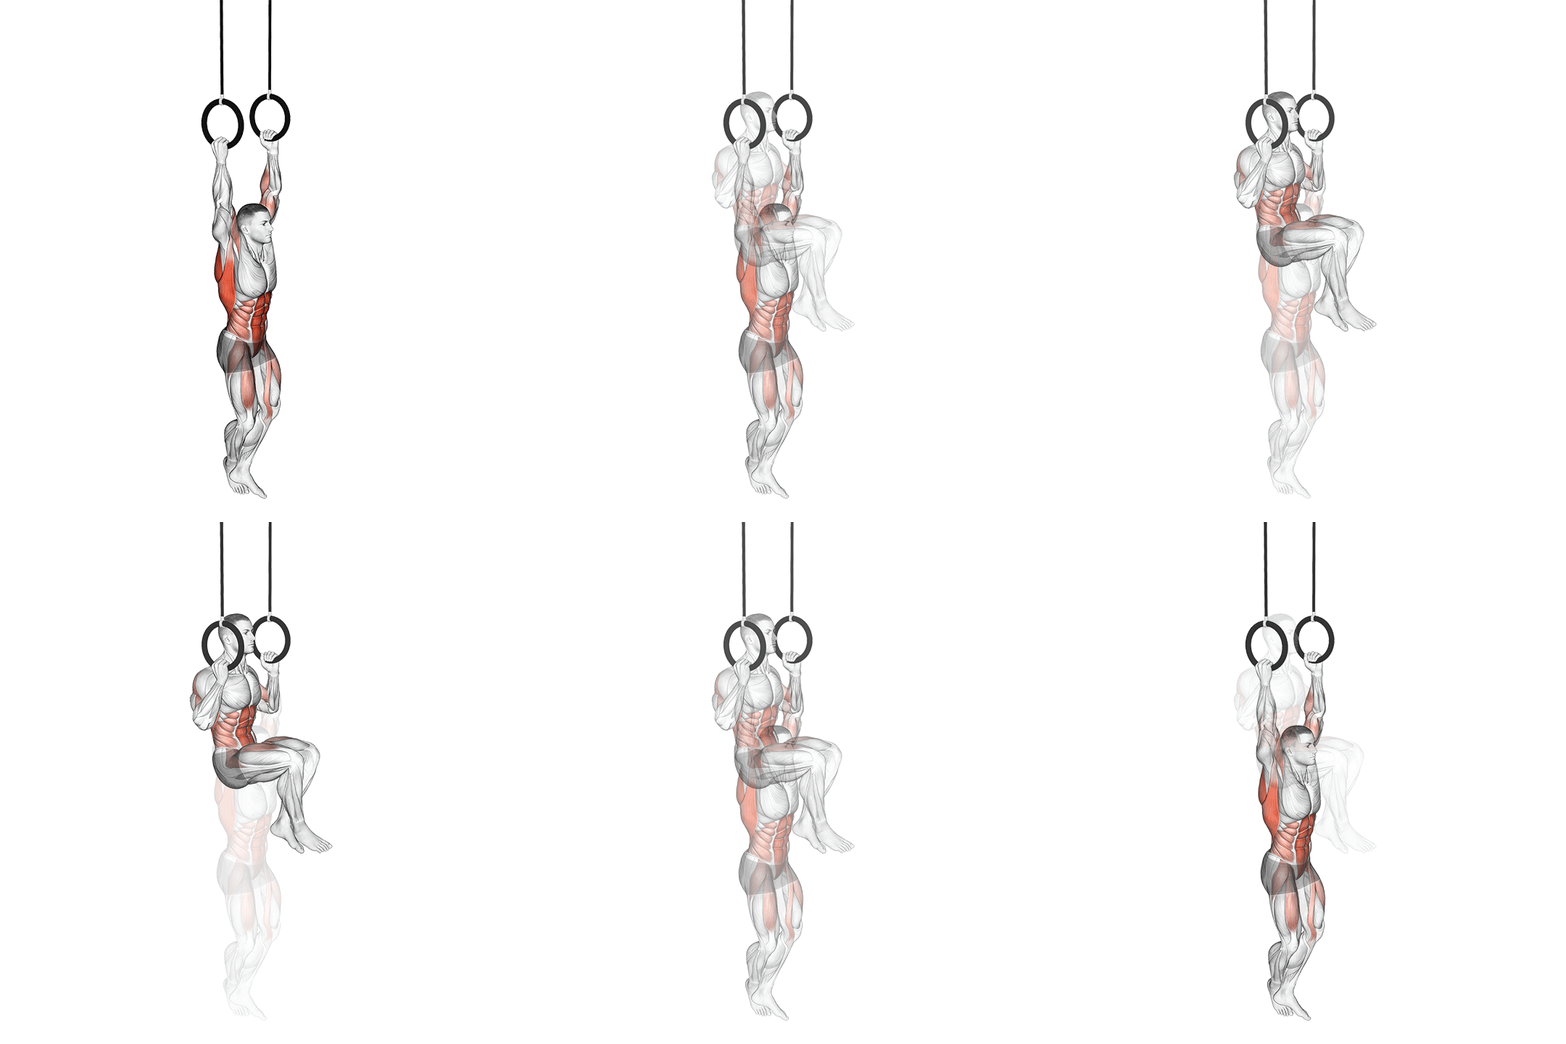
Rings Pull-Up
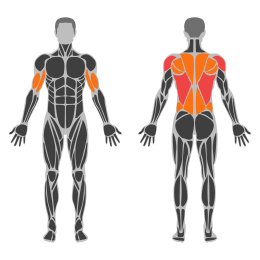
The Rings Pull Up is a bodyweight exercise performed using gymnastic rings. It primarily targets the muscles of the upper back, biceps, and shoulders, while also engaging the core for stabilization. This exercise enhances grip strength and improves overall upper body strength and coordination.
Muscle focus
Step-by-step cues
- Adjust the rings to a height where you can hang with your arms fully extended without your feet touching the ground.
- Grip the rings with a neutral grip (palms facing each other) and hang with your body straight, engaging your core.
- Initiate the movement by retracting your shoulder blades and pulling your chest towards the rings.
- Continue pulling until your chin is above the level of the rings.
- Slowly lower yourself back to the starting position with control, fully extending your arms.
- Repeat for the desired number of repetitions.
Technical tips
- Maintain a tight core throughout the movement to prevent swinging.
- Focus on squeezing your shoulder blades together as you pull up.
- Keep your elbows close to your body to maximize bicep engagement.
- Ensure a full range of motion by fully extending your arms at the bottom of each rep.
- Control the descent to build eccentric strength and prevent injury.
- If you're new to ring pull-ups, consider using a resistance band for assistance.
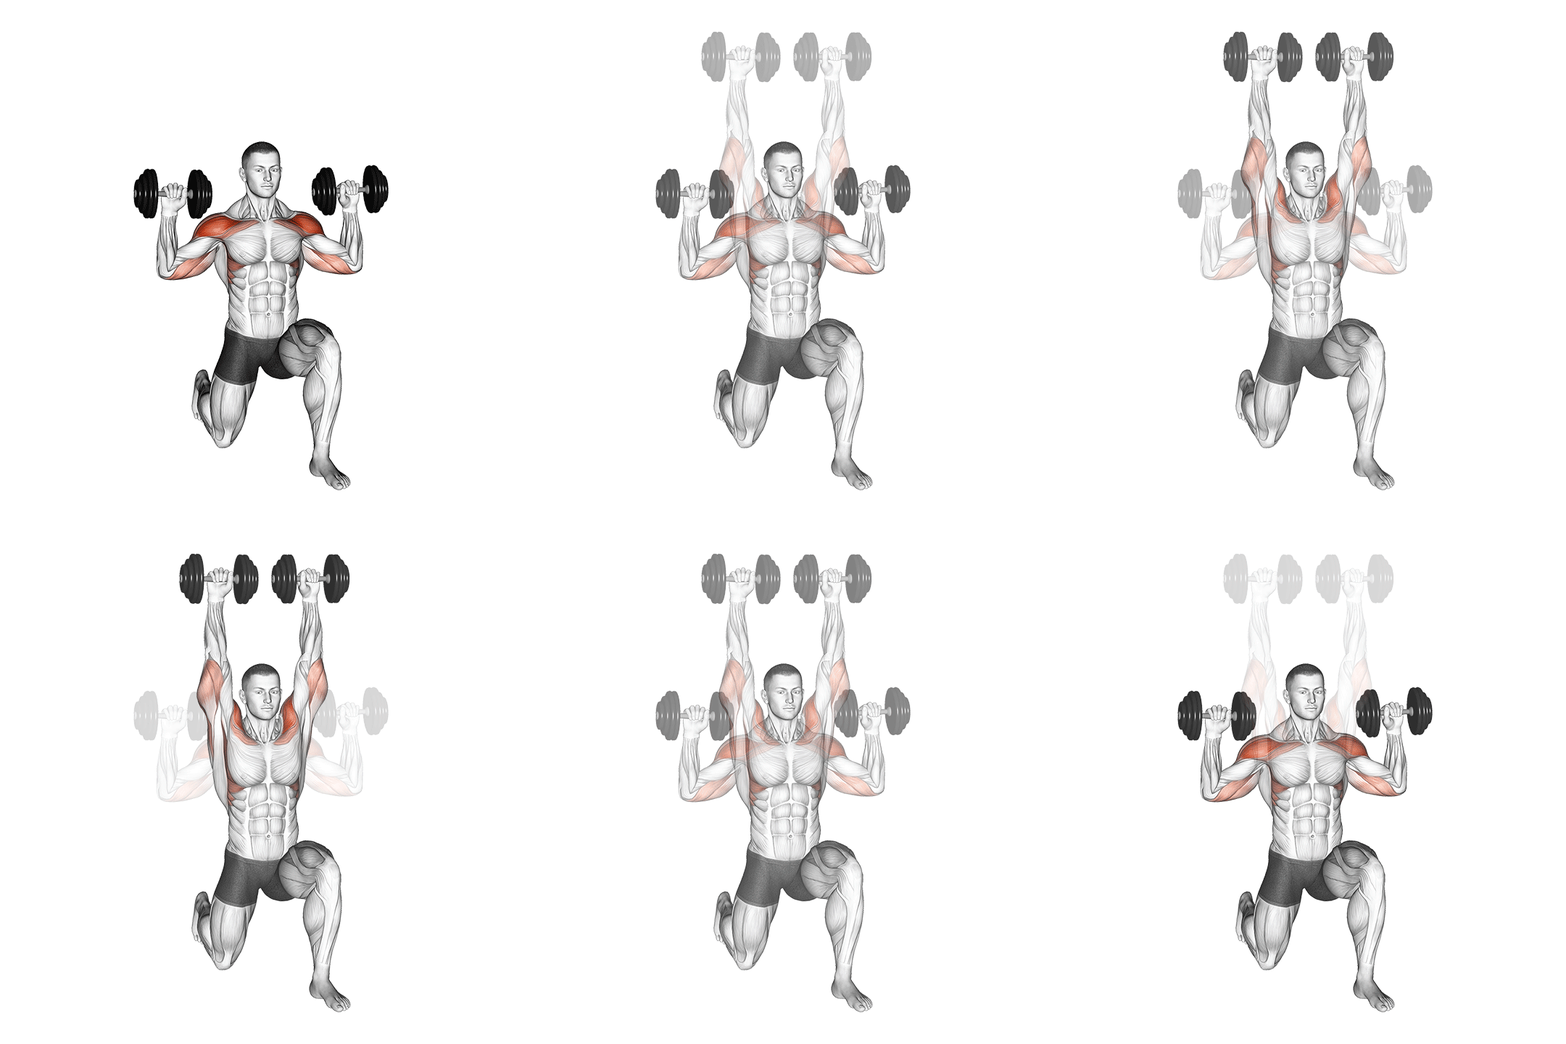
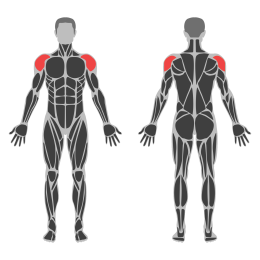
Half Kneeling Shoulder Dumbbell Press
The Half Kneeling Shoulder Dumbbell Press is an exercise that targets the shoulder muscles, particularly the deltoids, while also engaging the core for stability. This movement is performed in a half-kneeling position, which helps to improve balance and unilateral strength.
Muscle focus
Step-by-step cues
- Begin in a half-kneeling position with your right knee on the ground and left foot flat in front of you, forming a 90-degree angle at both knees.
- Hold a dumbbell in your right hand at shoulder height with your palm facing forward.
- Engage your core to maintain stability and keep your torso upright.
- Press the dumbbell overhead by extending your elbow until your arm is fully extended.
- Slowly lower the dumbbell back to the starting position at shoulder height.
- Complete the desired number of repetitions before switching sides.
Technical tips
- Ensure your core is engaged throughout the exercise to prevent leaning or arching your back.
- Keep your gaze forward and maintain a neutral spine to promote proper posture.
- Use a controlled motion when pressing and lowering the dumbbell to maximize muscle engagement.
- Start with a lighter weight to focus on form and gradually increase as you become more comfortable with the movement.
- Switch legs after completing a set on one side to ensure balanced development.
Wednesday
Zone 2 Recovery
Use easy cycling, rowing or walking for 35-50 minutes.
Thursday
Full Body Power
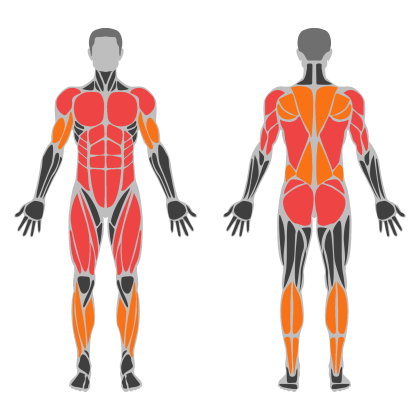
Full Body Power muscle focus
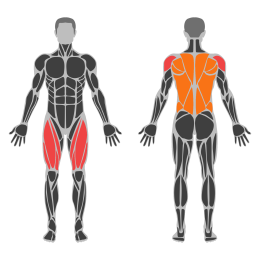
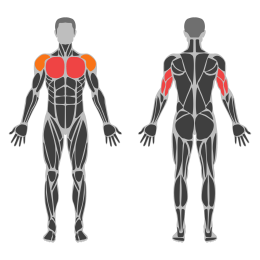
Red marks the primary training focus. Orange marks supporting muscle groups used throughout this session.
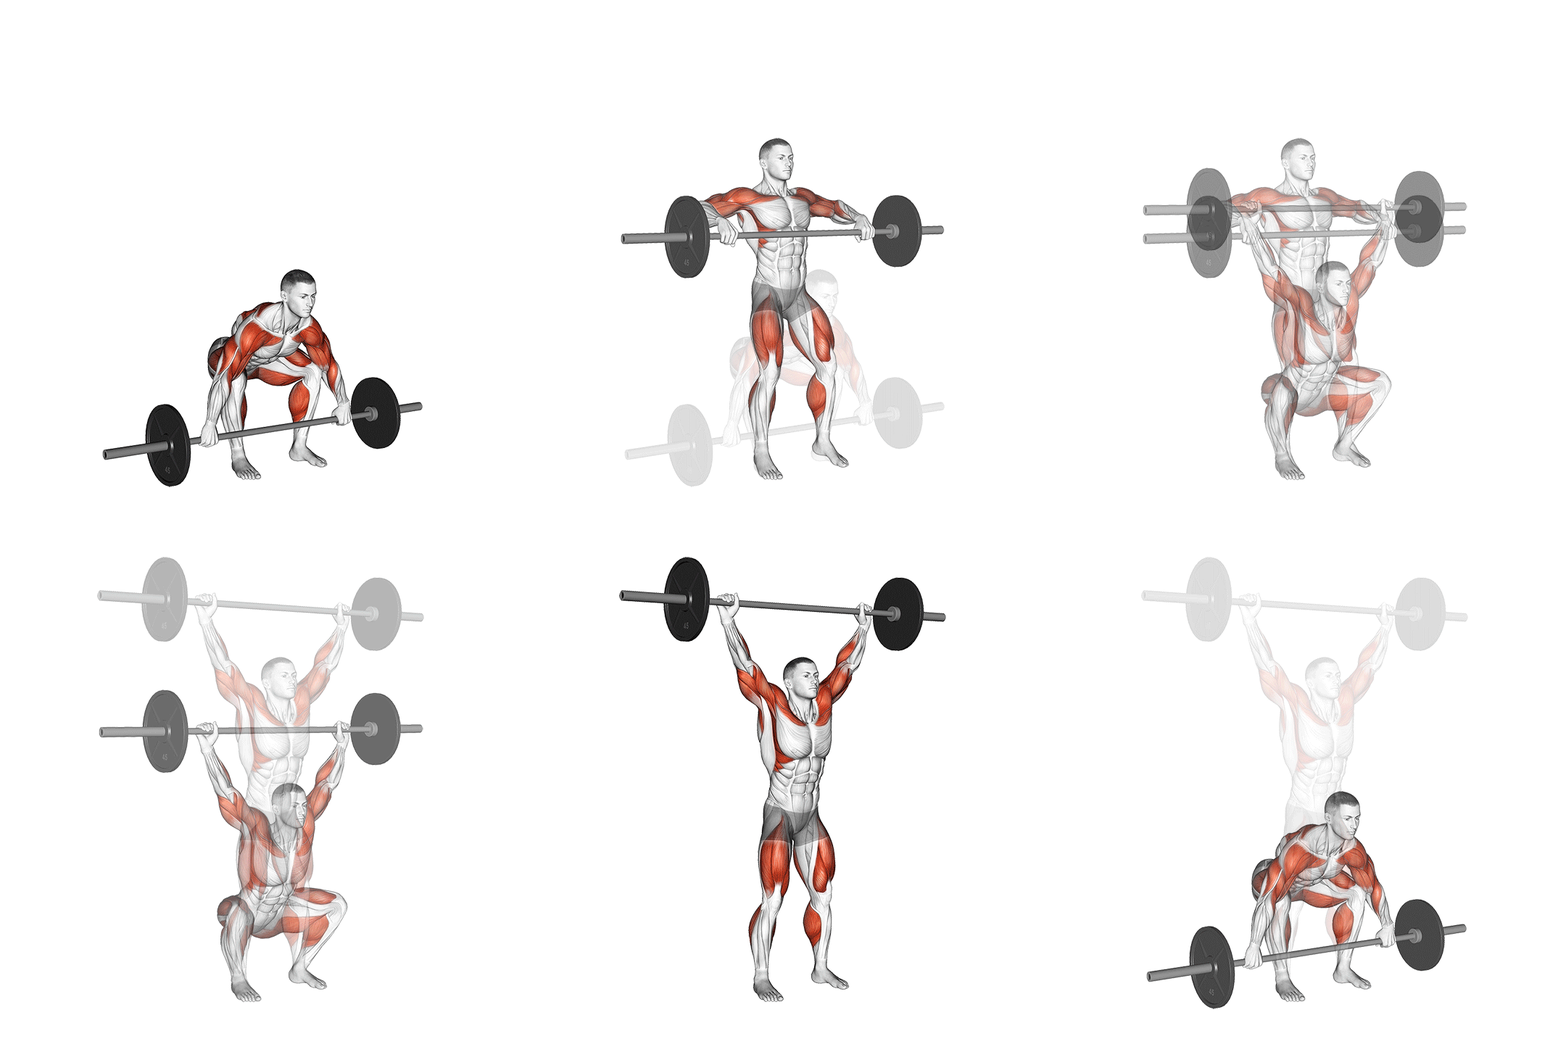
Snatch
The snatch is a dynamic Olympic weightlifting exercise that involves lifting a barbell from the ground to overhead in one continuous motion. It requires a combination of strength, speed, flexibility, and technique. The movement is divided into several phases: the first pull, transition, second pull, and catch.
Muscle focus
Step-by-step cues
- Stand with feet hip-width apart, toes slightly turned out. Position the barbell over the middle of your feet.
- Grip the barbell with a wide grip, arms straight and outside of your knees.
- Lower your hips with your chest up and back straight, keeping your gaze forward.
- Initiate the lift by pushing through your heels, extending your knees and hips in a smooth motion.
- As the bar passes your knees, transition by pulling the bar close to your body and shrugging your shoulders.
- Explosively extend your hips and knees while pulling yourself under the bar.
- Catch the bar overhead in a deep squat position with arms fully extended and locked out.
- Stand up from the squat position to complete the lift, keeping the bar stable overhead.
Technical tips
- Ensure your grip is wide enough to allow for a comfortable overhead position.
- Keep the barbell close to your body throughout the lift to maintain control and efficiency.
- Focus on an explosive hip extension to generate maximum power during the second pull.
- Practice flexibility in shoulders and ankles to achieve a stable overhead squat position.
- Use lighter weights initially to perfect technique before progressing to heavier loads.
- Maintain a neutral spine throughout the lift to prevent injury and ensure proper form.
Negative Pull-Up
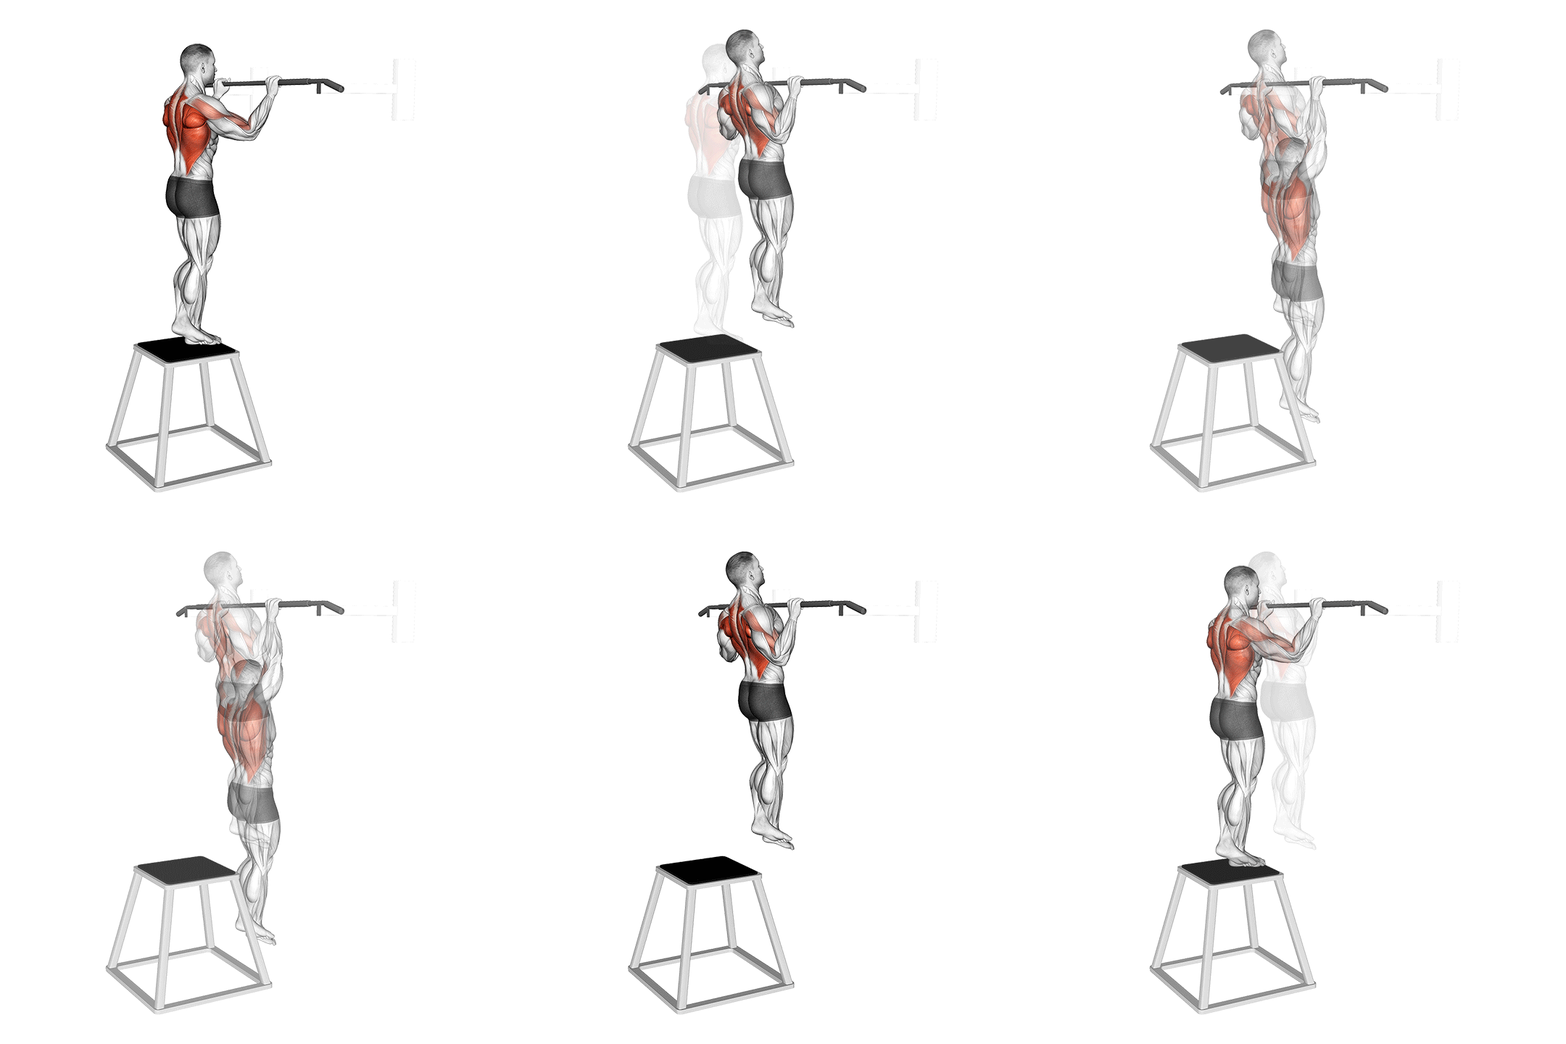
The Negative Pull-Up is an exercise focused on building strength in the upper body, particularly targeting the latissimus dorsi, biceps, and forearms. It involves controlling the descent from the top position of a pull-up, emphasizing eccentric muscle contraction. This exercise is beneficial for those who are working towards achieving their first full pull-up or looking to increase their pull-up repetitions.
Muscle focus
Step-by-step cues
- Start by using a box or step to position yourself at the top of a pull-up bar with your chin above the bar.
- Grip the bar with your hands shoulder-width apart, using an overhand grip.
- Engage your core and maintain a straight body alignment.
- Slowly lower yourself in a controlled manner, taking 3-5 seconds to descend until your arms are fully extended.
- Step back onto the box or step and repeat for the desired number of repetitions.
Technical tips
- Focus on controlling the descent to maximize muscle engagement.
- Keep your shoulders down and back to maintain proper form and avoid strain.
- Use a box or step that allows you to start at the top position comfortably.
- Breathe steadily throughout the exercise, exhaling as you lower yourself.
- If you're new to this exercise, start with fewer repetitions and gradually increase as you build strength.
Kneeling Wide Push-Up
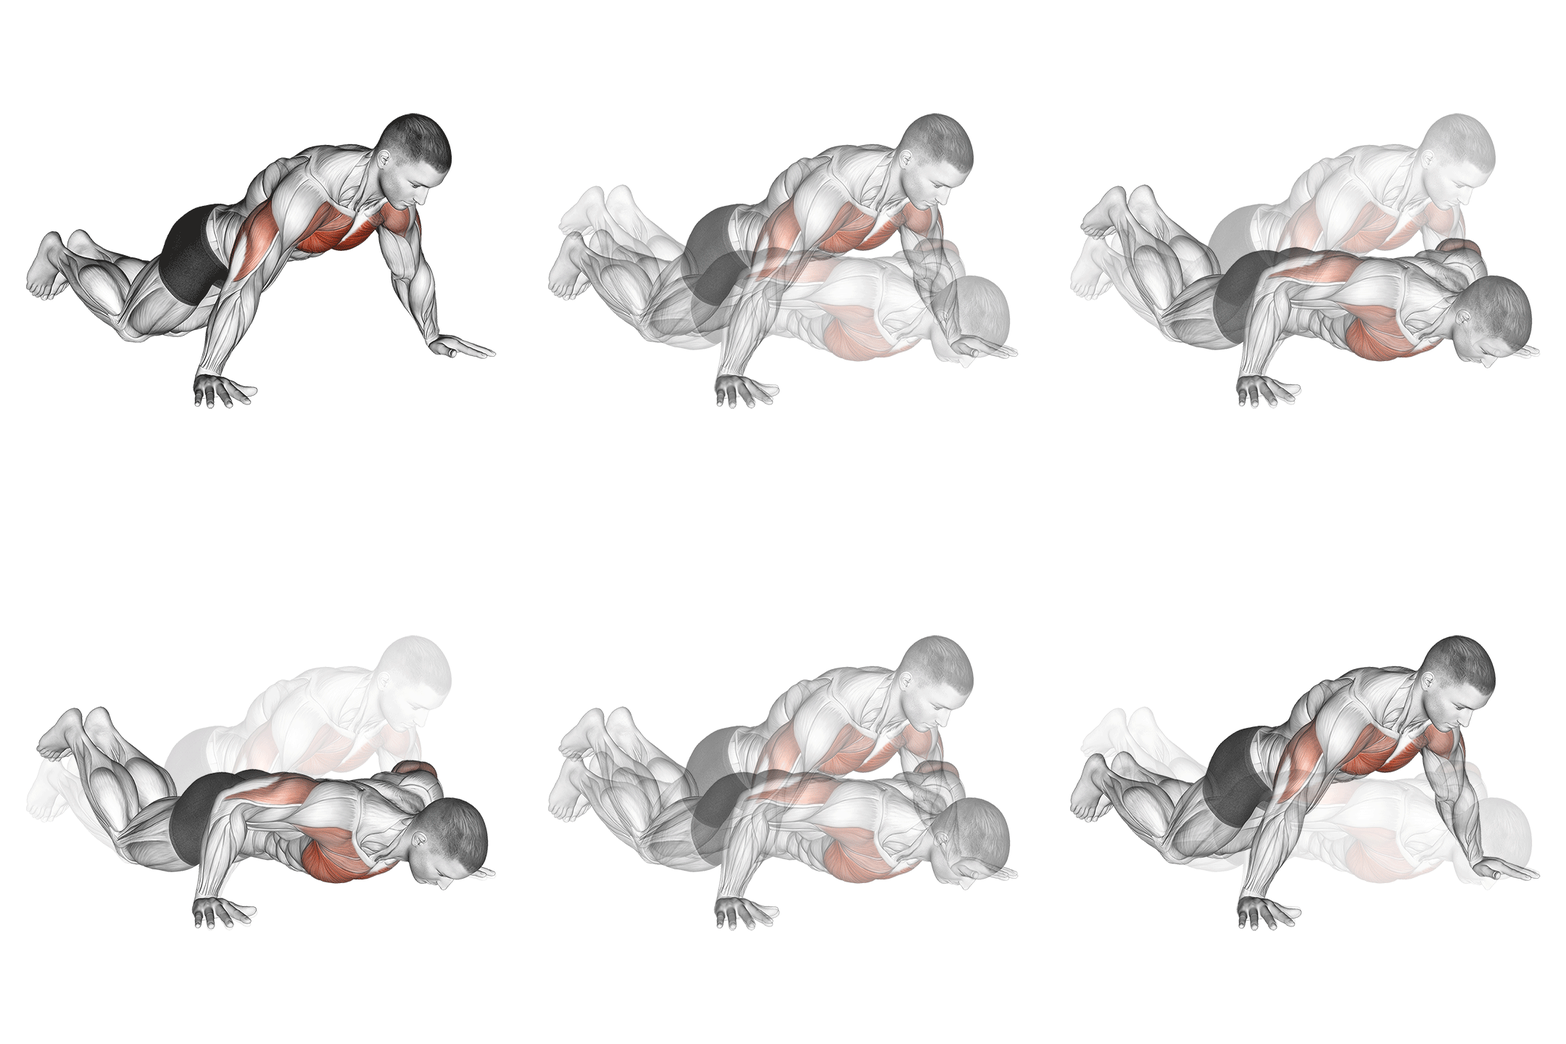
The Kneeling Wide Hand Push Up is a bodyweight exercise targeting the chest, shoulders, and triceps. By performing this exercise on your knees with a wide hand placement, it reduces the load compared to a standard push-up, making it suitable for beginners or as a warm-up for more advanced athletes.
Muscle focus
Step-by-step cues
- Start by kneeling on the floor with your hands placed wider than shoulder-width apart.
- Keep your body straight from your knees to your head, engaging your core.
- Lower your chest towards the floor by bending your elbows outwards.
- Stop when your chest is just above the ground, then push back up to the starting position.
- Maintain a steady pace and controlled movement throughout the exercise.
Technical tips
- Ensure your hands are placed wider than shoulder-width to target the chest effectively.
- Engage your core to maintain a straight line from knees to head.
- Focus on controlled movements; avoid letting gravity do the work during the descent.
- Keep elbows slightly bent at the top of the movement to maintain tension in the muscles.
- Breathe in as you lower your body and exhale as you push back up.
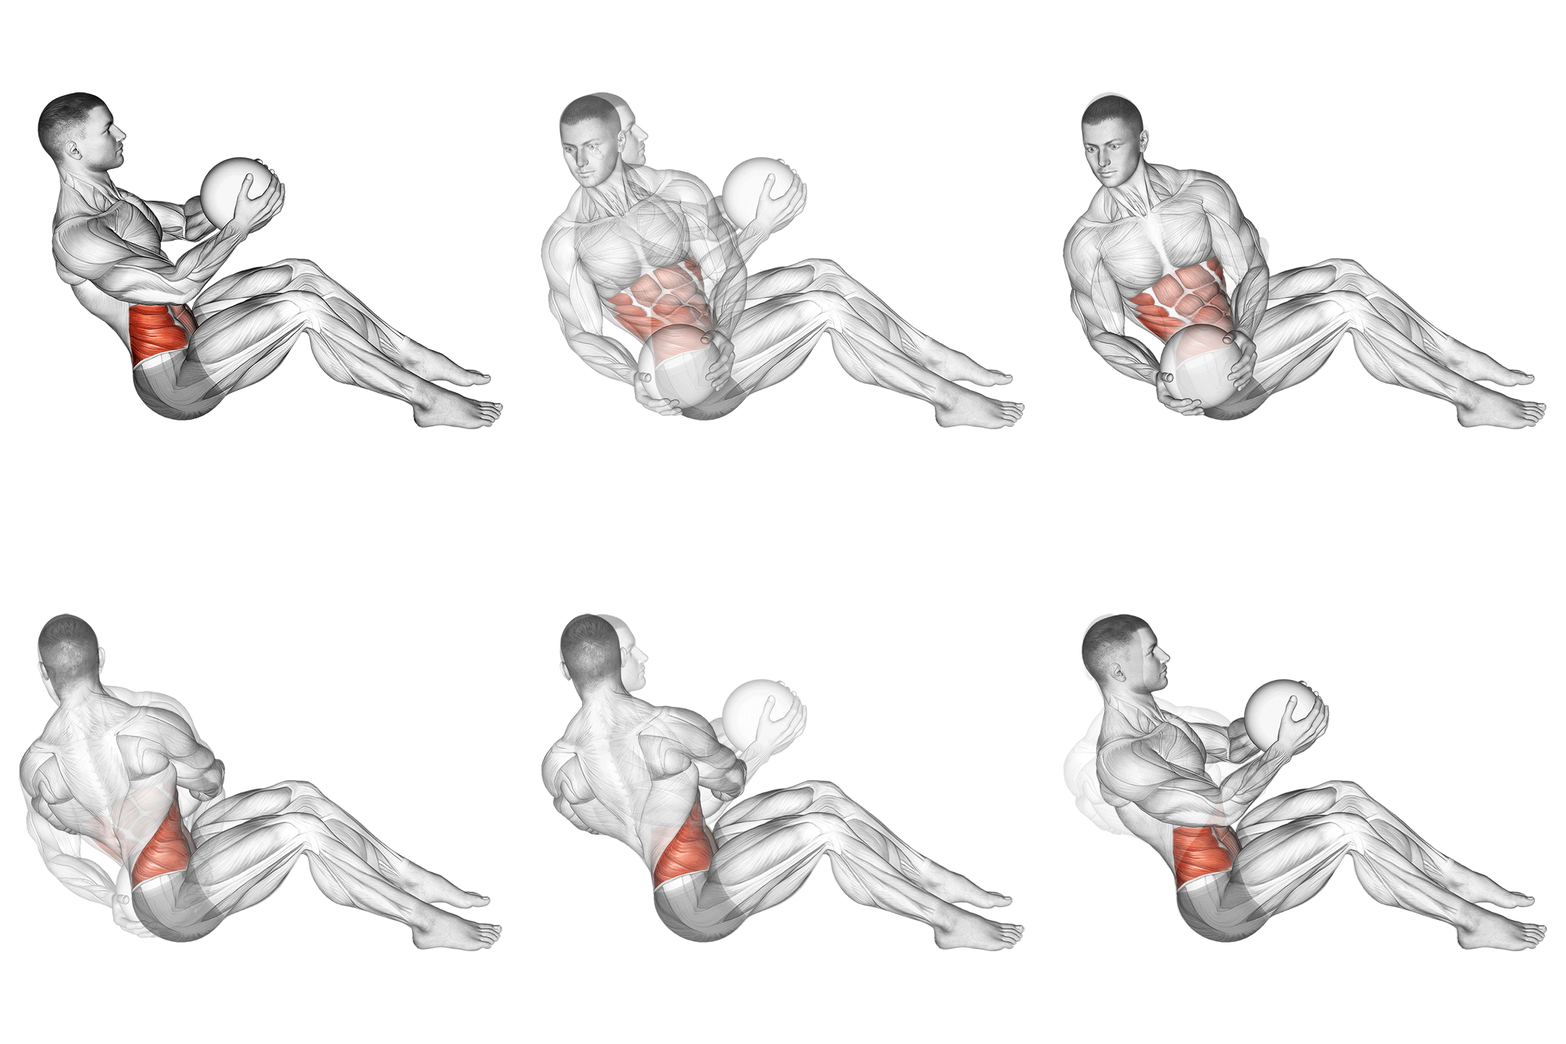
Med Ball Russian twist
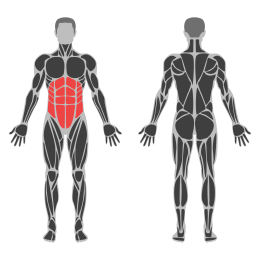
The Med Ball Russian Twist is a core exercise that targets the oblique muscles, improving rotational strength and stability. It involves sitting on the floor with legs elevated and twisting the torso while holding a medicine ball.
Muscle focus
Step-by-step cues
- Sit on the floor with your knees bent and feet flat on the ground.
- Lean back slightly to engage your core, keeping your back straight.
- Lift your feet off the ground, balancing on your sit bones.
- Hold a medicine ball with both hands close to your chest.
- Twist your torso to the right, bringing the medicine ball beside your hip.
- Return to the center, then twist to the left side.
- Continue alternating sides in a controlled manner.
Technical tips
- Keep your core engaged throughout the exercise to maintain balance.
- Focus on rotating your torso rather than just moving your arms.
- Maintain a steady breathing pattern; exhale as you twist, inhale as you return to center.
- If lifting your feet is too challenging, keep them on the ground for added stability.
- Ensure that your movements are slow and controlled to maximize muscle engagement.
- Start with a lighter medicine ball and increase weight as you build strength.
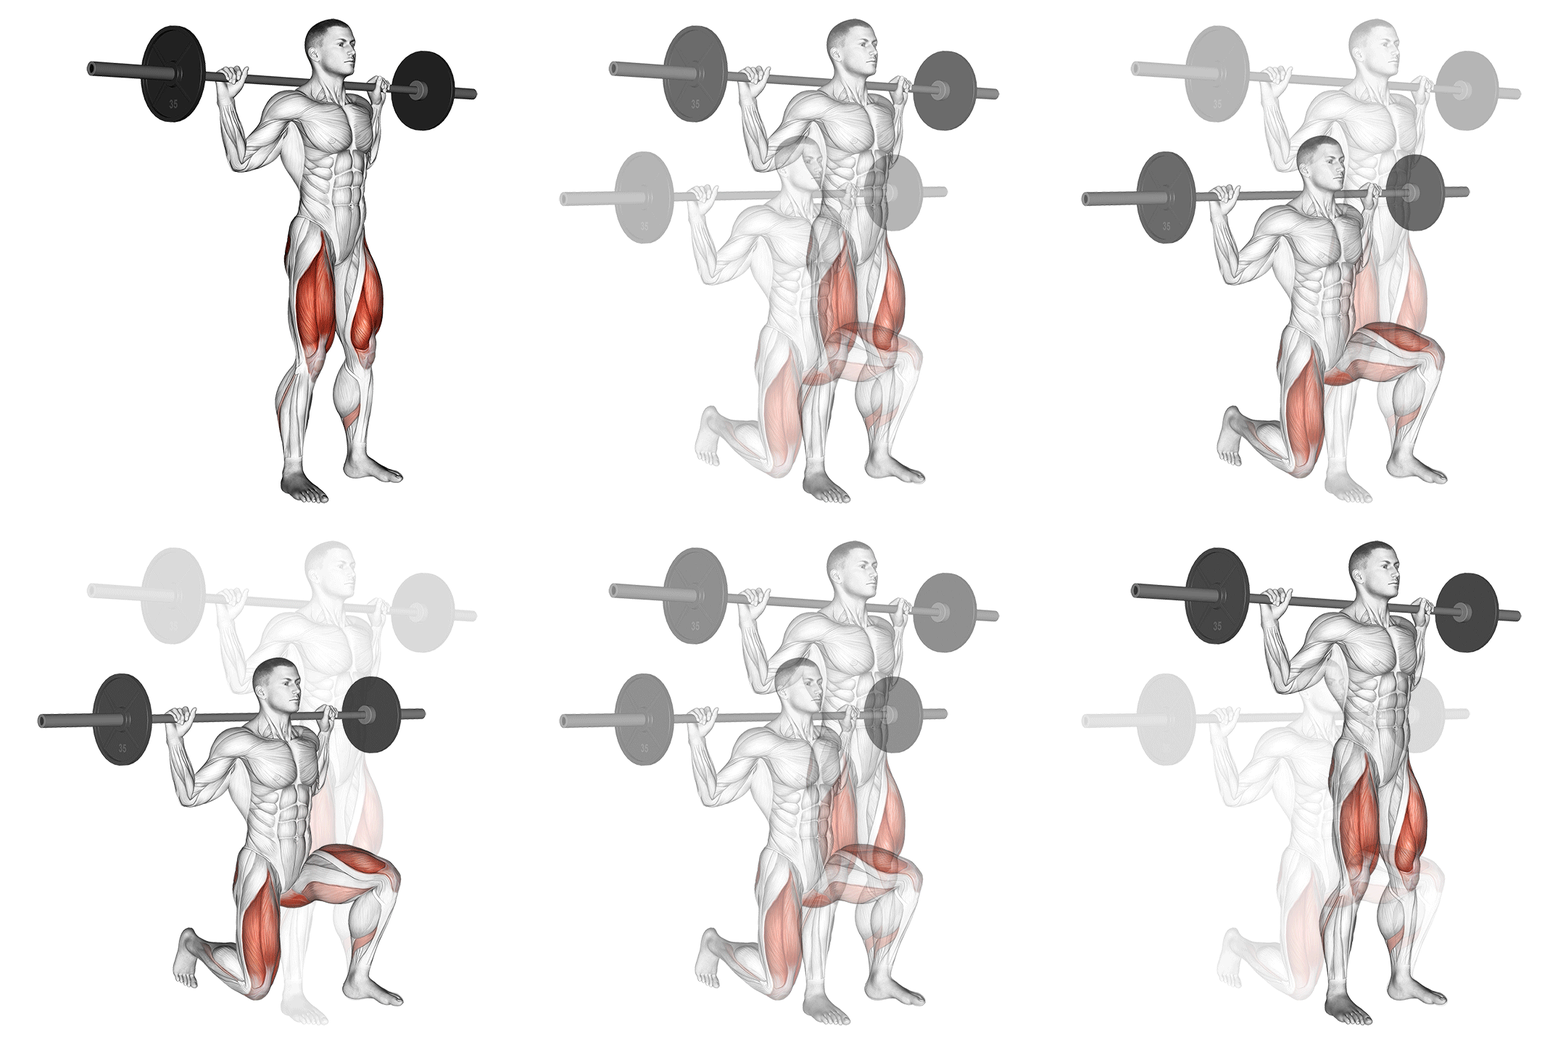
Barbell Reverse Lunges
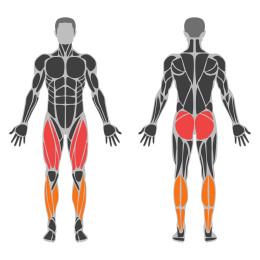
The Barbell Reverse Lunge is a compound lower-body exercise that targets the quadriceps, hamstrings, glutes, and calves. It involves stepping backward into a lunge position while holding a barbell across the upper back, requiring balance and core stability.
Muscle focus
Step-by-step cues
- Begin by standing upright with your feet hip-width apart and a barbell resting across your upper back. Grip the barbell with both hands slightly wider than shoulder-width.
- Engage your core and maintain an upright torso throughout the movement.
- Step backward with your right foot, lowering your hips until both knees are bent at approximately 90 degrees. Your front knee should be directly above your ankle, and your back knee should hover just above the ground.
- Push through the heel of your left foot to return to the starting position.
- Repeat the movement with your left foot stepping back to complete one full repetition.
- Continue alternating legs for the desired number of repetitions.
Technical tips
- Keep your chest lifted and shoulders back to maintain proper posture.
- Focus on a controlled descent to prevent losing balance.
- Ensure your front knee does not extend beyond your toes to protect your joints.
- Use a mirror or a spotter to check form and alignment during the exercise.
- Start with a lighter weight to master the technique before progressing to heavier loads.
- Breathe in as you step back and exhale as you push forward to return to the starting position.
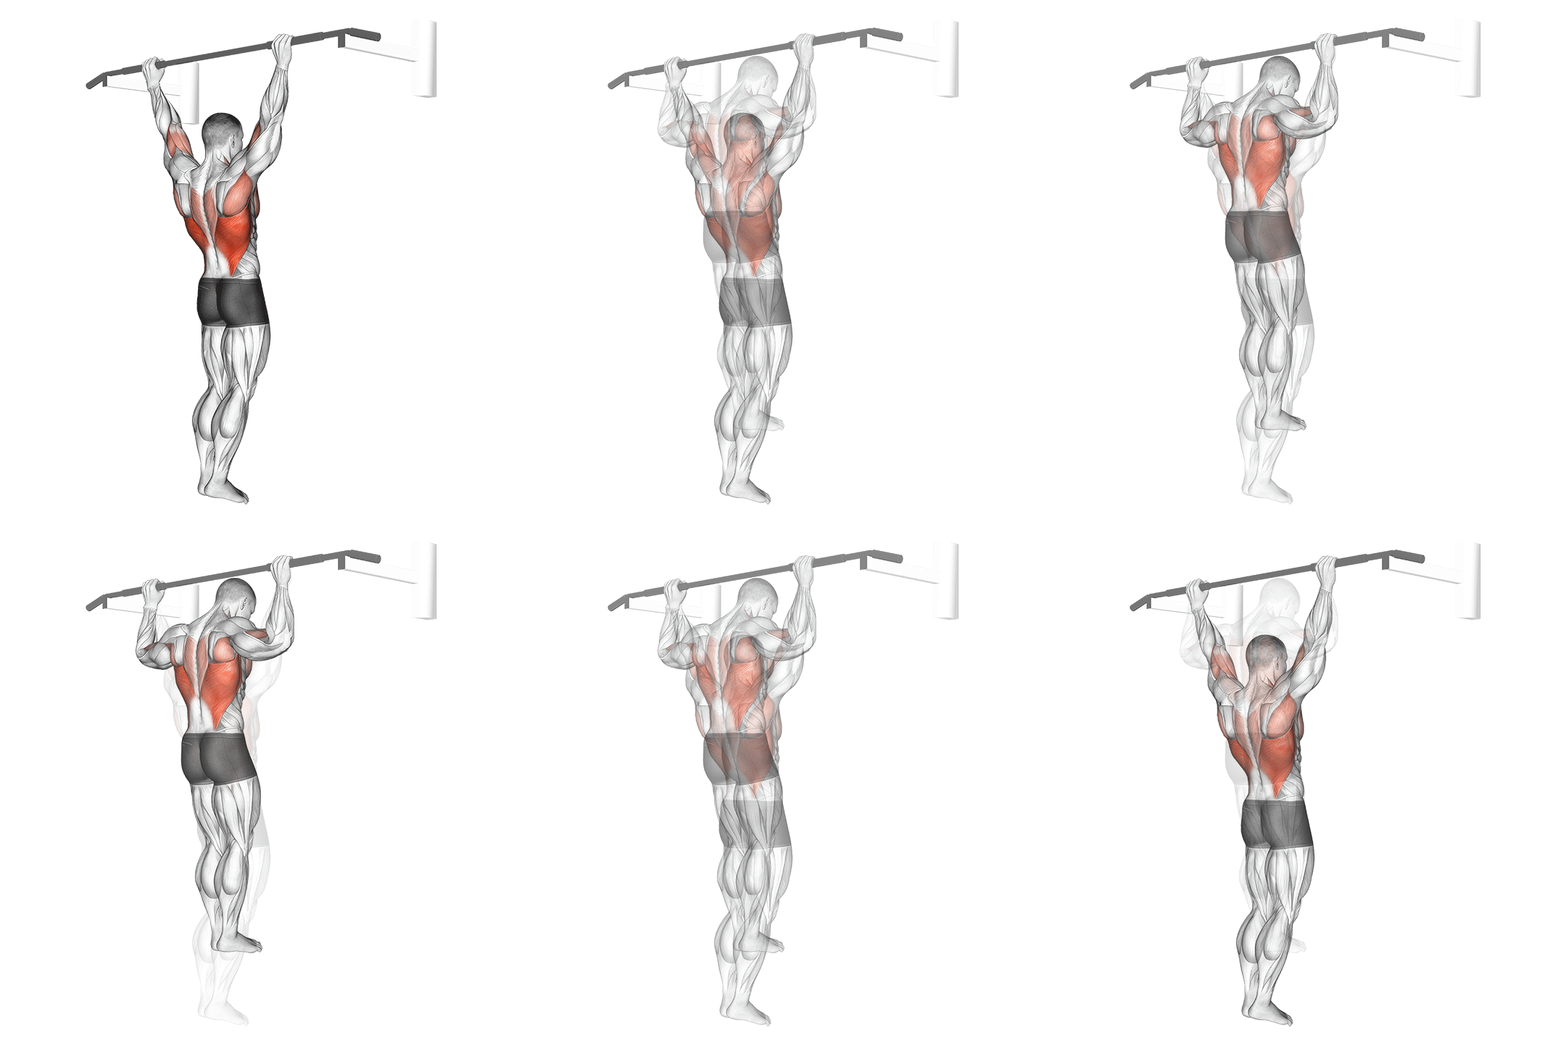
Wide Grip Rear Pull-Up
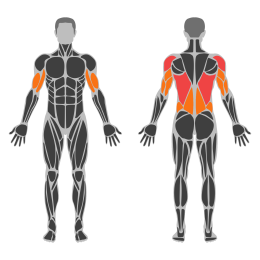
The Wide Grip Rear Pull Up is a compound upper body exercise targeting the latissimus dorsi, trapezius, and rhomboids. This exercise emphasizes the back muscles while also engaging the biceps and forearms. It is performed using a pull-up bar with a wide overhand grip, pulling the body upwards until the chin clears the bar.
Muscle focus
Step-by-step cues
- Stand under a pull-up bar and reach up to grasp it with an overhand grip, hands placed wider than shoulder-width apart.
- Engage your core and retract your shoulder blades to stabilize your upper body.
- Begin the movement by pulling your chest towards the bar, leading with your elbows and keeping them pointed outwards.
- Continue pulling until your chin is above the bar, ensuring your back muscles are fully engaged.
- Pause briefly at the top of the movement, then slowly lower yourself back to the starting position with control.
- Repeat for the desired number of repetitions.
Technical tips
- Focus on squeezing your shoulder blades together at the top of the movement to maximize back engagement.
- Avoid swinging or using momentum; maintain a controlled motion throughout.
- If you struggle with full pull-ups, use resistance bands for assistance or perform negative pull-ups by focusing on the lowering phase.
- Ensure your grip is secure but not overly tight to prevent forearm fatigue.
- Keep your body straight and avoid arching your back during the exercise.
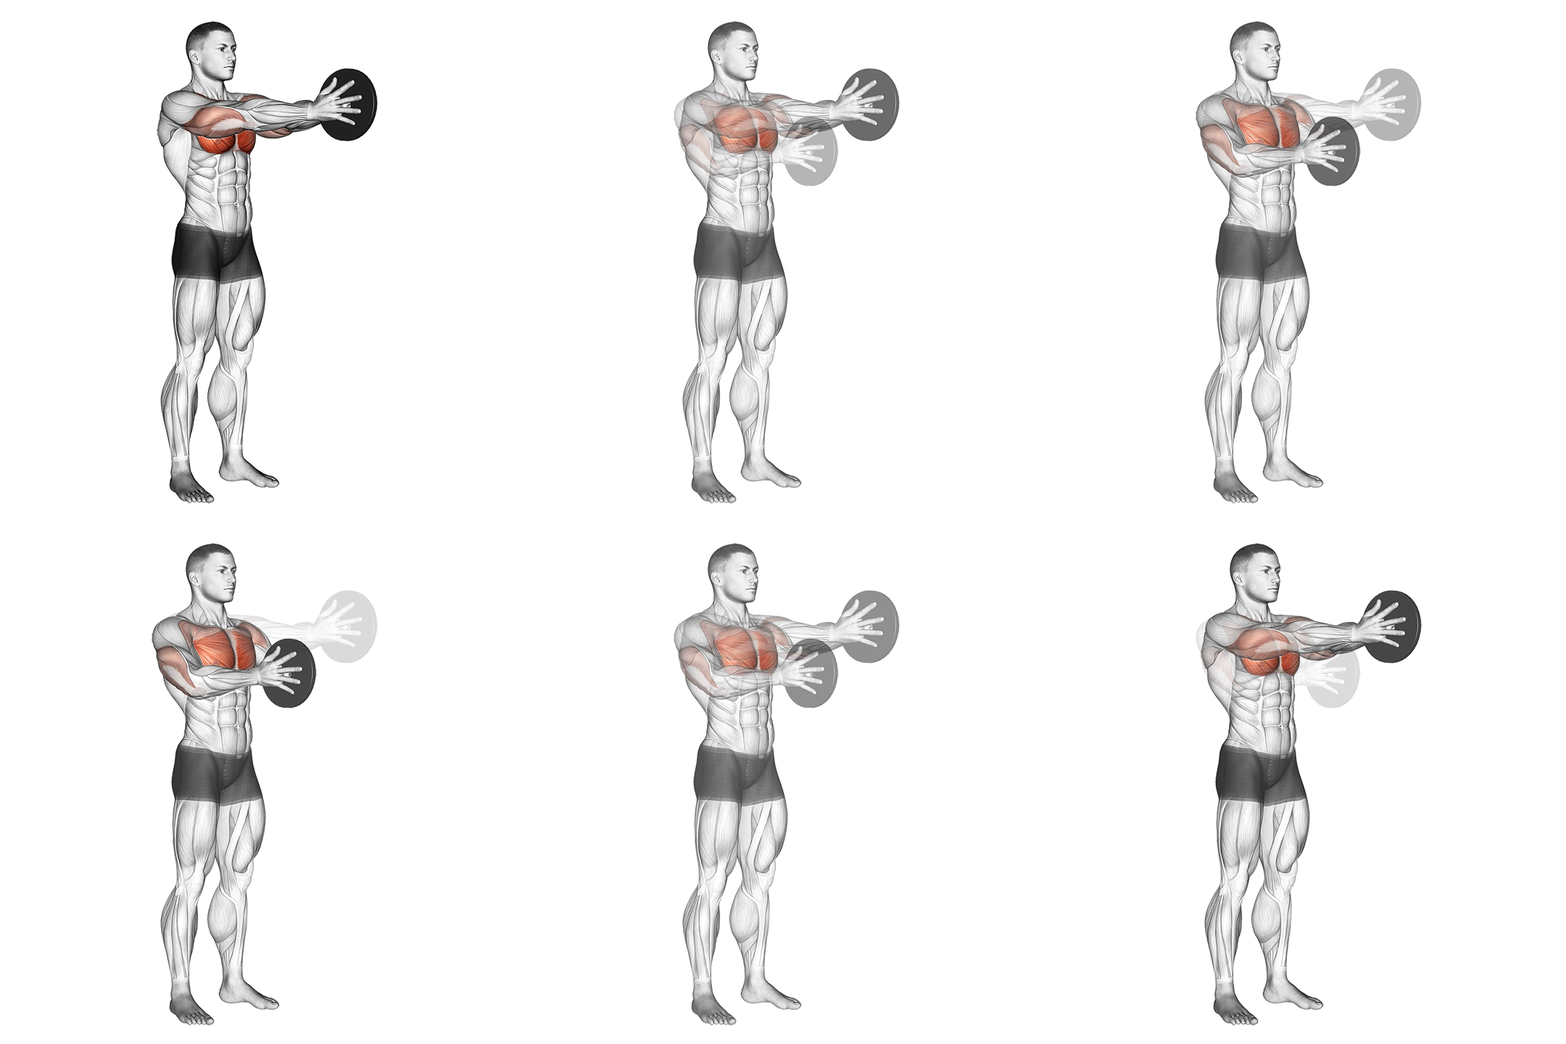
Svend Press
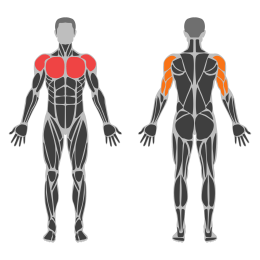
The Standing Svend Press is an isolation exercise targeting the chest muscles, particularly the pectoralis major. It involves pressing a weight plate while keeping constant tension in the chest, promoting muscle engagement and growth. This exercise is performed standing, which also engages the core for stability.
Muscle focus
Step-by-step cues
- Stand upright with your feet shoulder-width apart, maintaining a slight bend in your knees for stability.
- Hold a weight plate between your palms at chest level, keeping your elbows bent and close to your body.
- Press your palms together to squeeze the weight plate, engaging your chest muscles.
- Extend your arms forward slowly until they are fully extended in front of you, keeping the plate squeezed tightly.
- Pause briefly at full extension, maintaining tension in your chest.
- Slowly bring the weight plate back to the starting position at chest level while maintaining pressure on the plate.
- Repeat for the desired number of repetitions.
Technical tips
- Focus on squeezing the weight plate throughout the movement to maximize chest engagement.
- Keep your core tight to maintain balance and prevent unnecessary movement.
- Avoid locking your elbows at full extension to keep constant tension on your chest muscles.
- Start with a lighter weight to master the form before progressing to heavier plates.
- Breathe out as you press the plate forward and inhale as you return to the starting position.
Friday
Mobility
Complete 20 minutes of full-body mobility and relaxed walking.
Saturday
Conditioning Circuit
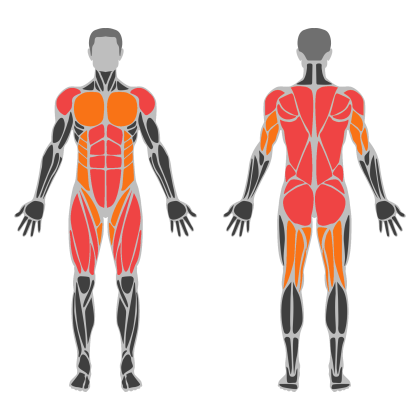
Conditioning Circuit muscle focus
Red marks the primary training focus. Orange marks supporting muscle groups used throughout this session.
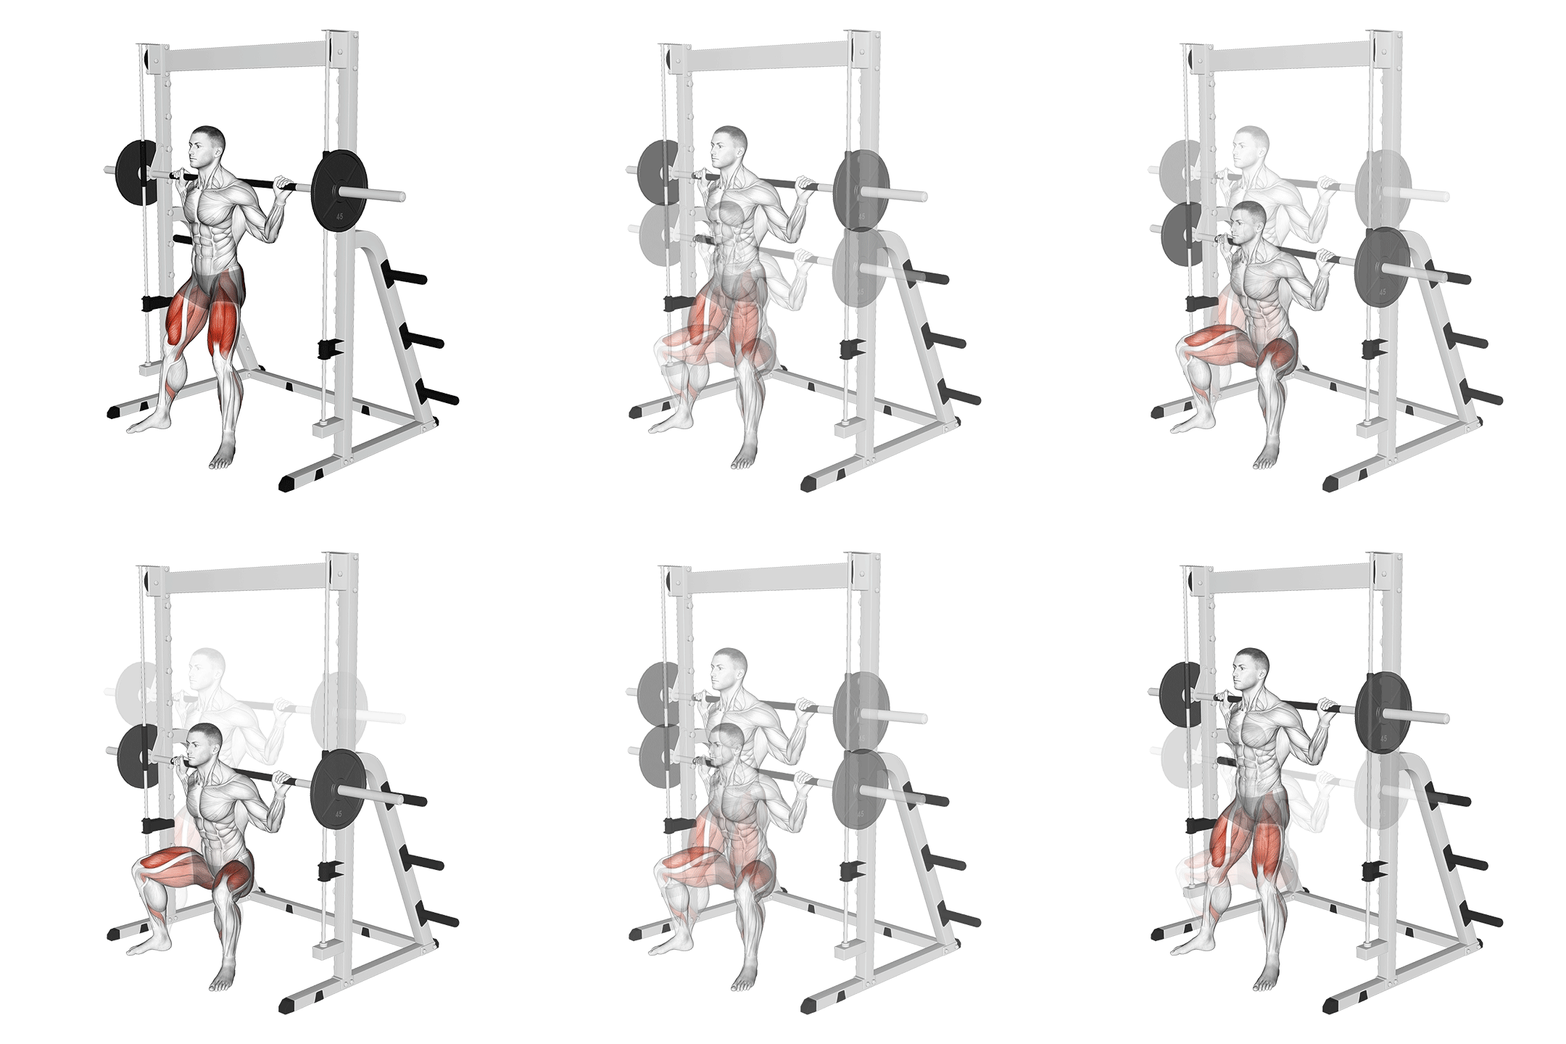
Sumo Squat With Smith
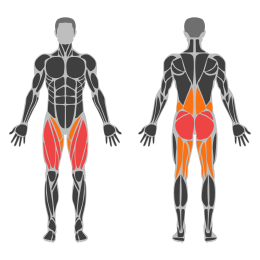
The Sumo Squat With Smith Machine is a lower body exercise targeting the quadriceps, hamstrings, glutes, and inner thighs. This variation of the squat involves a wider stance and utilizes the Smith machine for stability and control, allowing for a focused engagement of the lower body muscles.
Muscle focus
Step-by-step cues
- Position the bar of the Smith machine at shoulder height and set the safety stops just below your lowest squat position.
- Stand with your feet wider than shoulder-width apart and toes slightly pointed outwards.
- Place the bar across your upper back, ensuring it rests comfortably on your trapezius muscles.
- Grip the bar with your hands slightly wider than shoulder-width apart.
- Unrack the bar by straightening your legs and stepping back slightly.
- Engage your core and keep your chest up as you begin to lower into a squat by bending at the hips and knees.
- Descend until your thighs are parallel to the floor or slightly below, ensuring your knees track over your toes.
- Push through your heels to return to the starting position, fully extending your hips and knees.
Technical tips
- Maintain a neutral spine throughout the movement to prevent injury.
- Focus on keeping your knees aligned with your toes to avoid unnecessary strain on the joints.
- Engage your core muscles to stabilize your torso during the squat.
- Keep your weight distributed evenly across both feet, with emphasis on pushing through the heels.
- Adjust the width of your stance as needed to ensure comfort and proper form.
- Use a controlled tempo to maximize muscle engagement and maintain balance.
- Start with a lighter weight to perfect your form before progressing to heavier loads.
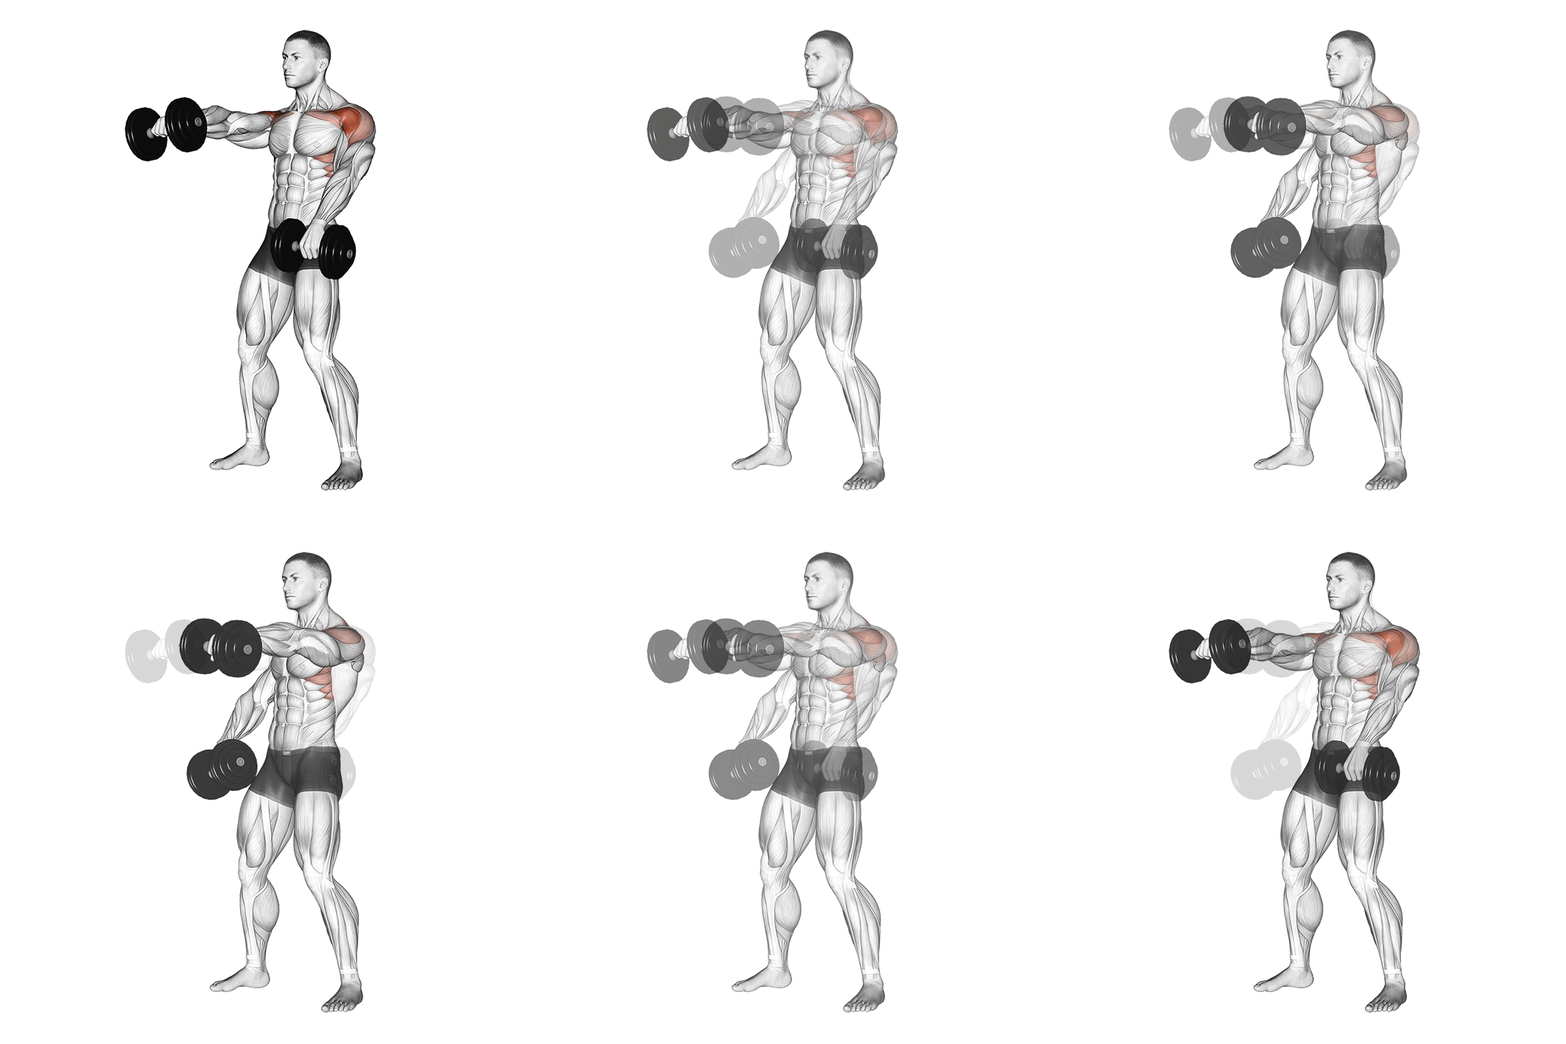
Dumbbell Alternate Front Raise
The Dumbbell Alternate Front Raise is an isolation exercise targeting the anterior deltoids. It involves lifting dumbbells in front of the body alternately, which helps in developing shoulder strength and definition. This exercise also engages the upper chest and traps to a lesser extent.
Muscle focus
Step-by-step cues
- Stand with feet shoulder-width apart, holding a dumbbell in each hand with a neutral grip.
- Keep your arms straight but not locked, and position the dumbbells in front of your thighs.
- Engage your core and maintain a slight bend in your knees.
- Raise one dumbbell in front of you to shoulder height, keeping your palm facing down.
- Lower the dumbbell back to the starting position with control.
- Repeat the movement with the opposite arm.
- Continue alternating arms for the desired number of repetitions.
Technical tips
- Maintain a controlled motion to avoid using momentum.
- Keep your back straight and avoid leaning backward as you lift the weights.
- Focus on lifting with your shoulders, not your arms or back.
- Exhale as you lift the dumbbell and inhale as you lower it.
- Start with lighter weights to ensure proper form before progressing to heavier dumbbells.
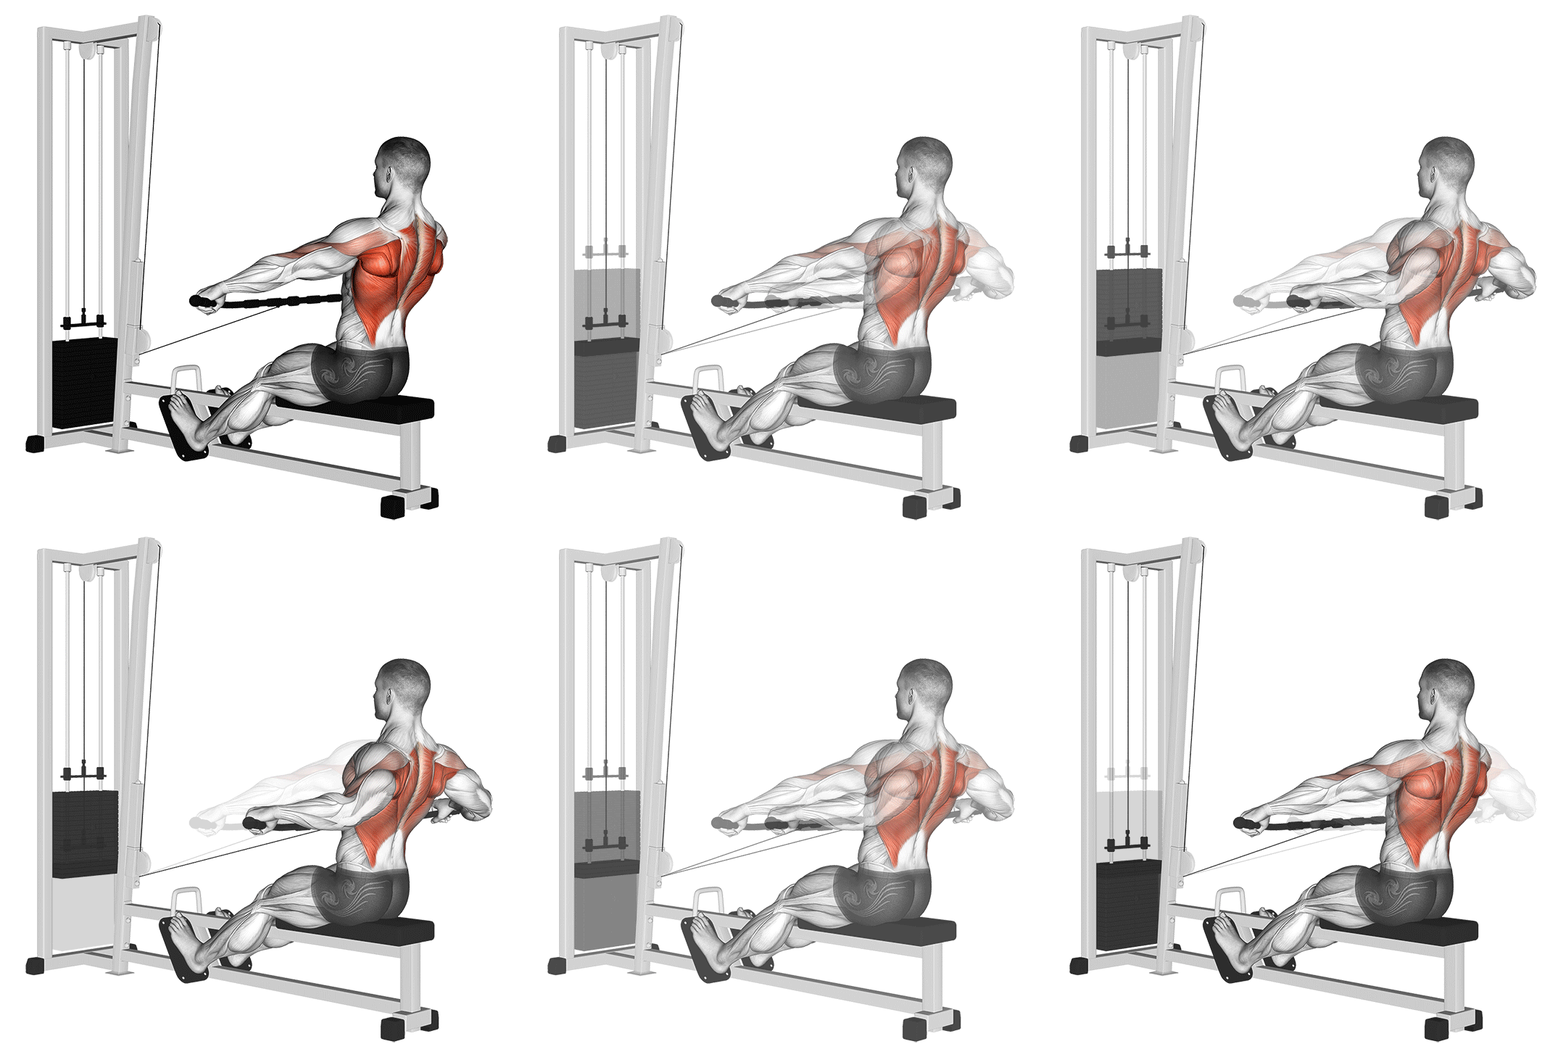
Seated Cable Wide Grip Row
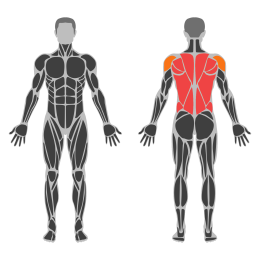
The Wide Grip Seated Row is a strength training exercise targeting the upper back muscles, including the latissimus dorsi, rhomboids, and trapezius. This exercise is performed using a cable row machine with a wide grip attachment, which emphasizes the outer portions of the back and helps improve posture and upper body strength.
Muscle focus
Step-by-step cues
- Sit on the seated row machine with your feet firmly placed on the foot platform and knees slightly bent.
- Grasp the wide grip handle with both hands, palms facing down, and arms fully extended.
- Keep your back straight and chest up as you pull the handle towards your torso by retracting your shoulder blades.
- Continue pulling until your elbows are at your sides and the handle is close to your abdomen.
- Pause briefly at the top of the movement, squeezing your shoulder blades together.
- Slowly extend your arms back to the starting position while maintaining control of the weight.
- Repeat for the desired number of repetitions.
Technical tips
- Maintain a neutral spine throughout the exercise to avoid lower back strain.
- Focus on pulling with your back muscles rather than your arms to maximize engagement of the target muscles.
- Avoid leaning too far forward or backward; keep your torso stable during the movement.
- Exhale as you pull the handle towards you and inhale as you return to the starting position.
- Adjust the seat height if necessary to ensure that your arms are parallel to the floor when extended.
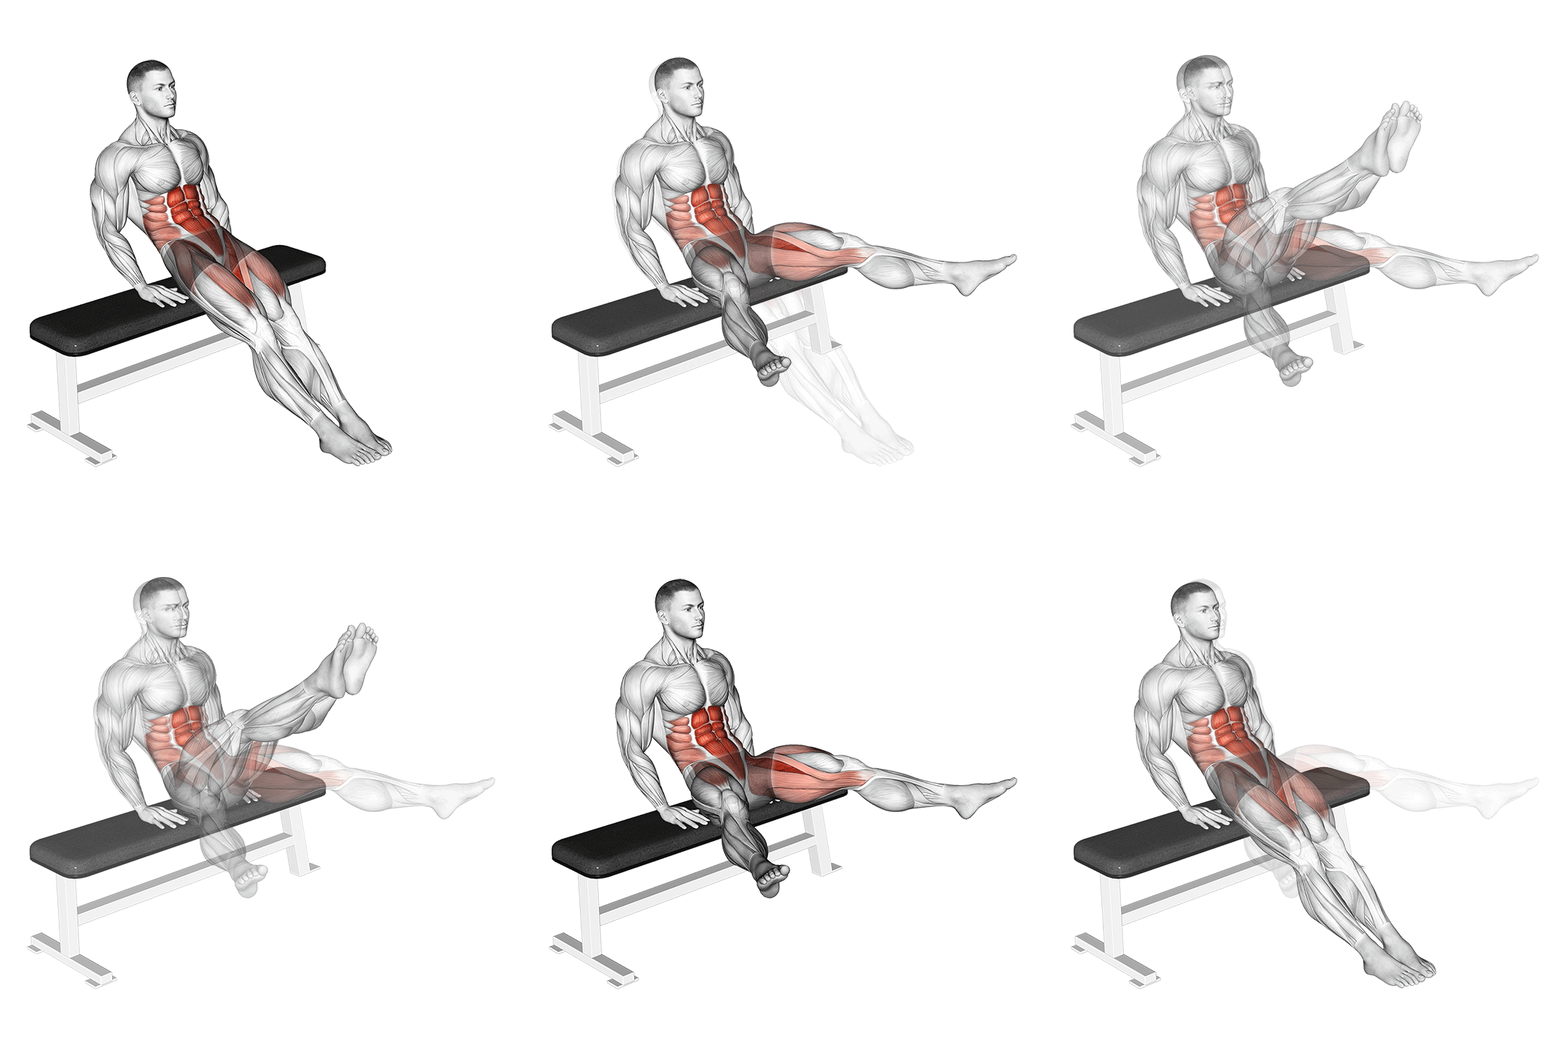
Seated Reverse Circle Crunches
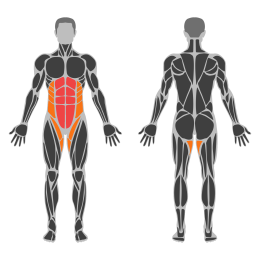
Seated Reverse Circle Crunches are an abdominal exercise that targets the lower and upper abs, as well as the obliques. This exercise involves performing circular motions with your legs while maintaining a seated position, engaging your core muscles to stabilize your body.
Muscle focus
Step-by-step cues
- Sit on the edge of a bench or mat with your knees bent and feet flat on the floor.
- Lean back slightly, keeping your back straight and core engaged.
- Lift your feet off the ground, bringing your knees towards your chest.
- Begin to draw a circle in the air with your knees, moving them in a clockwise direction.
- Complete the desired number of repetitions, then switch to a counterclockwise direction.
- Maintain controlled breathing throughout the exercise.
Technical tips
- Keep your core tight to prevent strain on your lower back.
- Focus on smooth, controlled movements rather than speed.
- If you find it difficult to balance, place your hands lightly on the floor beside you for support.
- Ensure that your shoulders remain relaxed and away from your ears.
- Start with smaller circles if you're new to this exercise and gradually increase the size as you gain strength.
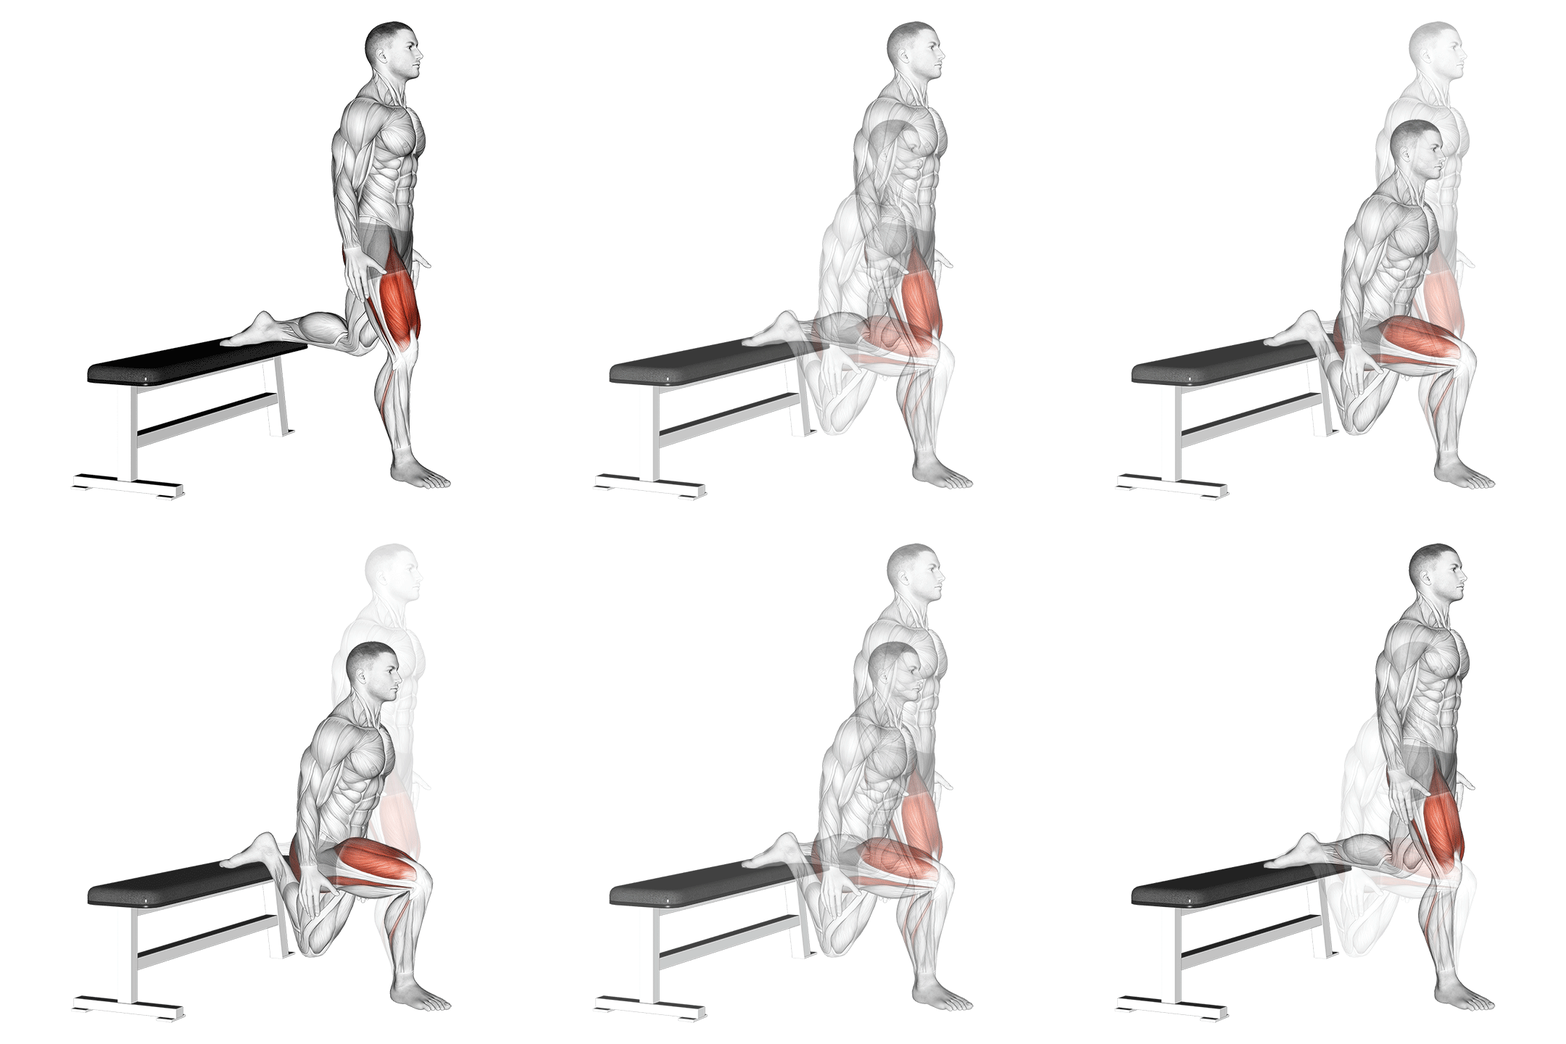
Bulgarian Squat
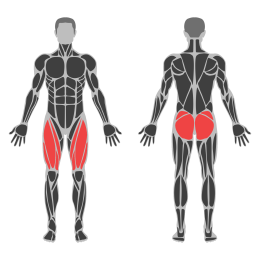
The Bulgarian Squat, also known as the Bulgarian Split Squat, is a unilateral leg exercise that targets the quadriceps, glutes, and hamstrings. It involves placing one foot behind you on an elevated surface while performing a squat with the other leg. This exercise enhances balance, coordination, and lower body strength.
Muscle focus
Step-by-step cues
- Stand a few feet in front of a bench or elevated surface.
- Extend one leg back and place the top of your foot on the bench.
- Keep your chest up and core engaged.
- Lower your hips by bending your front knee until your thigh is parallel to the ground.
- Ensure your front knee does not extend past your toes.
- Push through the heel of your front foot to return to the starting position.
- Complete the desired number of repetitions before switching legs.
Technical tips
- Maintain a straight back throughout the movement to avoid injury.
- Focus on keeping your front knee aligned with your toes to ensure proper form.
- Engage your core muscles to help maintain balance.
- Start with bodyweight to master the form before adding weights.
- Use a mirror or have a partner check your form if possible.
- Adjust the distance from the bench to find a comfortable position that allows for full range of motion.
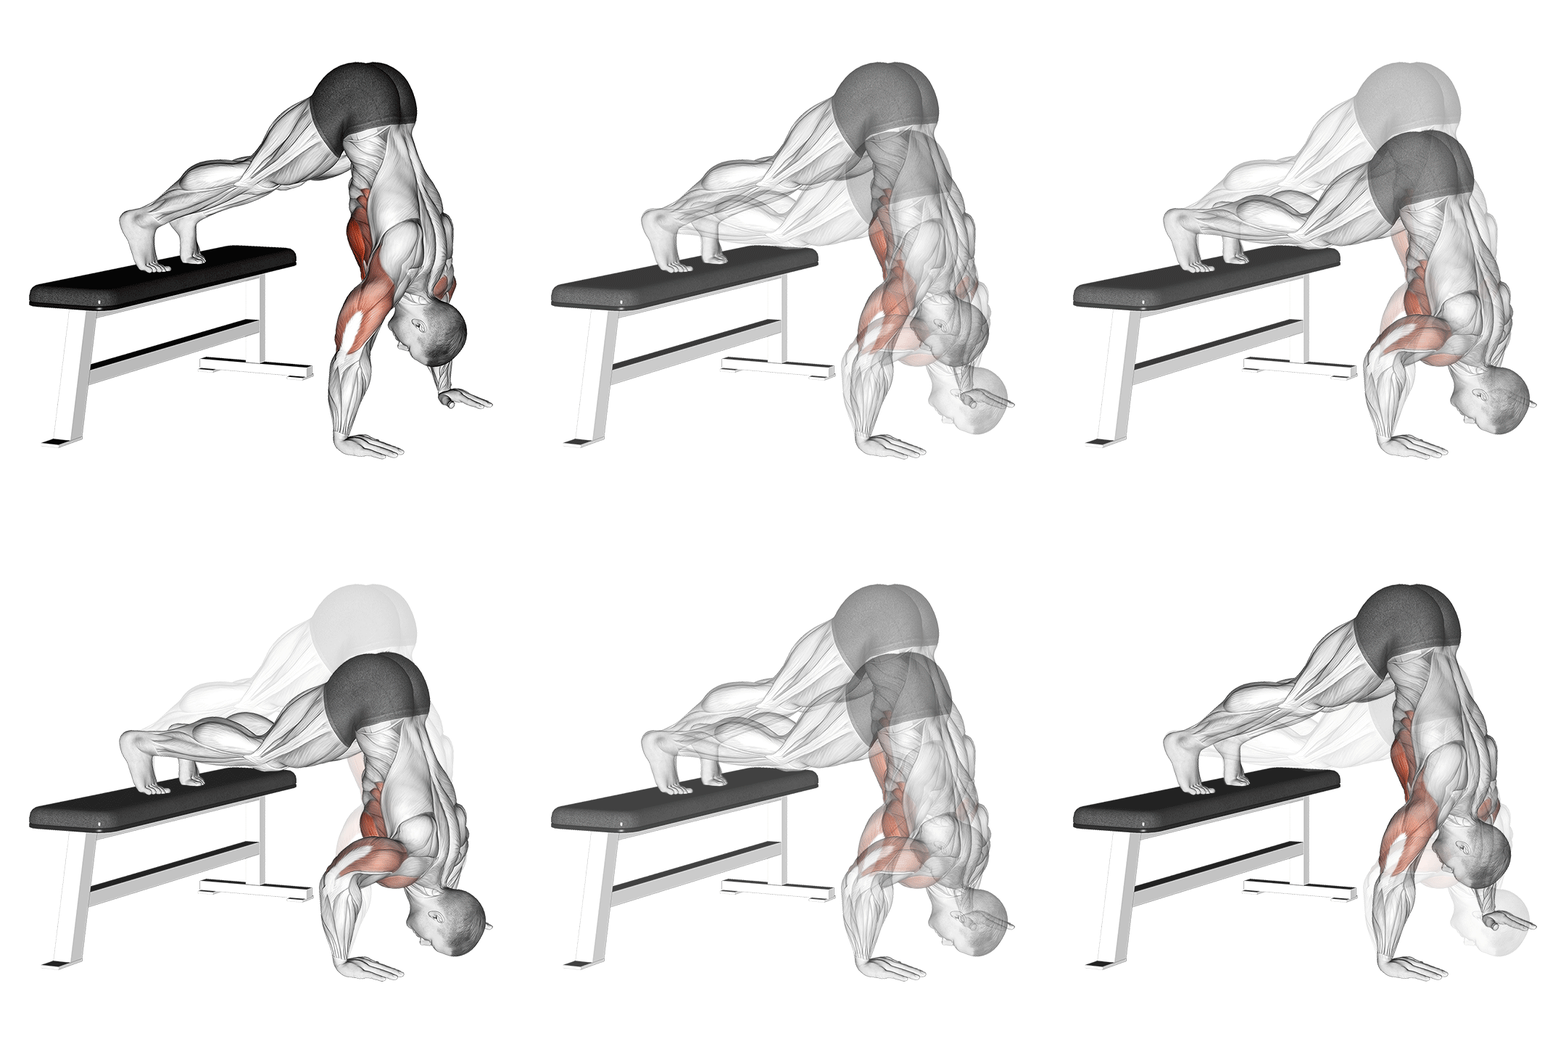
Pike Push-Up On Bench
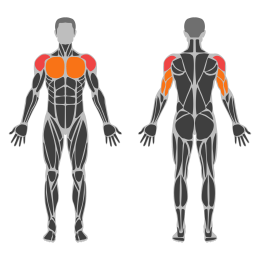
The Pike Push Up On Bench is a bodyweight exercise targeting the shoulders, triceps, and upper chest. It involves elevating the feet on a bench to increase the angle of the body, which shifts more emphasis onto the shoulders compared to a standard push-up.
Muscle focus
Step-by-step cues
- Begin by positioning yourself in front of a bench. Place your feet on the bench and your hands on the floor, shoulder-width apart.
- Walk your hands back towards the bench until your body forms an inverted V shape, with your hips elevated and head pointing downwards.
- Keep your legs straight and core engaged throughout the movement.
- Lower your head towards the floor by bending your elbows, keeping them slightly flared out.
- Pause briefly when your head is close to the floor, then push through your palms to extend your arms and return to the starting position.
- Repeat for the desired number of repetitions.
Technical tips
- Ensure that your hands are placed firmly on the ground to maintain stability.
- Focus on keeping your core tight to prevent sagging or arching of the back.
- Control the movement by lowering slowly and pushing up with steady force.
- Keep your elbows at a slight angle rather than flaring them directly out to reduce strain on the joints.
- Adjust the height of the bench if needed to modify difficulty; a higher bench increases difficulty by shifting more weight onto the shoulders.
- Breathing is crucial: inhale as you lower down and exhale as you push up.
Sunday
Full Rest
Recover fully and review sleep, soreness and training quality.
Four-week progression
Nutrition guidance

- Start near maintenance calories and adjust slowly using training performance, hunger and body-weight trends.
- Target roughly 1.6-2.0 g of protein per kg of body weight per day across three to five meals.
- Use carbohydrates around training and include vegetables, fruit and healthy fats every day.
- Hydrate consistently and avoid treating one meal or one day as success or failure.
Use these numbers as practical starting ranges, not medical prescriptions. Adjust for your health, body size and activity, and consult a qualified professional when needed.