4-Week Athletic Conditioning and Strength Plan: Progression Cycle 6
A progressive plan combining strength, athletic conditioning, core work and controlled recovery.
How to use this plan
Follow the days in order, log every working set, and finish each set with one to three good repetitions still available. Use the exercise animations to learn the movement and open the video when you need a full demonstration.
Monday
Lower Strength
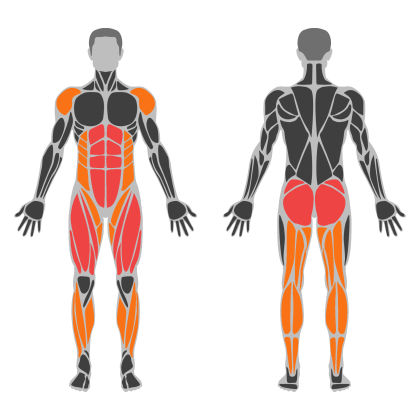
Lower Strength muscle focus
Red marks the primary training focus. Orange marks supporting muscle groups used throughout this session.
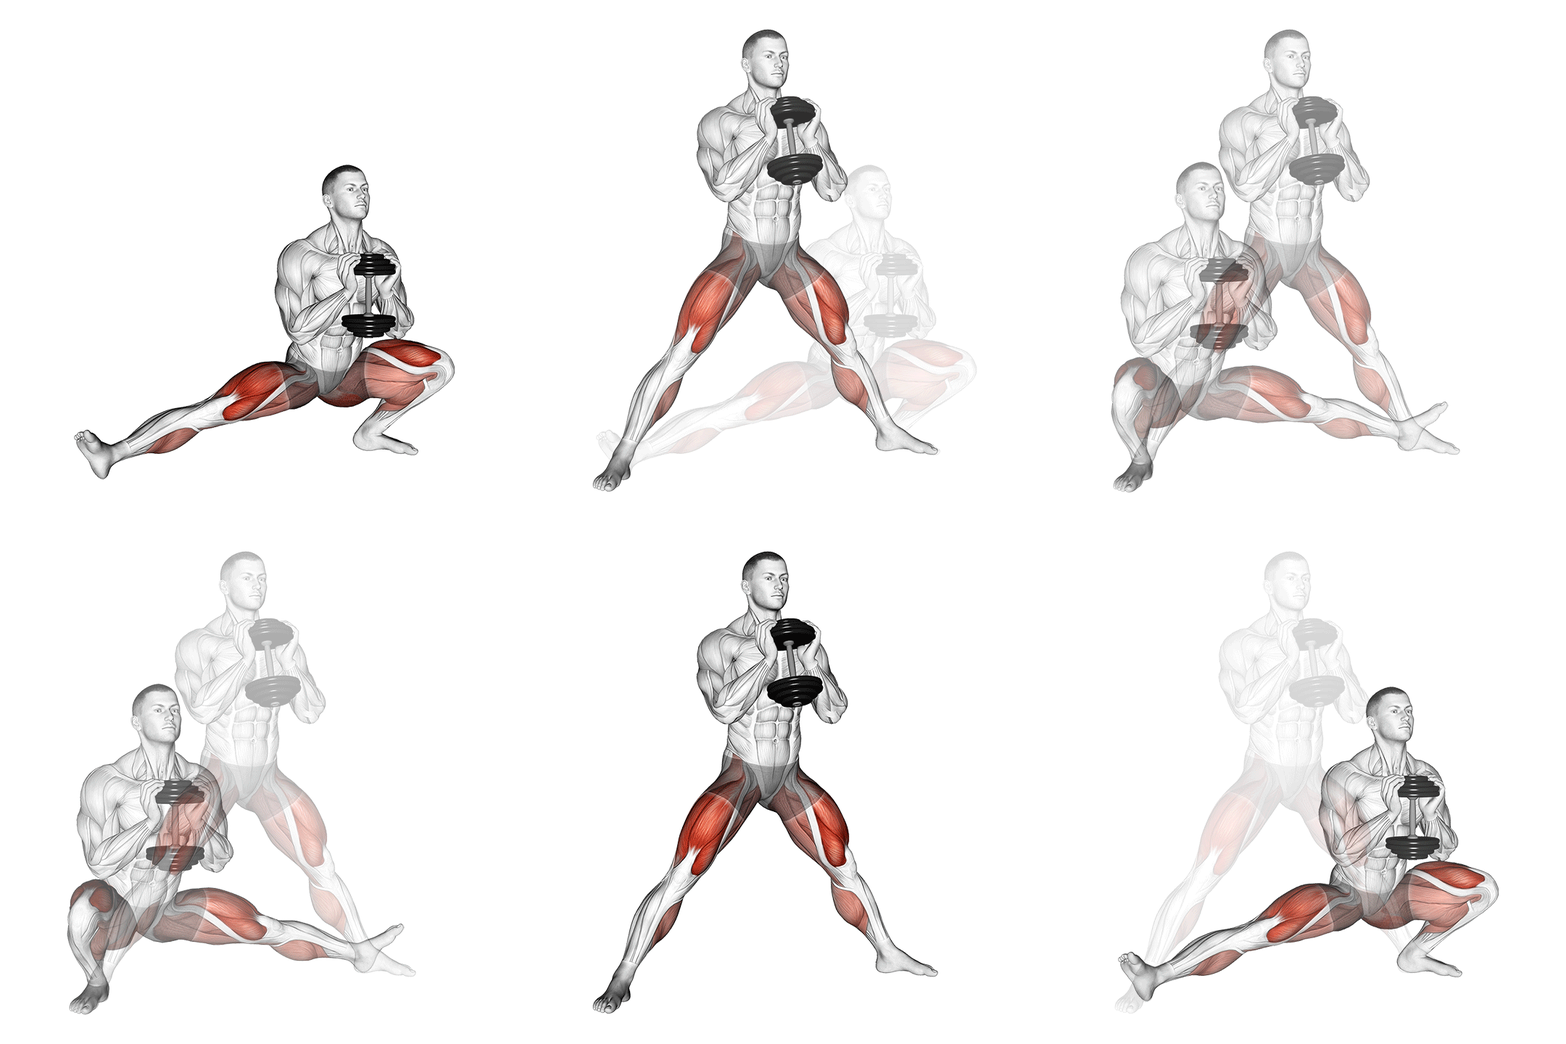
Dumbbell Cossack Squat
The Weighted Cossack Squat is a lower-body exercise that targets the quadriceps, hamstrings, glutes, and adductors. It involves performing a lateral squat while holding a weight, enhancing strength, flexibility, and balance. This exercise is beneficial for improving hip mobility and building unilateral leg strength.
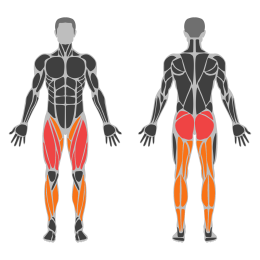
Muscle focus
Step-by-step cues
- Stand with your feet wider than shoulder-width apart, holding a dumbbell or kettlebell with both hands in front of your chest.
- Shift your weight to your right leg, bending your right knee and lowering your hips into a squat position while keeping your left leg straight.
- Ensure your right foot remains flat on the ground and your knee is aligned with your toes.
- Keep your chest up and core engaged throughout the movement.
- Push through your right heel to return to the starting position.
- Repeat the movement on the left side by shifting your weight to your left leg.
- Continue alternating sides for the desired number of repetitions.
Technical tips
- Maintain an upright torso to prevent leaning forward excessively.
- Focus on keeping your core tight to stabilize your body during the movement.
- Start with a lighter weight to master the technique before progressing to heavier loads.
- Ensure that your knees do not extend beyond your toes to protect the joints.
- Use a controlled tempo to maximize muscle engagement and prevent injury.
- Inhale as you lower into the squat and exhale as you push back to standing.
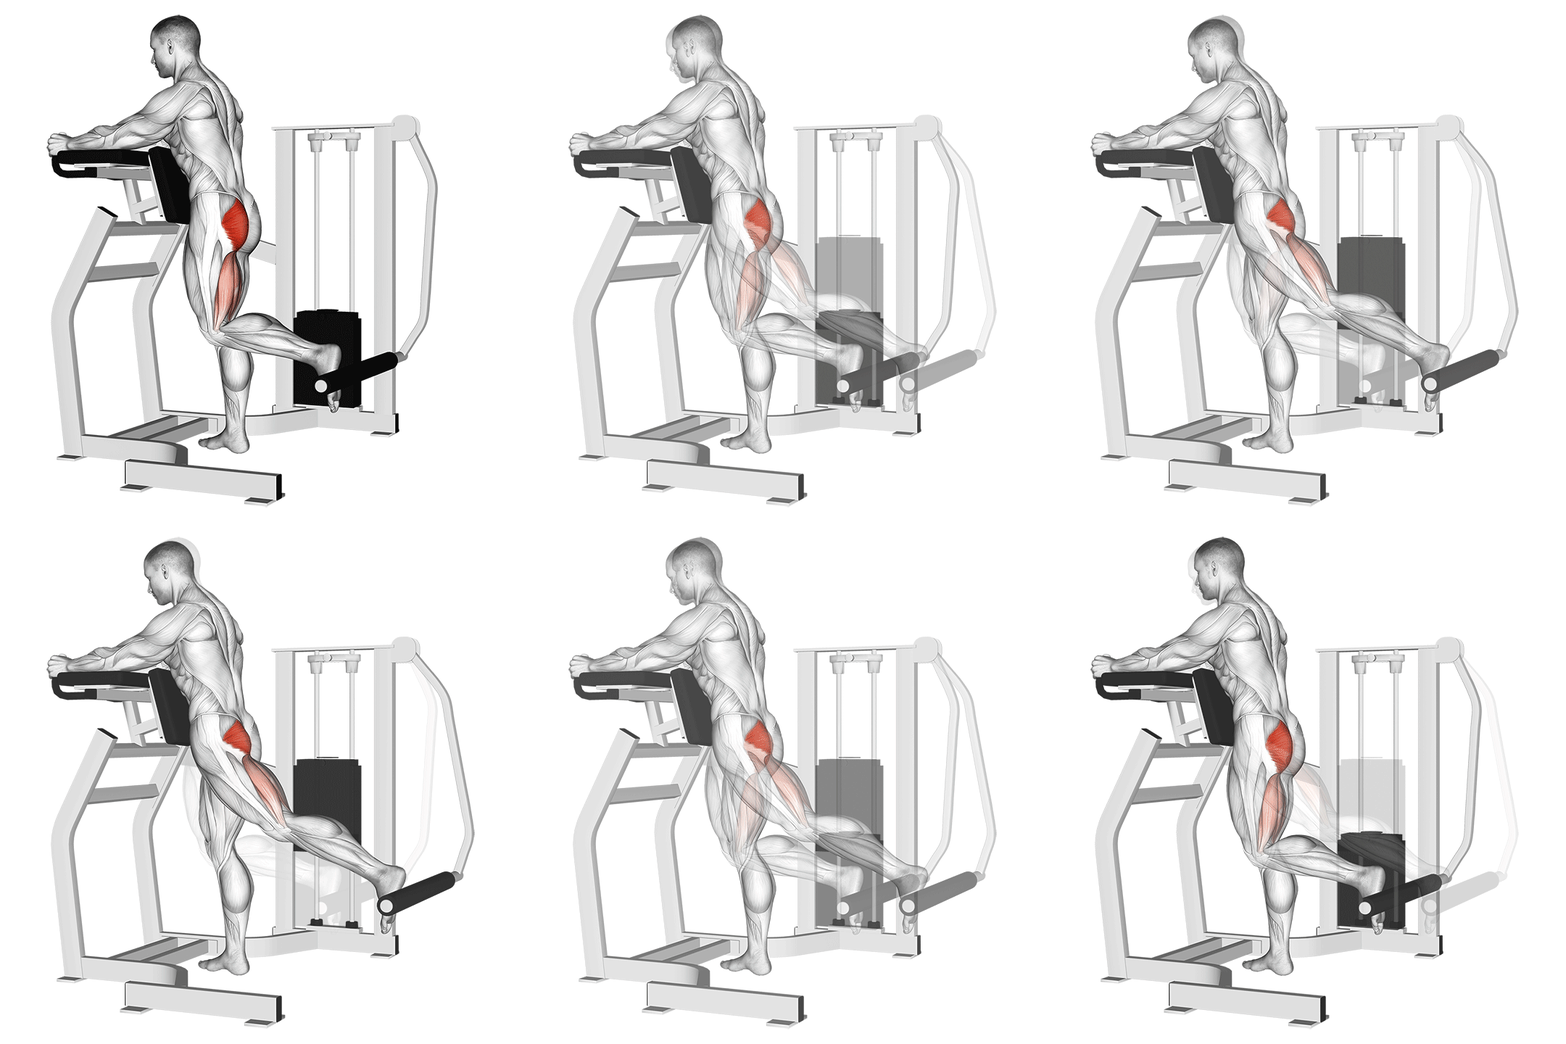
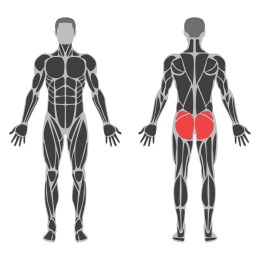
Glute Machine Kickback
The Glute Machine Kickback is an isolation exercise targeting the gluteus maximus. It involves extending the leg backward against resistance, focusing on strengthening and toning the glutes. This exercise is typically performed using a specialized machine designed to provide controlled resistance.
Muscle focus
Step-by-step cues
- Adjust the machine settings to fit your height and secure the ankle strap around your lower leg.
- Stand facing the machine, holding onto the handles for support.
- Place one foot on the platform or pad, ensuring your knee is slightly bent.
- Engage your core and maintain a straight posture throughout the movement.
- Extend your leg backward in a controlled motion, squeezing your glutes at the top of the movement.
- Slowly return to the starting position without letting the weight stack touch down completely.
- Complete the desired number of repetitions before switching to the other leg.
Technical tips
- Focus on squeezing your glutes at the top of each kickback for maximum activation.
- Keep your movements slow and controlled to maintain tension on the muscles.
- Avoid arching your back; keep your core engaged to support proper posture.
- Adjust the machine settings if you feel discomfort or improper alignment.
- Start with a lighter weight to perfect your form before increasing resistance.
- Breathe out as you extend your leg and inhale as you return to the starting position.
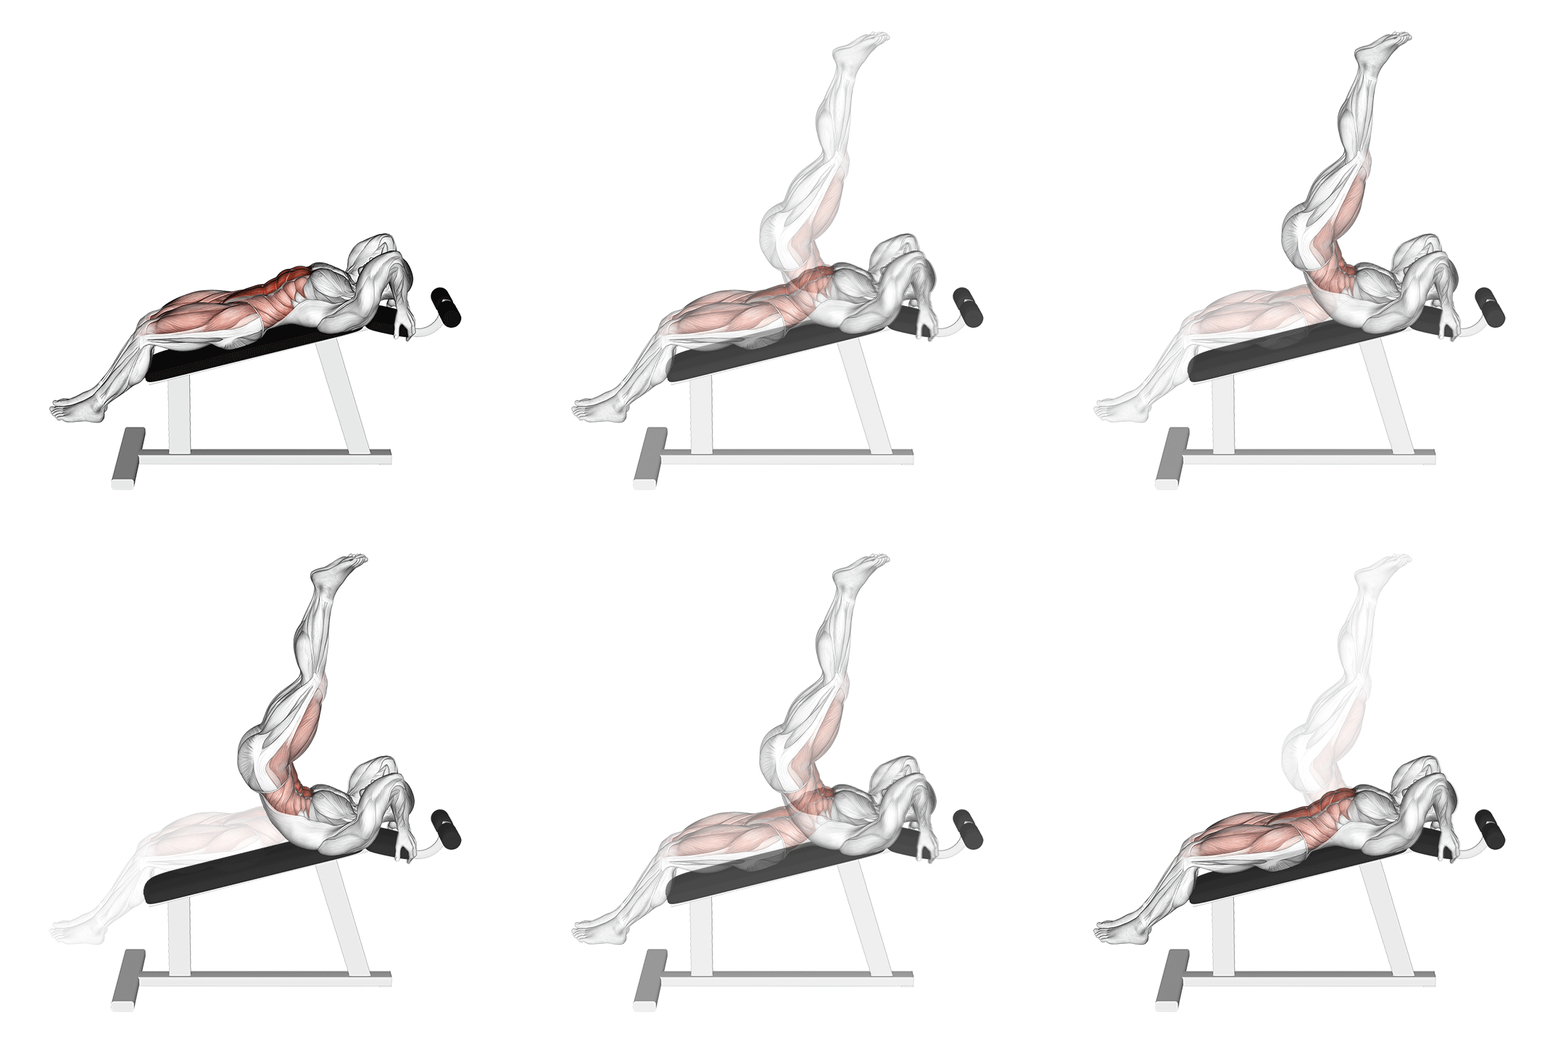
Incline Bench Leg Raises
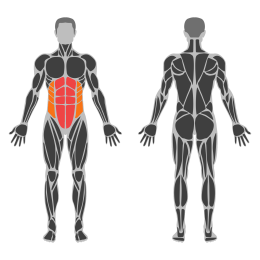
Incline Bench Leg Raises target the lower abdominal muscles by lifting the legs while lying on an incline bench. This exercise helps in strengthening the core and improving overall abdominal definition.
Muscle focus
Step-by-step cues
- Lie back on an incline bench with your head at the higher end and your legs extended off the lower end.
- Grip the sides of the bench for stability.
- Keep your legs straight and together, then lift them towards your chest by flexing at the hips.
- Raise your legs until they are perpendicular to your torso, or as high as you comfortably can.
- Slowly lower your legs back to the starting position without letting them touch the ground.
- Repeat for the desired number of repetitions.
Technical tips
- Ensure your lower back remains in contact with the bench throughout the movement to prevent strain.
- Control the movement both when raising and lowering your legs to maximize muscle engagement.
- Exhale as you lift your legs and inhale as you lower them to maintain proper breathing rhythm.
- If you find it difficult to keep your legs straight, you can slightly bend your knees.
- Start with a moderate incline and adjust as needed to increase or decrease difficulty.
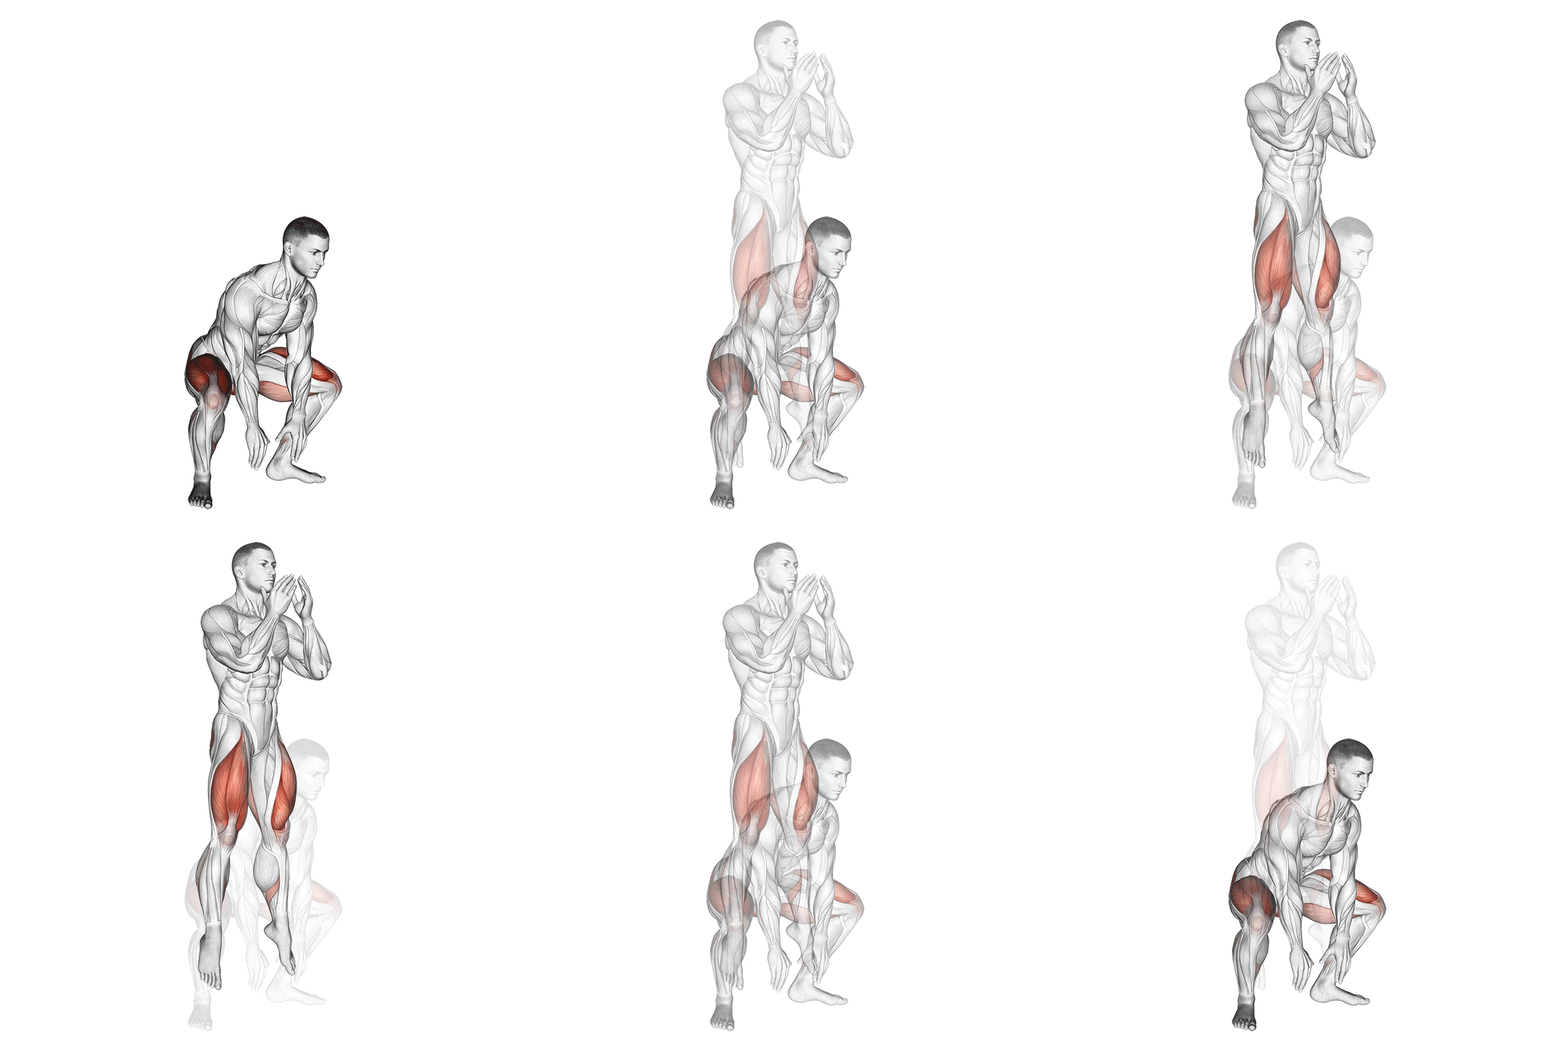
Jump Squat
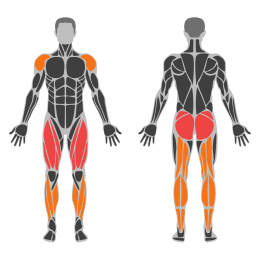
The Air Squat is a fundamental bodyweight exercise targeting the lower body, specifically the quadriceps, hamstrings, glutes, and calves. It also engages the core for stability and balance. This exercise is essential for building foundational strength and improving mobility.
Muscle focus
Step-by-step cues
- Stand with your feet shoulder-width apart and toes slightly pointed out.
- Engage your core and keep your chest up while maintaining a neutral spine.
- Begin the movement by pushing your hips back as if sitting into a chair.
- Bend your knees and lower your body until your thighs are parallel to the ground or as low as your mobility allows.
- Ensure your knees track over your toes and do not cave inward.
- Keep your weight distributed evenly through your heels and midfoot.
- Pause briefly at the bottom of the squat.
- Drive through your heels to return to the starting position, fully extending your hips and knees.
Technical tips
- Warm up properly before performing air squats to prevent injury.
- Focus on maintaining a straight back throughout the movement to protect your spine.
- Keep your gaze forward to help maintain balance and posture.
- If you struggle with depth, work on ankle and hip mobility exercises.
- Practice in front of a mirror to ensure proper form and alignment.
- Engage your core throughout the exercise to enhance stability and control.
- Start with a slow tempo to master technique before increasing speed or adding variations.
Glutes Roll
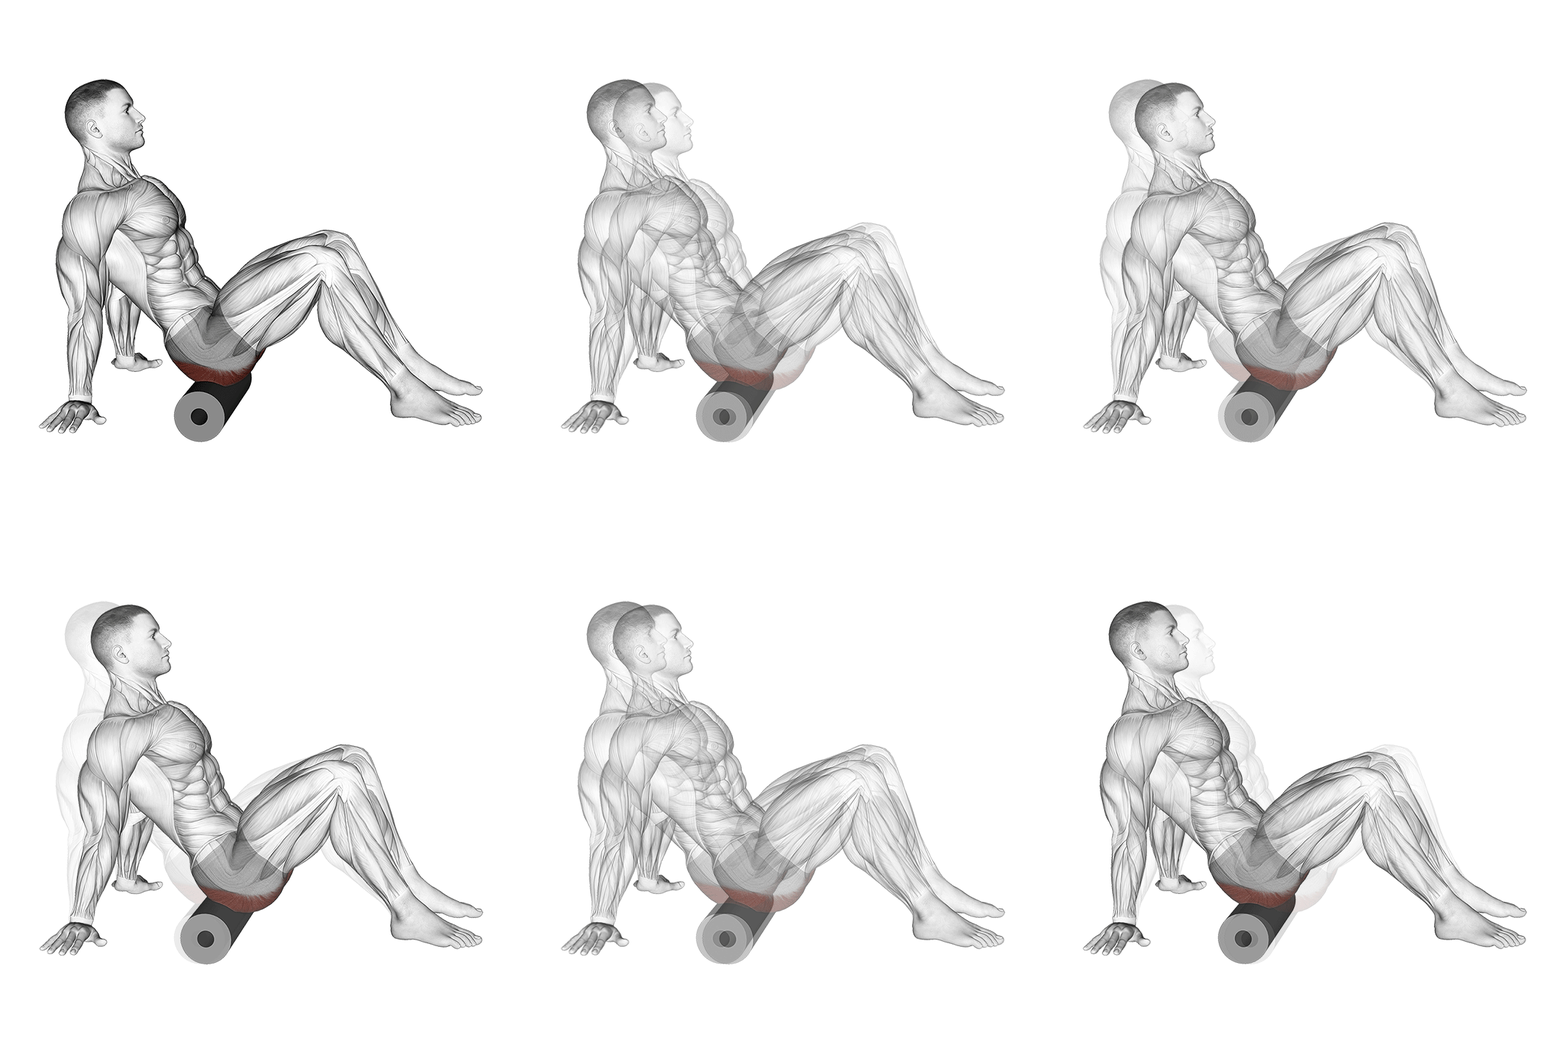
The Glutes Roll is a self-myofascial release exercise targeting the gluteal muscles. It involves using a foam roller to apply pressure to the glutes, helping to release tension, improve flexibility, and enhance muscle recovery.
Muscle focus
Step-by-step cues
- Sit on the floor with your legs extended and place a foam roller under your glutes.
- Bend your knees and place your feet flat on the floor.
- Cross your right ankle over your left knee to target the right glute.
- Place your hands on the floor behind you for support.
- Shift your weight onto the right glute and slowly roll back and forth from the top of the glute to the bottom.
- Continue rolling for 30-60 seconds, focusing on any tight or tender areas.
- Switch sides by crossing your left ankle over your right knee and repeat the process for the left glute.
Technical tips
- Maintain a steady pace while rolling to effectively target muscle tension.
- If you find a particularly tight spot, pause and hold pressure for 20-30 seconds to help release tension.
- Keep your core engaged to maintain stability during the exercise.
- Breathe deeply and relax your muscles as much as possible while rolling.
- Adjust the pressure by shifting more or less of your body weight onto the foam roller.
Sit Up
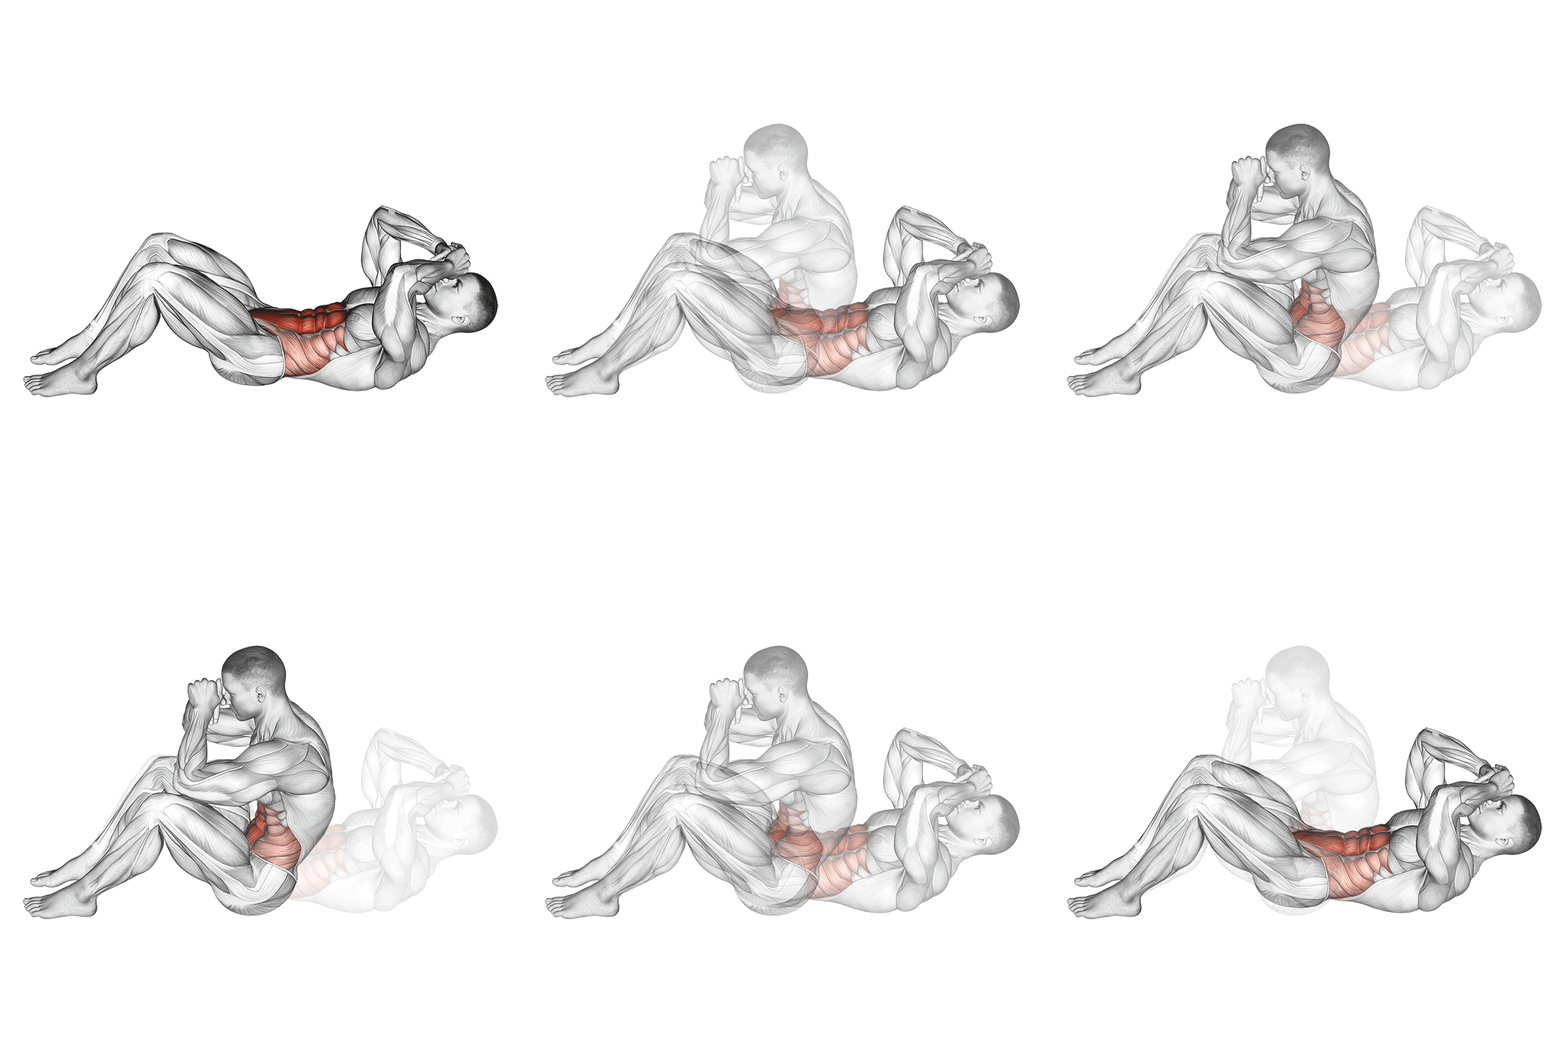
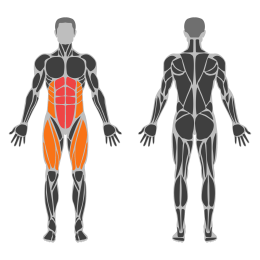
Sit Ups are a core exercise targeting the abdominal muscles. They involve lifting the upper body from a lying position to a seated position, engaging the rectus abdominis, obliques, and hip flexors. This exercise helps improve core strength and stability.
Muscle focus
Step-by-step cues
- Lie on your back on a mat with your knees bent and feet flat on the floor, hip-width apart.
- Place your fingertips lightly behind your ears, keeping your elbows wide.
- Engage your core by drawing your belly button towards your spine.
- Exhale as you lift your upper body towards your knees, keeping your lower back pressed against the floor.
- Pause at the top of the movement, ensuring your torso is upright and spine neutral.
- Inhale as you slowly lower back down to the starting position with control.
- Repeat for the desired number of repetitions.
Technical tips
- Keep your feet flat on the floor throughout the movement to maintain stability.
- Avoid pulling on your neck with your hands; use your core muscles to lift.
- Focus on a smooth, controlled motion rather than speed to maximize effectiveness.
- Keep your chin slightly tucked to prevent strain on the neck.
- Ensure that your lower back remains in contact with the floor during the initial phase of the lift.
- Breathe out as you lift and breathe in as you lower to maintain proper breathing rhythm.
Tuesday
Upper Strength
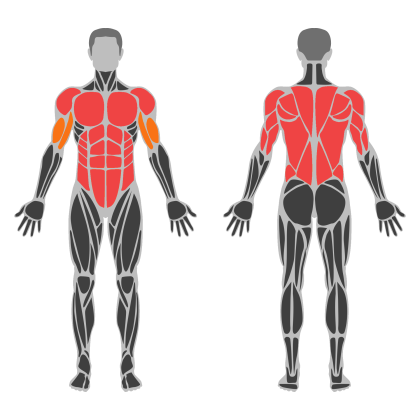
Upper Strength muscle focus
Red marks the primary training focus. Orange marks supporting muscle groups used throughout this session.
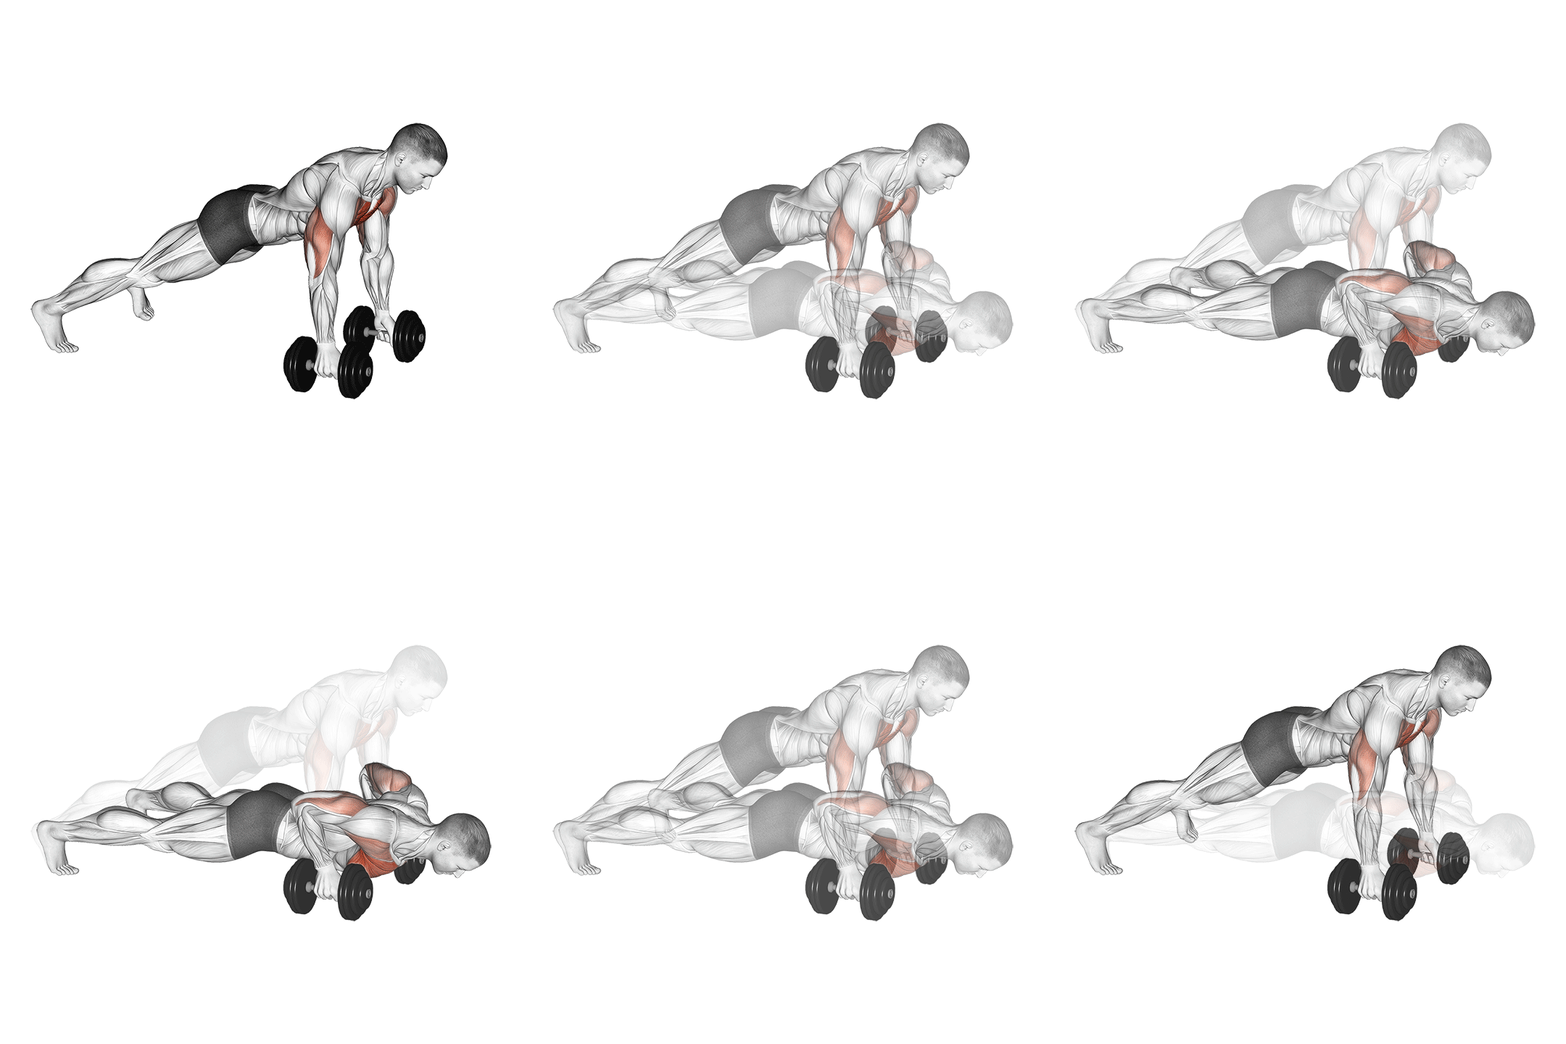
Dumbbell Deep Push Up
The Dumbbell Deep Push Up is an advanced variation of the traditional push-up that involves using dumbbells to increase the range of motion and engage the chest, shoulders, and triceps more intensely. This exercise enhances upper body strength, stability, and muscle definition.
Muscle focus
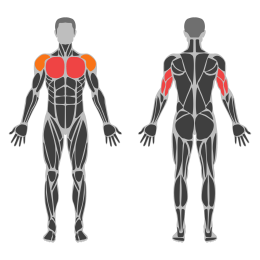
Step-by-step cues
- Begin by placing two dumbbells on the floor shoulder-width apart. Ensure they are stable and won't roll.
- Grip the dumbbells firmly and position yourself in a high plank position with your arms extended, keeping your body in a straight line from head to heels.
- Engage your core and lower your body by bending your elbows, allowing your chest to descend between the dumbbells.
- Lower yourself until your chest is slightly below the level of the dumbbells to maximize range of motion.
- Pause briefly at the bottom, then push through your palms to return to the starting position.
- Repeat for the desired number of repetitions, maintaining control throughout the movement.
Technical tips
- Keep your elbows at a 45-degree angle relative to your torso to protect your shoulders.
- Maintain a neutral spine by keeping your head aligned with your spine throughout the exercise.
- Focus on squeezing your chest muscles as you push back up to enhance muscle engagement.
- Ensure that the dumbbells are stable and placed on a non-slip surface to prevent injury.
- Start with lighter weights if you're new to this exercise to master the form before progressing.
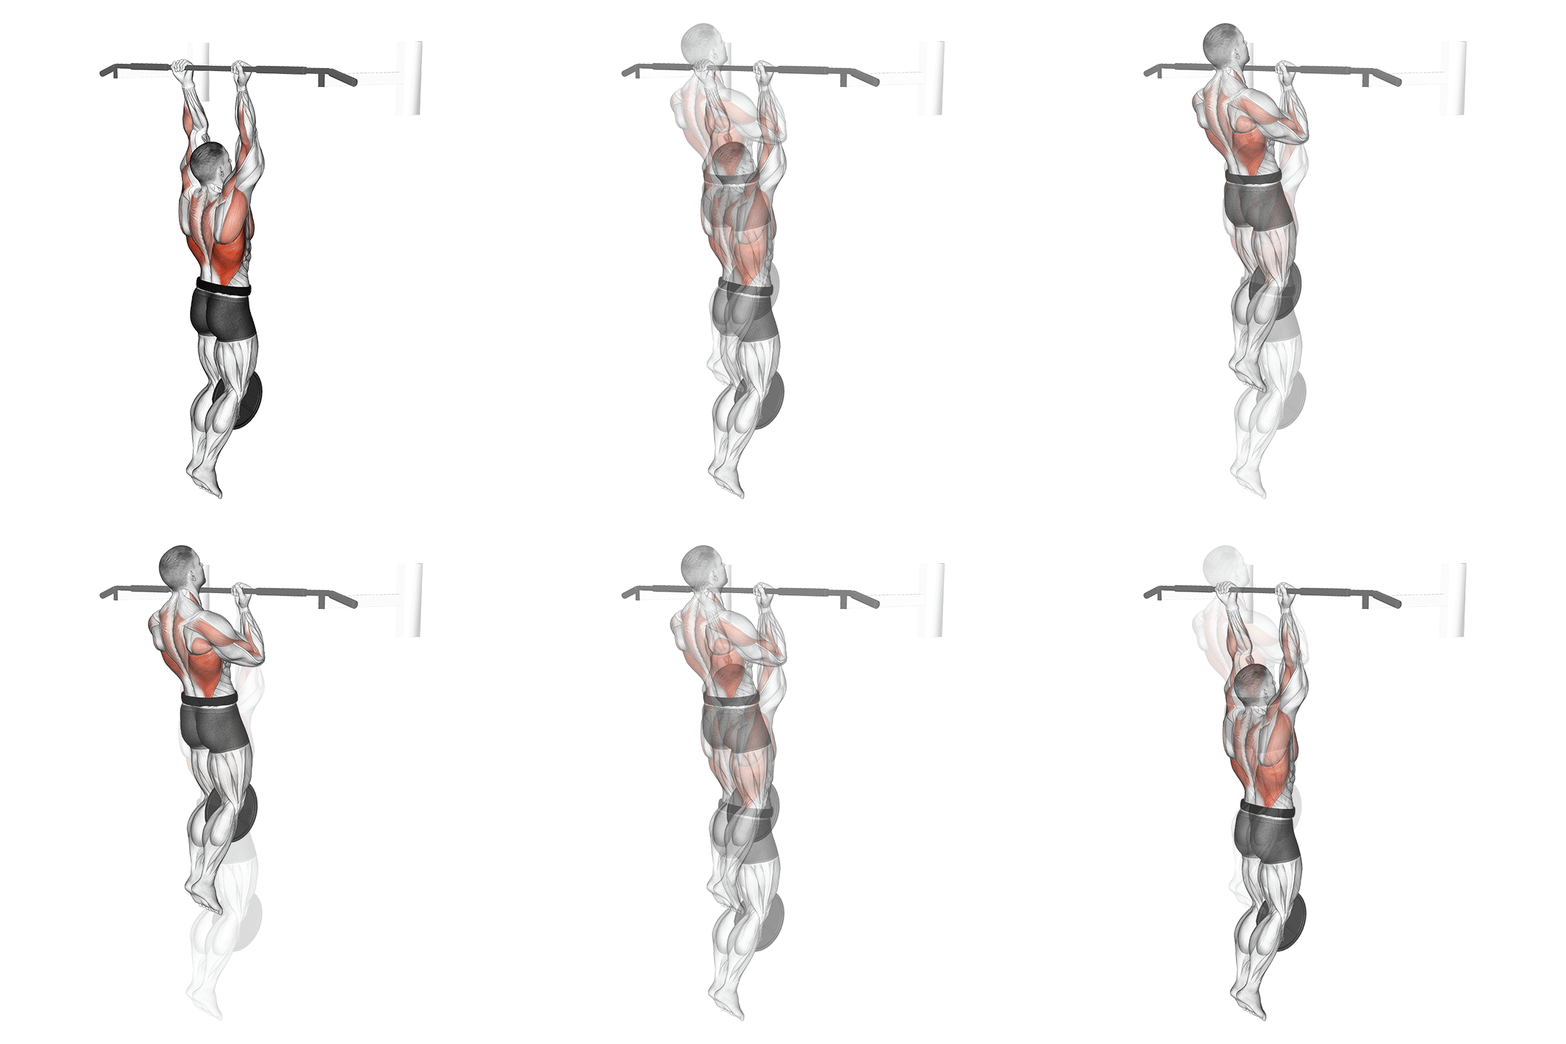
Weighted Chin Up
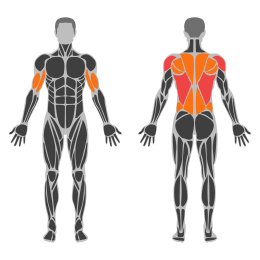
The Weighted Chin Up is an advanced upper body exercise that targets the latissimus dorsi, biceps, and upper back muscles. By adding weight, this exercise increases resistance, enhancing muscle strength and hypertrophy. It requires a chin-up bar and additional weight, typically attached via a dip belt.
Muscle focus
Step-by-step cues
- Attach the desired weight to a dip belt securely around your waist.
- Stand beneath a chin-up bar and grasp it with an underhand grip, palms facing you, shoulder-width apart.
- Engage your core and pull your shoulder blades down and back.
- Initiate the movement by pulling yourself up until your chin clears the bar.
- Pause briefly at the top of the movement, ensuring full contraction of the back muscles.
- Lower yourself in a controlled manner until your arms are fully extended.
- Repeat for the desired number of repetitions.
Technical tips
- Ensure your grip is firm to maintain control throughout the exercise.
- Focus on engaging your lats and biceps during the pull-up phase.
- Keep your core tight to prevent swinging or using momentum.
- Control the descent to maximize muscle engagement and prevent injury.
- Start with lighter weights to master form before progressing to heavier loads.
- Breath out as you pull up and inhale as you lower yourself down.
Weighted Woodchopper
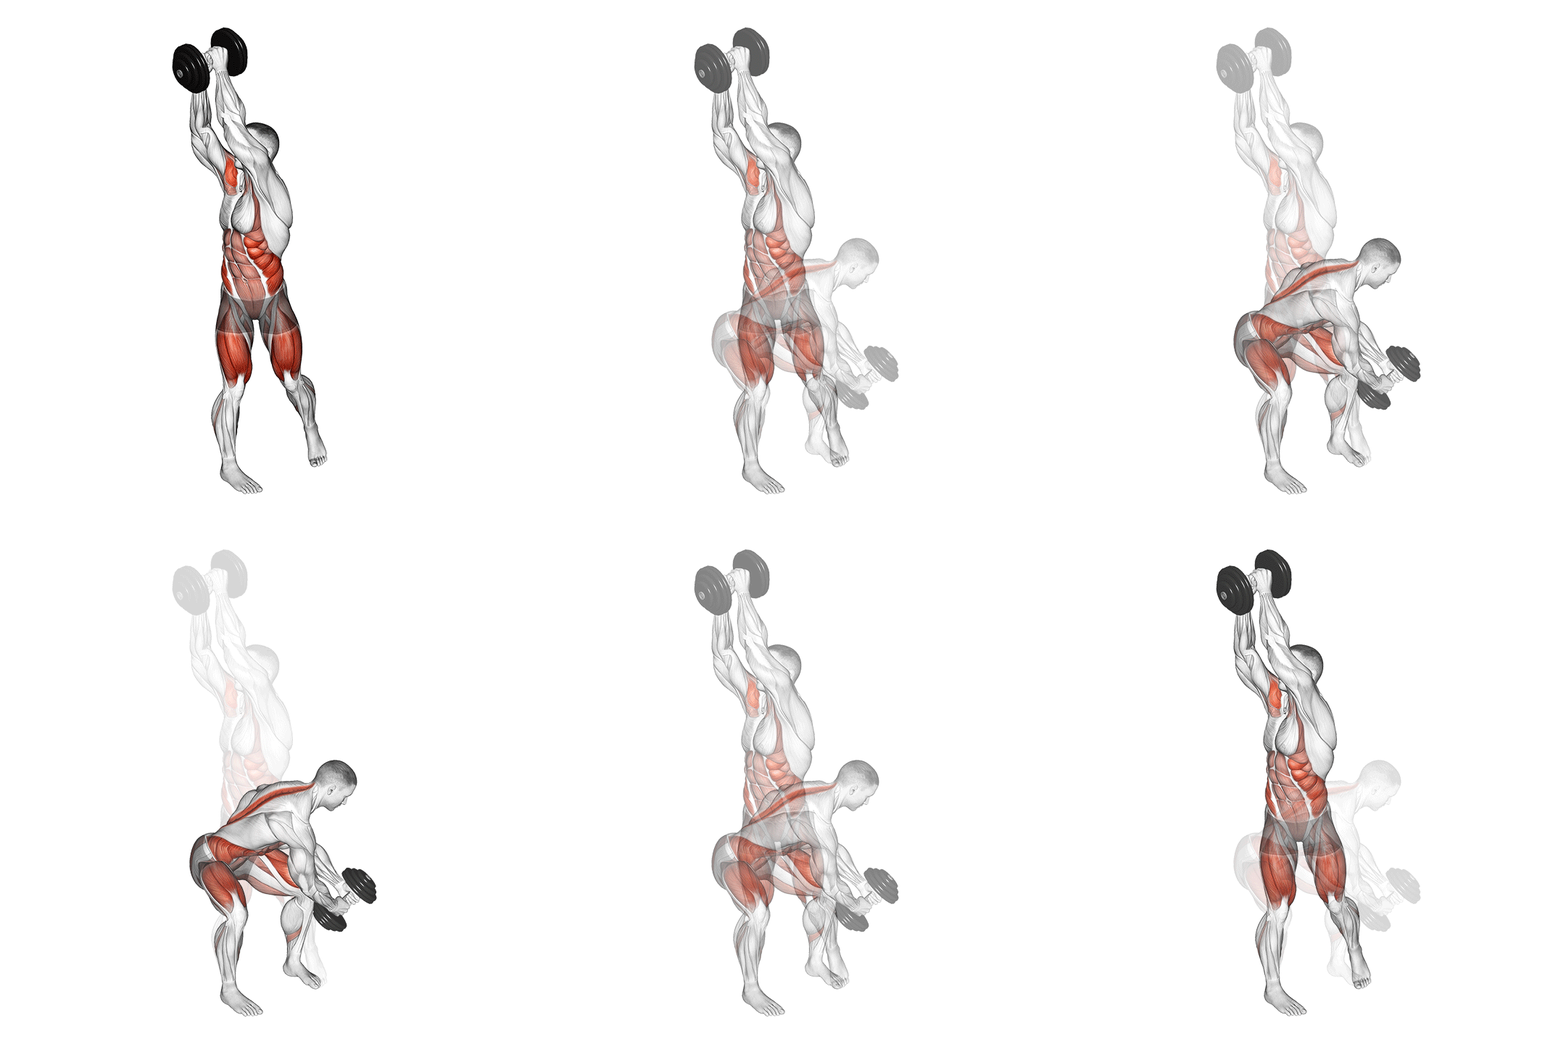
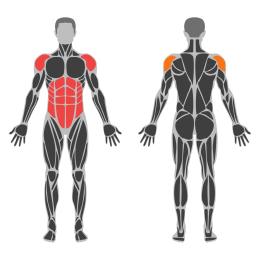
The Weighted Woodchopper is a dynamic exercise that targets the core, particularly the obliques, while also engaging the shoulders and hips. It mimics the motion of chopping wood, involving a rotational movement that enhances functional strength and stability.
Muscle focus
Step-by-step cues
- Stand with feet shoulder-width apart, holding a weight (dumbbell or medicine ball) with both hands.
- Start with the weight positioned near one shoulder, keeping your arms slightly bent.
- Engage your core and rotate your torso as you bring the weight diagonally across your body towards the opposite hip.
- Allow your hips and knees to pivot naturally as you perform the movement.
- Reverse the motion, bringing the weight back to the starting position near your shoulder.
- Repeat for the desired number of repetitions before switching sides.
Technical tips
- Maintain a strong core throughout the exercise to protect your lower back.
- Focus on controlled movements rather than speed to maximize muscle engagement.
- Ensure your knees and hips pivot smoothly to avoid unnecessary strain.
- Start with a lighter weight to master the form before progressing to heavier weights.
- Keep your shoulders relaxed and avoid shrugging them during the movement.
- Breathe out as you chop downwards and inhale as you return to the starting position.
One-Arm Dumbbell Bench Press
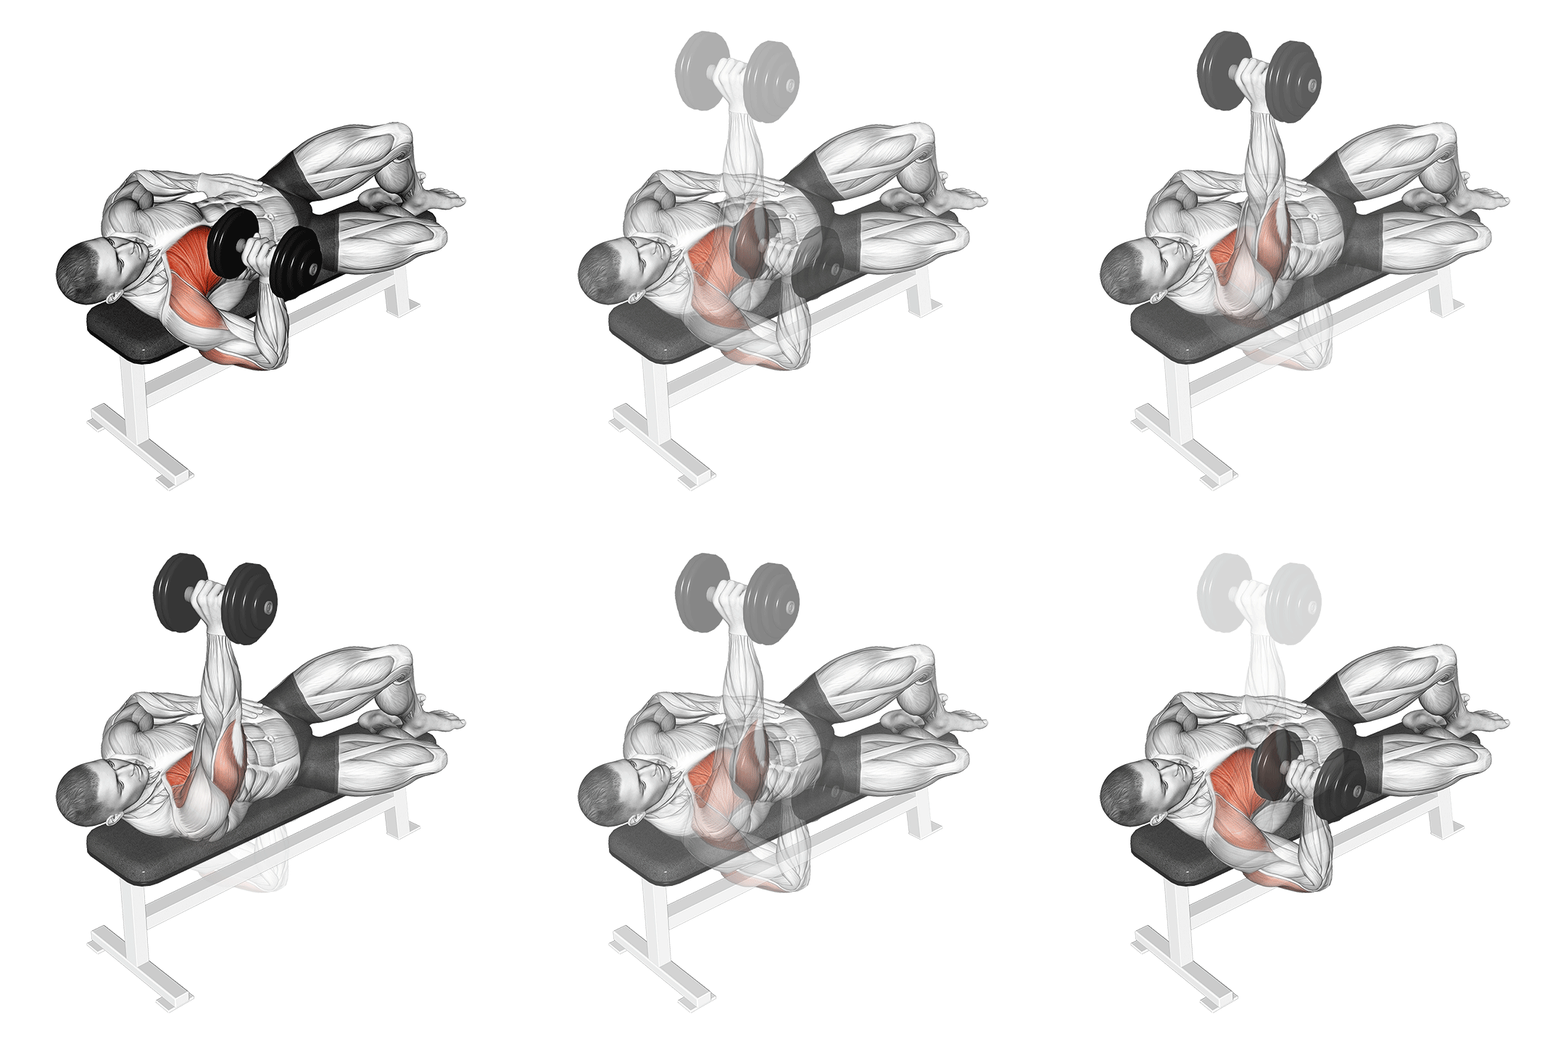
The One-Arm Dumbbell Bench Press is a unilateral chest exercise that targets the pectoral muscles, triceps, and deltoids. This exercise enhances muscle symmetry, core stability, and overall strength by engaging stabilizing muscles to maintain balance.
Muscle focus
Step-by-step cues
- Lie flat on a bench with your feet firmly planted on the floor.
- Hold a dumbbell in one hand with an overhand grip, arm extended above your chest.
- Place your free hand on your hip or extend it out to the side for balance.
- Lower the dumbbell slowly to the side of your chest, keeping your elbow at a 45-degree angle.
- Pause briefly at the bottom of the movement.
- Press the dumbbell back up to the starting position by extending your arm fully.
- Complete the desired number of repetitions before switching arms.
Technical tips
- Engage your core throughout the exercise to maintain stability and prevent rotation.
- Focus on controlled movements; avoid using momentum to lift the weight.
- Keep your shoulder blades retracted and pressed against the bench for better support.
- Ensure your wrist remains straight and aligned with your forearm to prevent strain.
- Start with a lighter weight to master form before progressing to heavier loads.
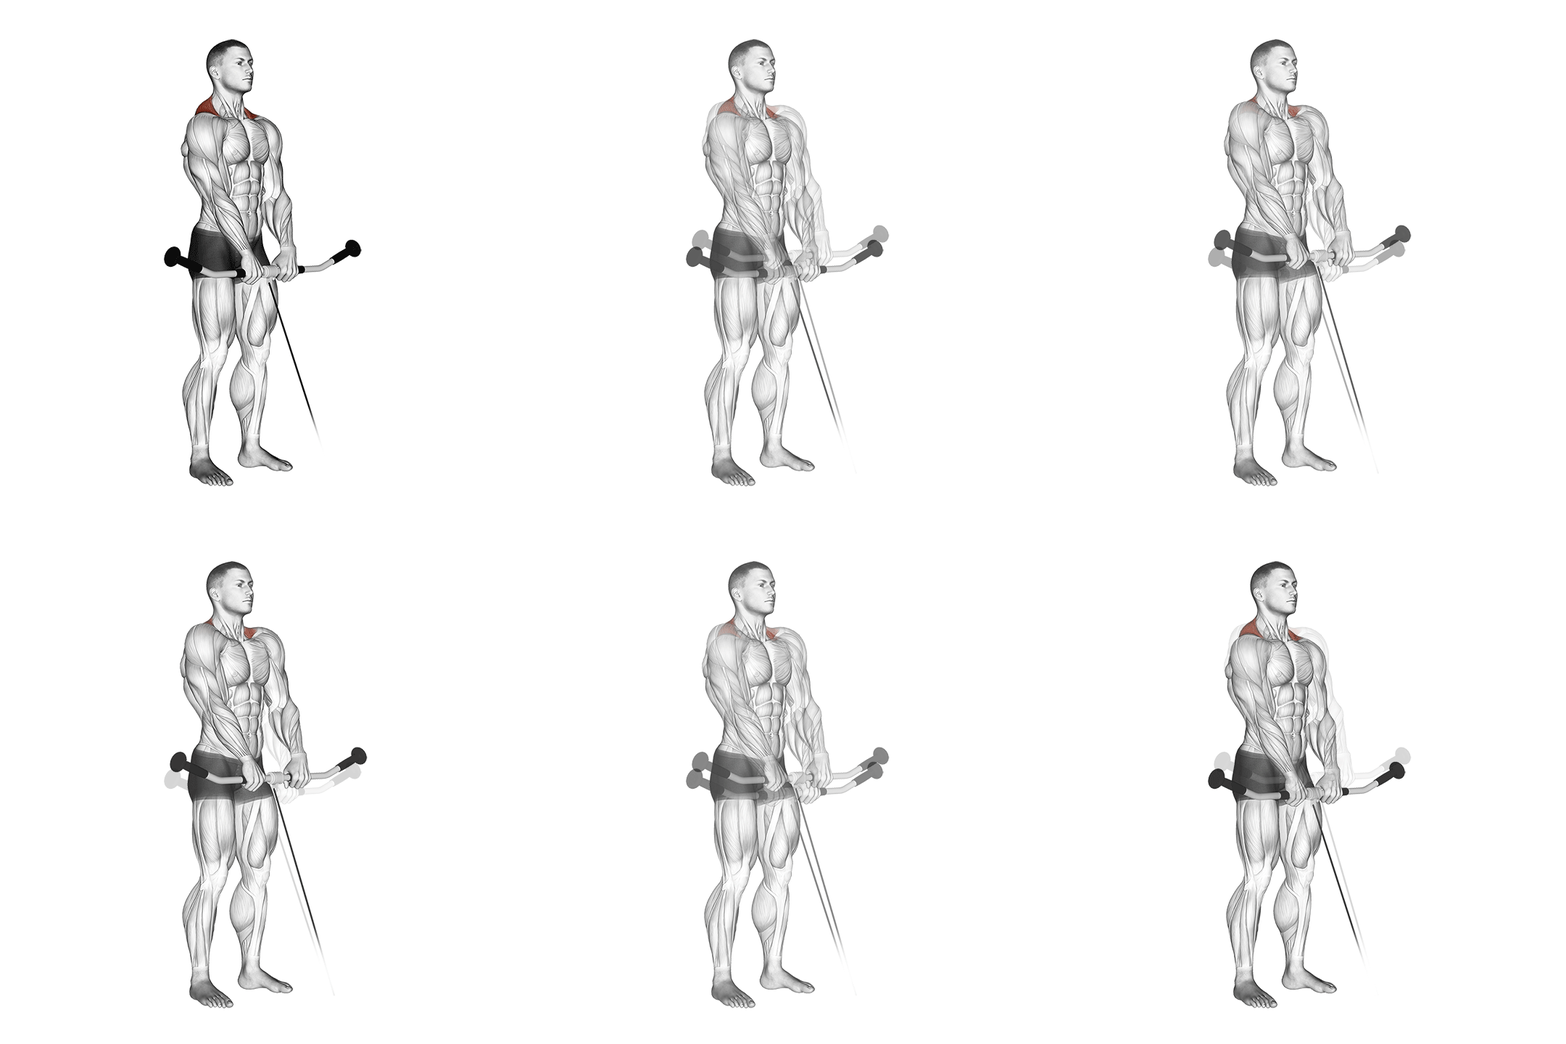
Cable Shrug
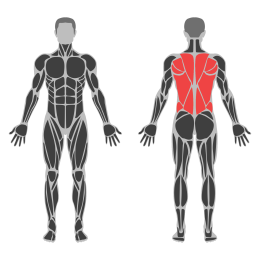
Cable shrugs are an isolation exercise targeting the trapezius muscles. This exercise uses a cable machine to provide constant tension throughout the movement, effectively engaging the upper back and shoulders. It is ideal for building strength and size in the trapezius muscles.
Muscle focus
Step-by-step cues
- Stand facing a low pulley cable machine with your feet shoulder-width apart.
- Attach a straight bar or rope handle to the low pulley.
- Grasp the handle with both hands, using an overhand grip, and stand upright with your arms fully extended.
- Keep your back straight and core engaged throughout the exercise.
- Lift your shoulders towards your ears in a shrugging motion, squeezing your trapezius muscles at the top of the movement.
- Hold the contraction for a moment before slowly lowering your shoulders back to the starting position.
- Repeat for the desired number of repetitions.
Technical tips
- Focus on using your trapezius muscles to lift the weight, avoiding assistance from your arms.
- Keep your movements slow and controlled to maximize muscle engagement.
- Avoid rolling your shoulders forward or backward; move them straight up and down.
- Maintain a neutral head position, looking straight ahead throughout the exercise.
- Start with a lighter weight to ensure proper form and gradually increase as you become more comfortable.
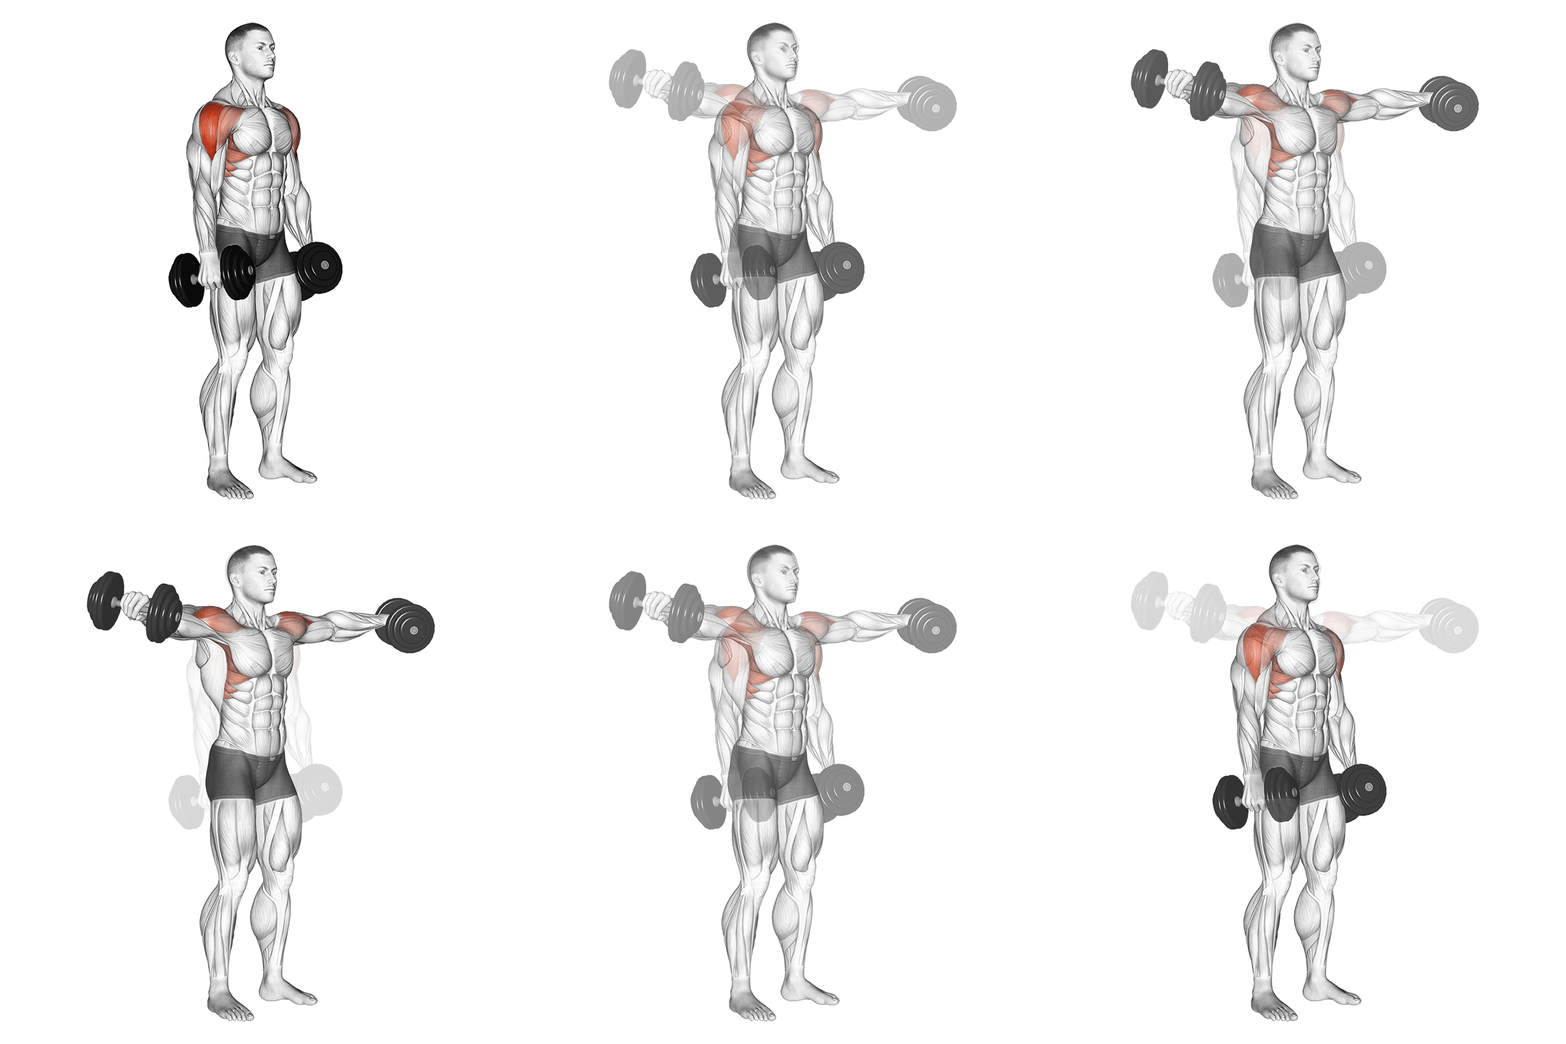
Dumbbell Lateral Raise
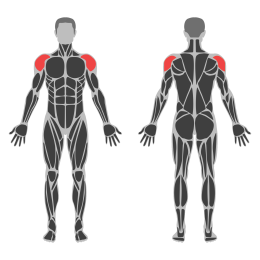
The Dumbbell Lateral Raise is an isolation exercise targeting the lateral deltoid muscles of the shoulders. It is designed to increase shoulder width and improve overall shoulder aesthetics. This exercise involves lifting dumbbells out to the sides of your body until they reach shoulder height, focusing on controlled movement and proper form.
Muscle focus
Step-by-step cues
- Stand with your feet shoulder-width apart, holding a dumbbell in each hand with a neutral grip.
- Keep your arms slightly bent at the elbows and maintain this angle throughout the exercise.
- Engage your core and keep your back straight.
- Slowly raise the dumbbells out to the sides until your arms are parallel to the floor, keeping your wrists in line with your forearms.
- Pause briefly at the top of the movement, ensuring you feel tension in your shoulders.
- Lower the dumbbells back to the starting position in a controlled manner.
- Repeat for the desired number of repetitions.
Technical tips
- Focus on using your shoulder muscles to lift the weights, not momentum or swinging.
- Keep your movements slow and controlled to maximize muscle engagement.
- Avoid lifting too heavy weights that compromise form; prioritize technique over weight.
- Ensure your elbows lead the movement, not your hands, to properly target the lateral deltoids.
- Maintain a slight bend in your knees to stabilize your stance.
- Exhale as you lift the weights and inhale as you lower them.
Wednesday
Zone 2 Recovery
Use easy cycling, rowing or walking for 35-50 minutes.
Thursday
Full Body Power
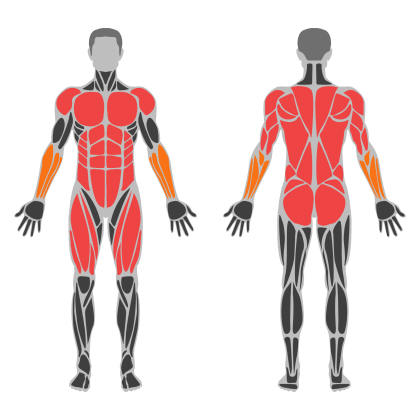
Full Body Power muscle focus
Red marks the primary training focus. Orange marks supporting muscle groups used throughout this session.
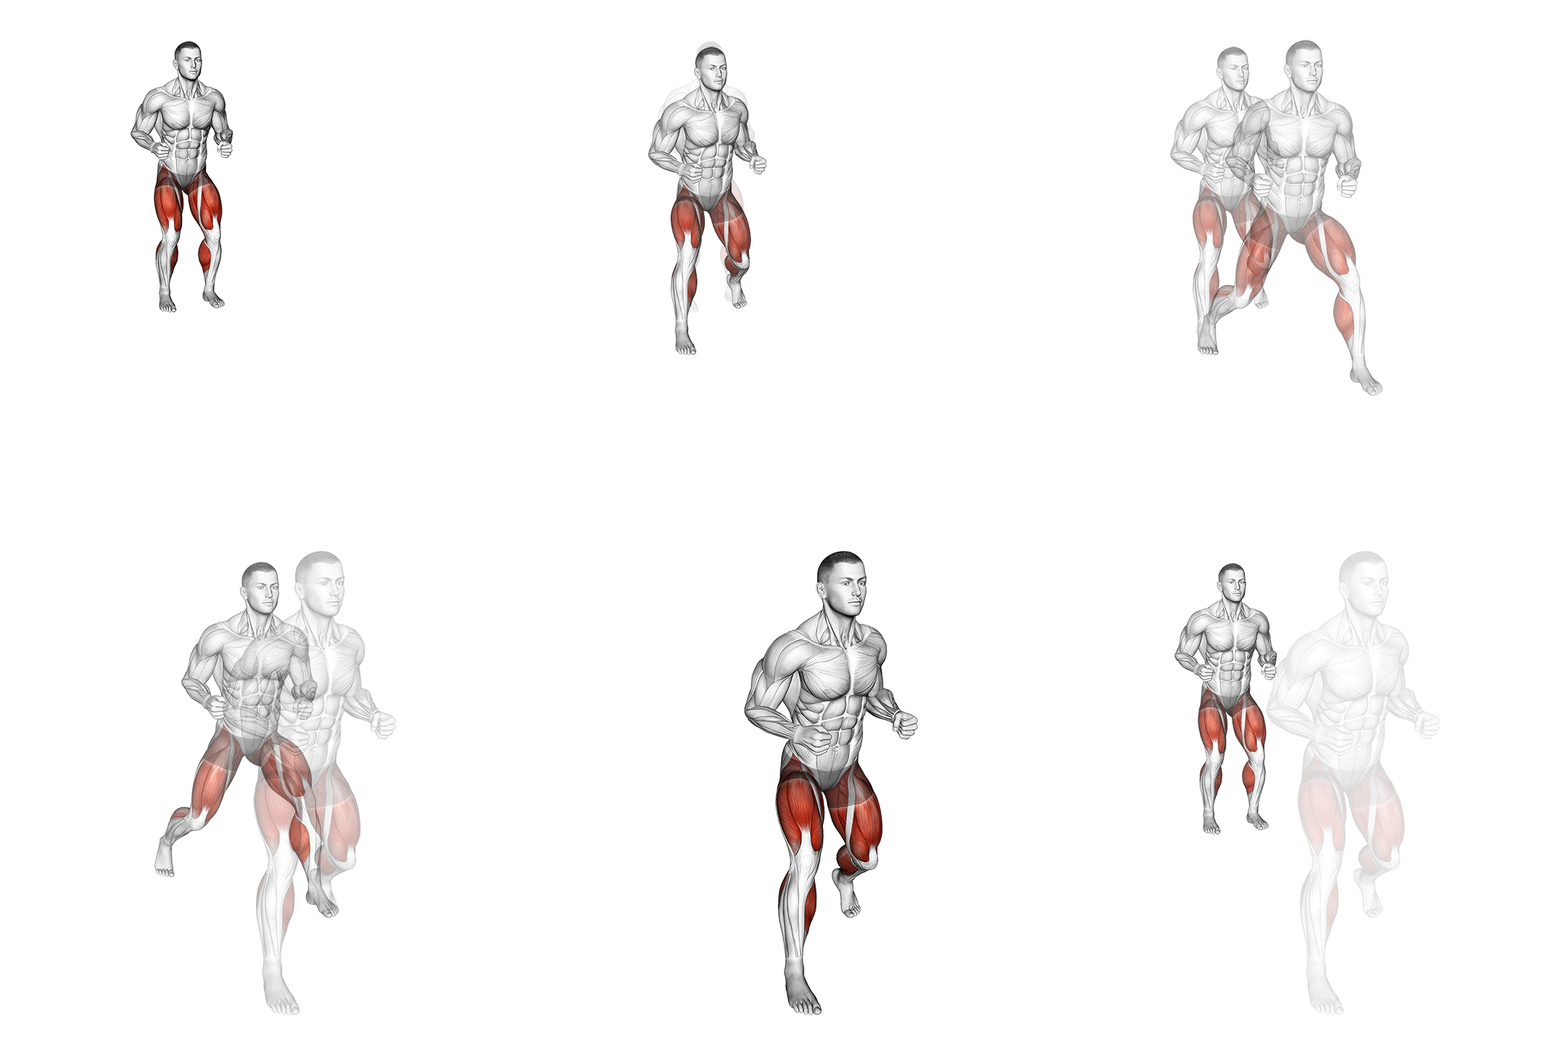
Forward Band Monster Walk
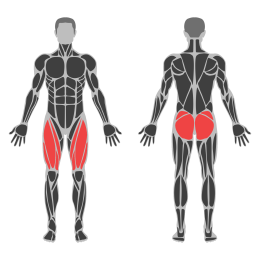
The Forward Band Monster Walk is a lower body exercise that targets the gluteus medius, hip abductors, and stabilizers. It involves walking forward with a resistance band placed around the legs, typically just above the knees, to create tension and activate the muscles effectively.
Muscle focus
Step-by-step cues
- Place a resistance band around your legs, just above your knees.
- Stand with your feet shoulder-width apart and slightly bend your knees.
- Engage your core and keep your chest up.
- Step forward with your right foot, maintaining tension in the band.
- Follow with your left foot, keeping the band taut throughout.
- Continue walking forward for the desired number of steps or distance.
- Maintain a controlled pace and avoid letting your knees collapse inward.
Technical tips
- Ensure the resistance band is tight enough to provide adequate tension without restricting movement.
- Focus on keeping your knees aligned with your toes to prevent inward collapse.
- Maintain an upright posture with a slight forward lean to engage the core effectively.
- Perform the exercise slowly to maximize muscle activation and control.
- If you feel discomfort in your knees, try adjusting the band's position or reducing its tension.
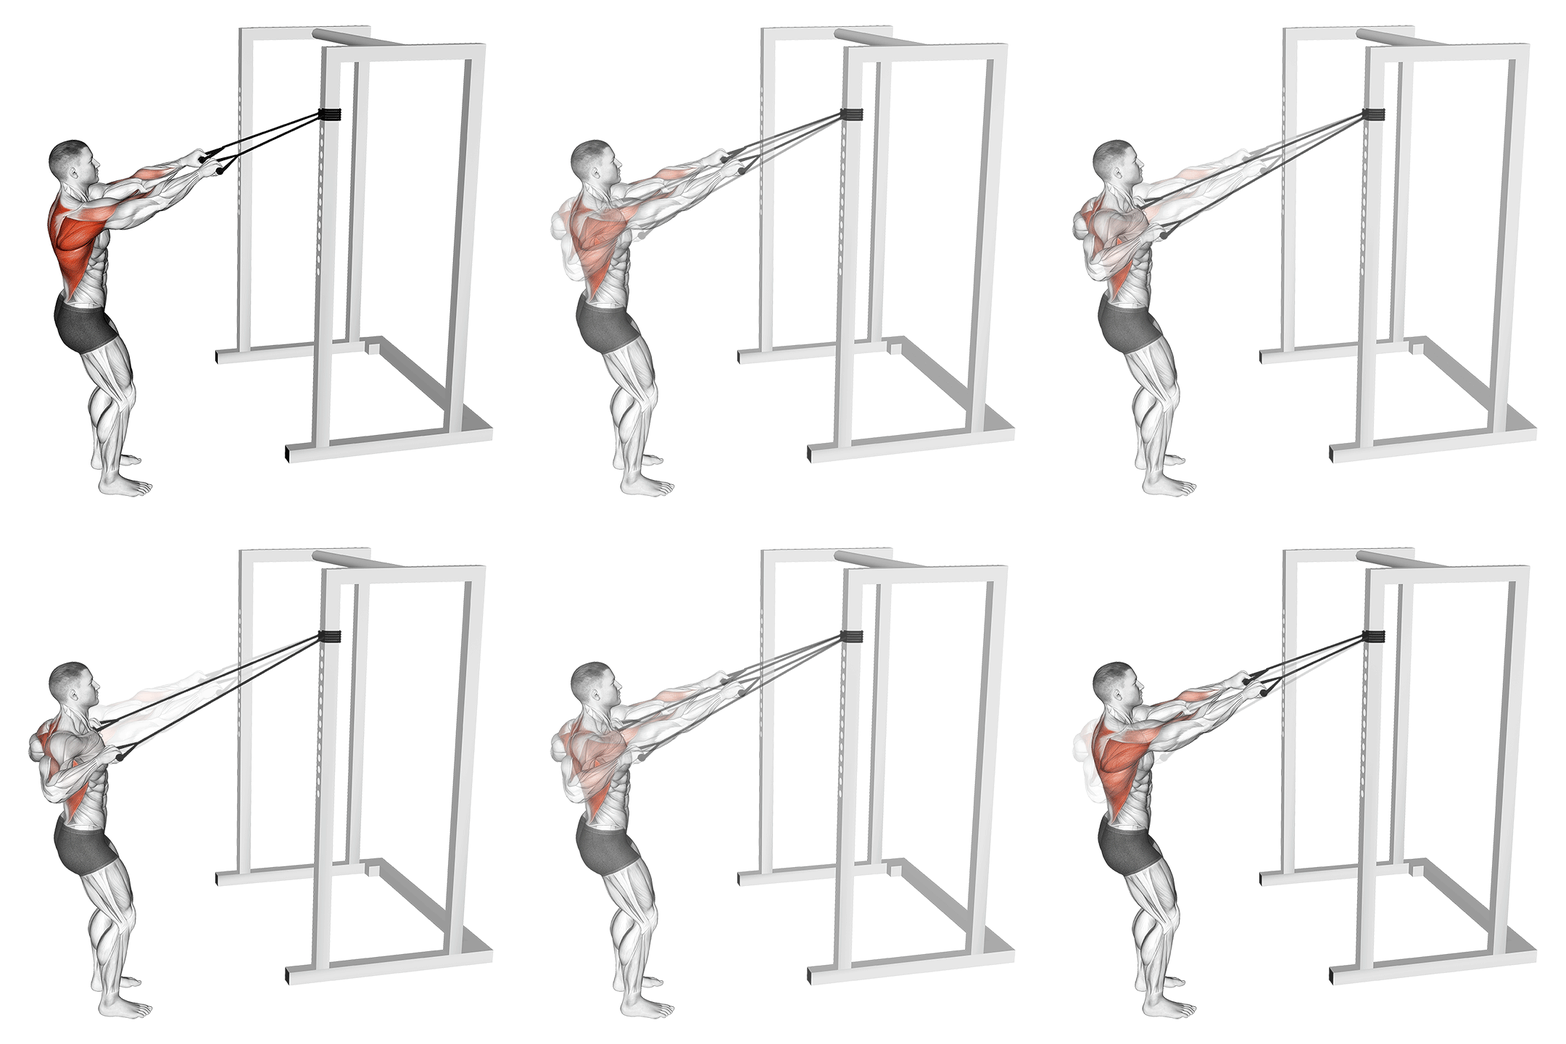
Band High Anchor Wide Row
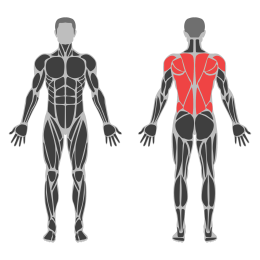
The Band High Anchor Wide Row is an exercise targeting the upper back muscles, including the rhomboids, trapezius, and rear deltoids. It involves pulling a resistance band anchored at a high point towards your chest with elbows flared out, promoting scapular retraction and shoulder stability.
Muscle focus
Step-by-step cues
- Anchor a resistance band at a high point above your head level.
- Stand facing the anchor point with feet shoulder-width apart.
- Hold the band handles with an overhand grip, arms extended forward.
- Step back to create tension in the band while maintaining a slight bend in your knees.
- Engage your core and keep your back straight.
- Pull the band towards your chest by driving your elbows out and back, squeezing your shoulder blades together.
- Pause briefly at the peak contraction, ensuring full scapular retraction.
- Slowly extend your arms back to the starting position, maintaining control.
- Repeat for the desired number of repetitions.
Technical tips
- Ensure the anchor point is secure to prevent slipping during the exercise.
- Keep your core engaged throughout to maintain balance and posture.
- Focus on squeezing your shoulder blades together at the peak of each row.
- Avoid using momentum; perform the movement in a controlled manner.
- Maintain a slight bend in your knees to stabilize your stance.
- Keep your wrists straight to avoid unnecessary strain.
One-Arm Push-Up
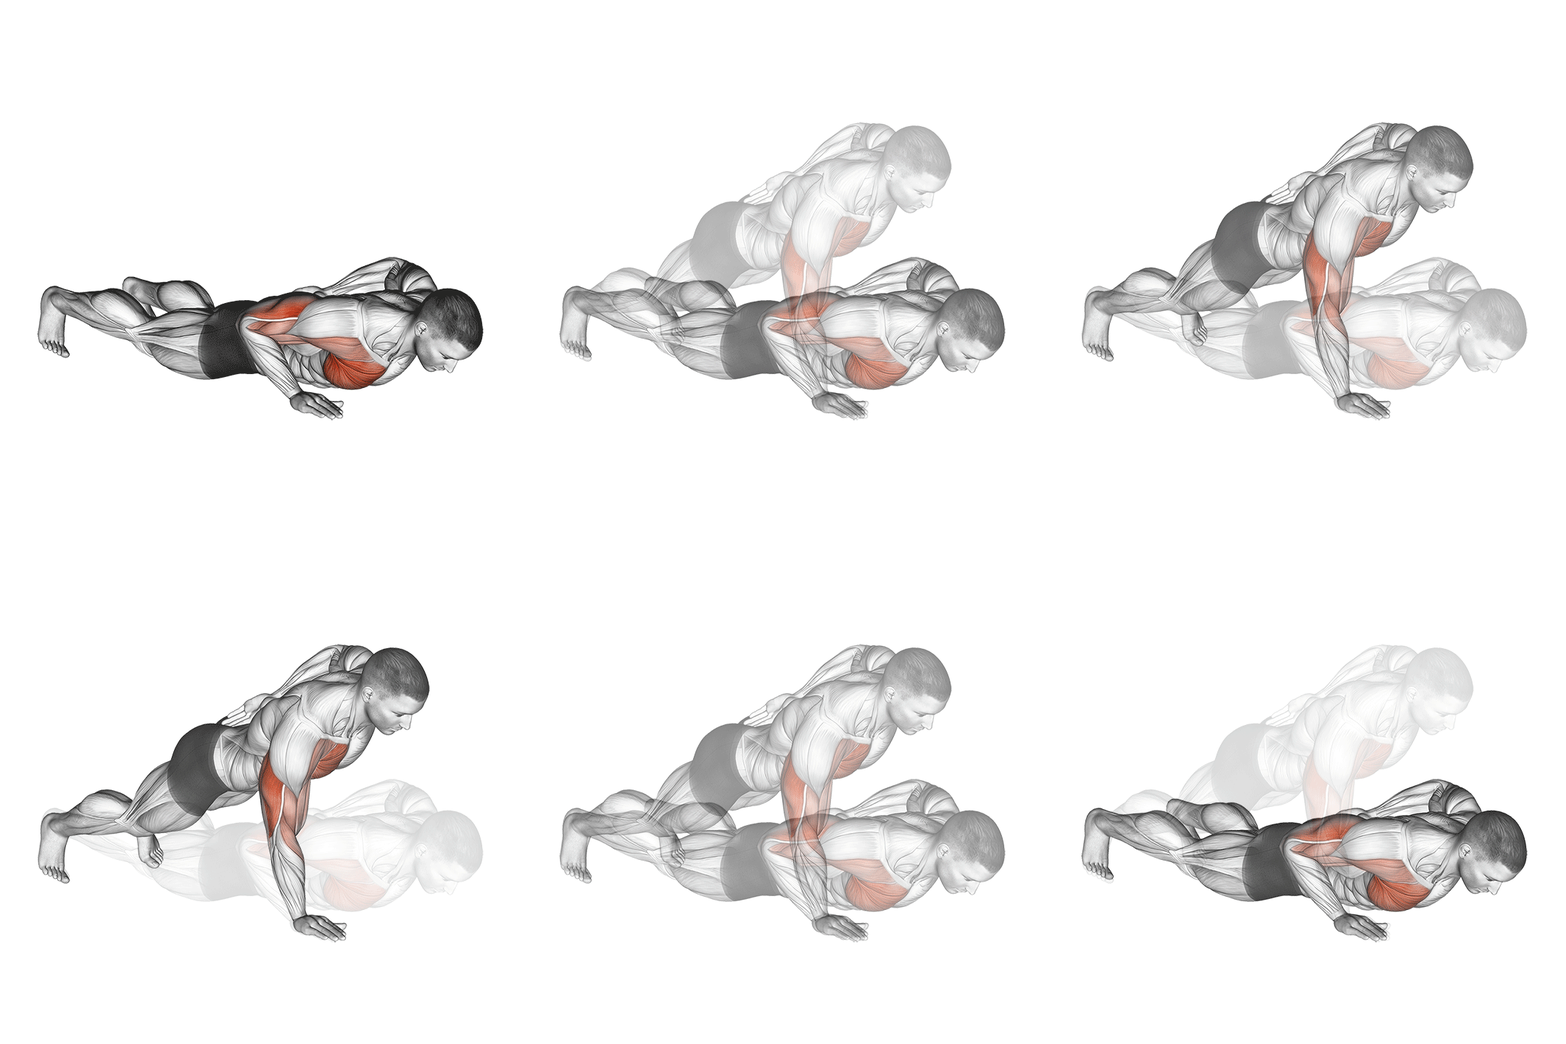
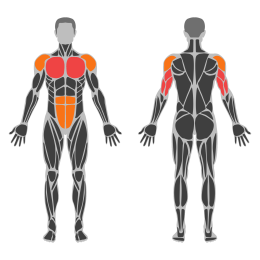
The Single Arm Push Up is an advanced bodyweight exercise that targets the chest, shoulders, triceps, and core muscles. It requires significant strength, balance, and stability, making it a challenging progression from the standard push-up.
Muscle focus
Step-by-step cues
- Begin in a high plank position with your feet slightly wider than shoulder-width apart for better stability.
- Place one hand directly under your shoulder while extending the other arm out to the side or behind your back.
- Engage your core and glutes to maintain a straight line from head to heels.
- Lower your body by bending the elbow of the supporting arm until your chest is just above the ground.
- Pause briefly at the bottom, then push through your palm to return to the starting position.
- Repeat for the desired number of repetitions before switching arms.
Technical tips
- Ensure your core is tight throughout the movement to prevent hip sagging.
- Keep your supporting elbow close to your body as you lower down for better control.
- Start with elevated surfaces or knee variations if full single arm push-ups are too challenging initially.
- Focus on controlled movements rather than speed to maximize muscle engagement and reduce injury risk.
- Breath in as you lower down and exhale as you push up to maintain proper breathing rhythm.
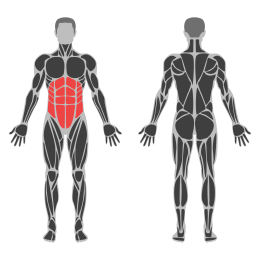
Side Plank
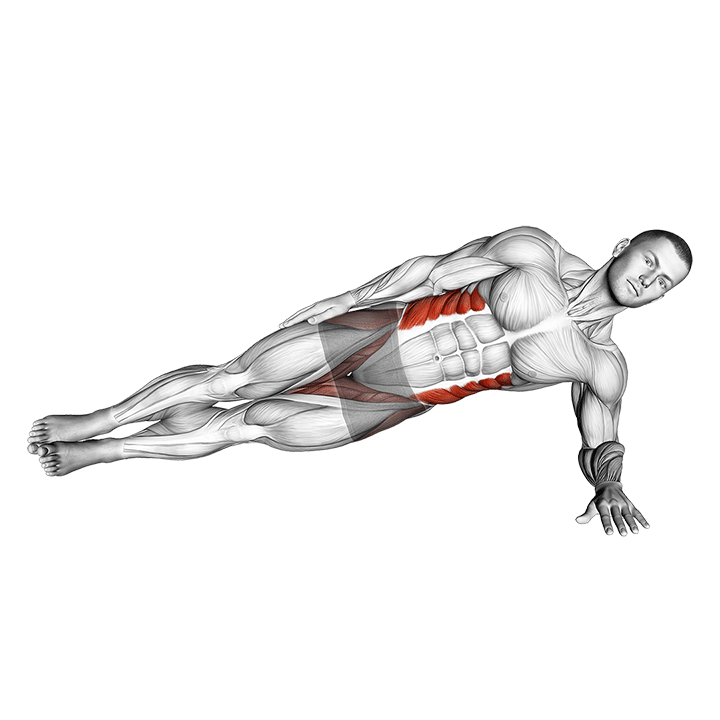
The Side Plank is an isometric core exercise that targets the oblique muscles, improving core stability and balance. It involves maintaining a straight body position supported by one arm and the side of one foot.
Muscle focus
Step-by-step cues
- Lie on your side with your legs extended and stacked from hip to feet.
- Place your elbow directly under your shoulder, ensuring your forearm is perpendicular to your body.
- Engage your core and lift your hips off the ground, forming a straight line from head to feet.
- Keep your head in line with your spine and hold the position while breathing steadily.
- Maintain the position for the desired duration, then switch sides.
Technical tips
- Ensure your elbow is directly under your shoulder to avoid strain.
- Engage your core muscles to maintain balance and stability.
- Keep your body in a straight line to maximize effectiveness.
- Avoid letting your hips sag or rise too high; aim for a neutral position.
- Focus on steady breathing to help maintain the position longer.
Poliquin Step-Up
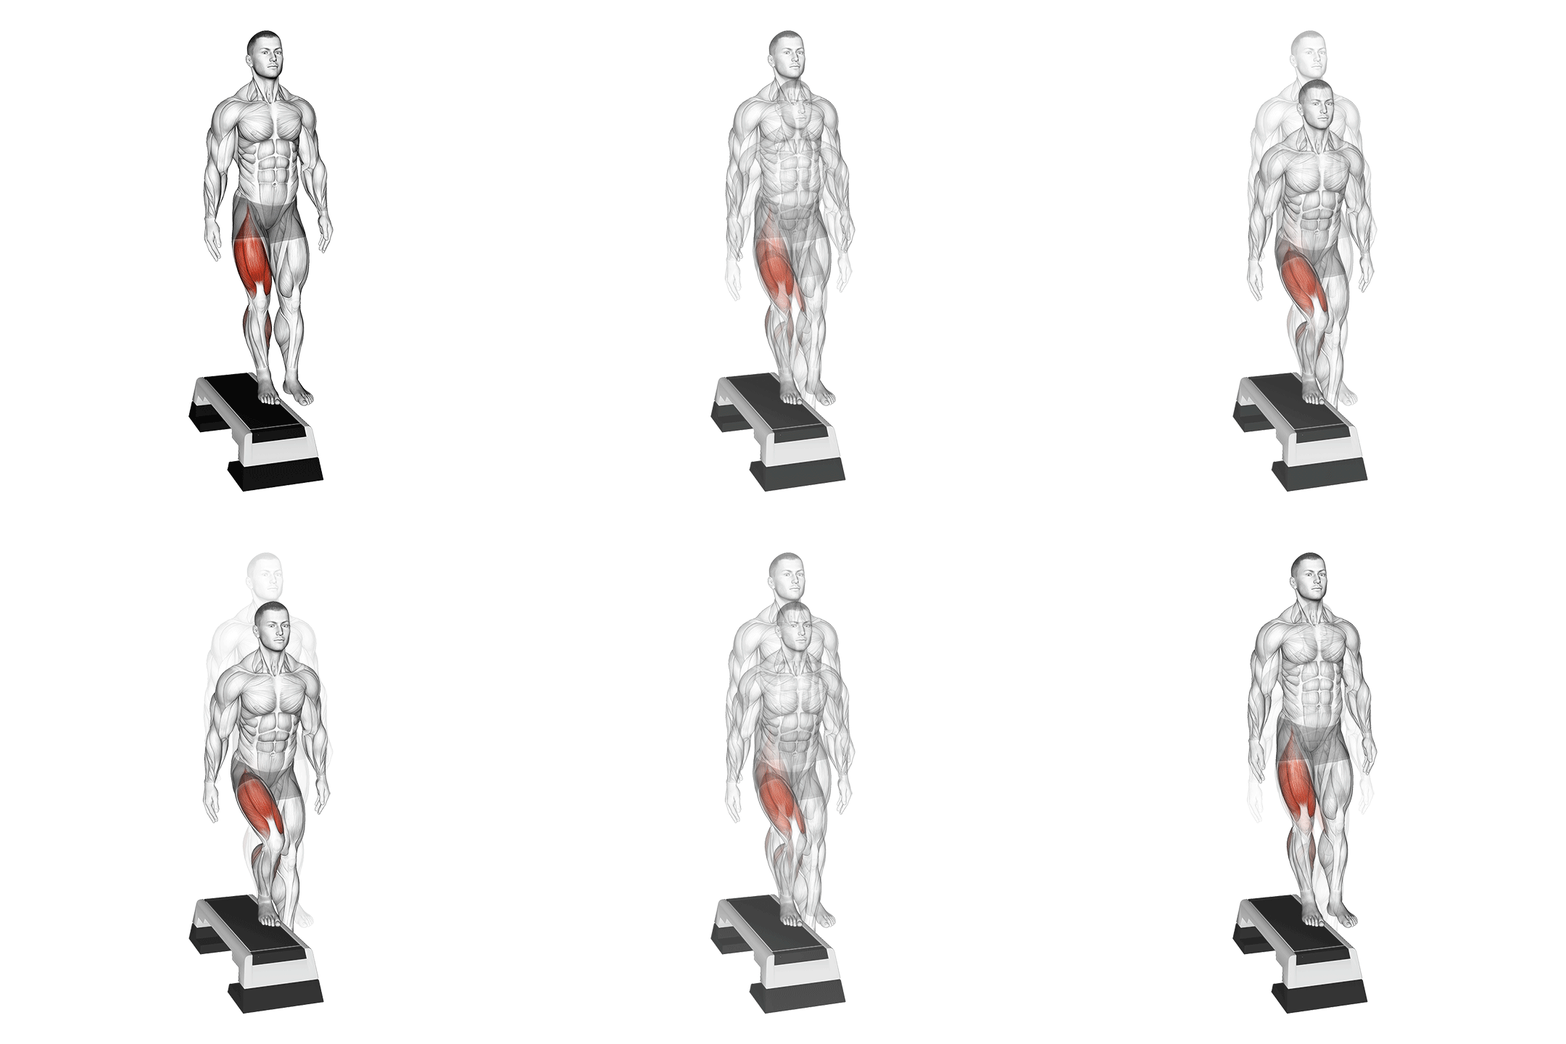
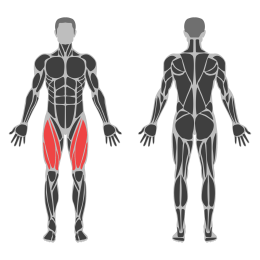
The Poliquin Step-Up is a lower body exercise that targets the quadriceps, glutes, and hamstrings. It is performed with a focus on controlled movement and balance, enhancing knee stability and strength. This exercise is named after Charles Poliquin, a renowned strength coach, and is particularly effective for athletes looking to improve their leg power and knee health.
Muscle focus
Step-by-step cues
- Stand facing a bench or step with your feet hip-width apart.
- Place one foot on the bench, ensuring your entire foot is flat and stable.
- Push through the heel of the foot on the bench to lift your body upward.
- Keep your torso upright and avoid leaning forward excessively.
- Bring the trailing leg up to tap the bench lightly without placing weight on it.
- Lower the trailing leg back to the ground in a controlled manner.
- Repeat for the desired number of repetitions before switching legs.
Technical tips
- Ensure the bench or step is at a height where your knee is at or slightly below hip level when stepping up.
- Focus on pushing through the heel of the working leg to engage the glutes effectively.
- Maintain a neutral spine throughout the movement to prevent lower back strain.
- Control the descent to maximize muscle engagement and prevent injury.
- Start with body weight and progress to holding dumbbells as you become more comfortable with the exercise.
- Keep your core engaged to aid in balance and stability during the movement.
Inverted Shrug
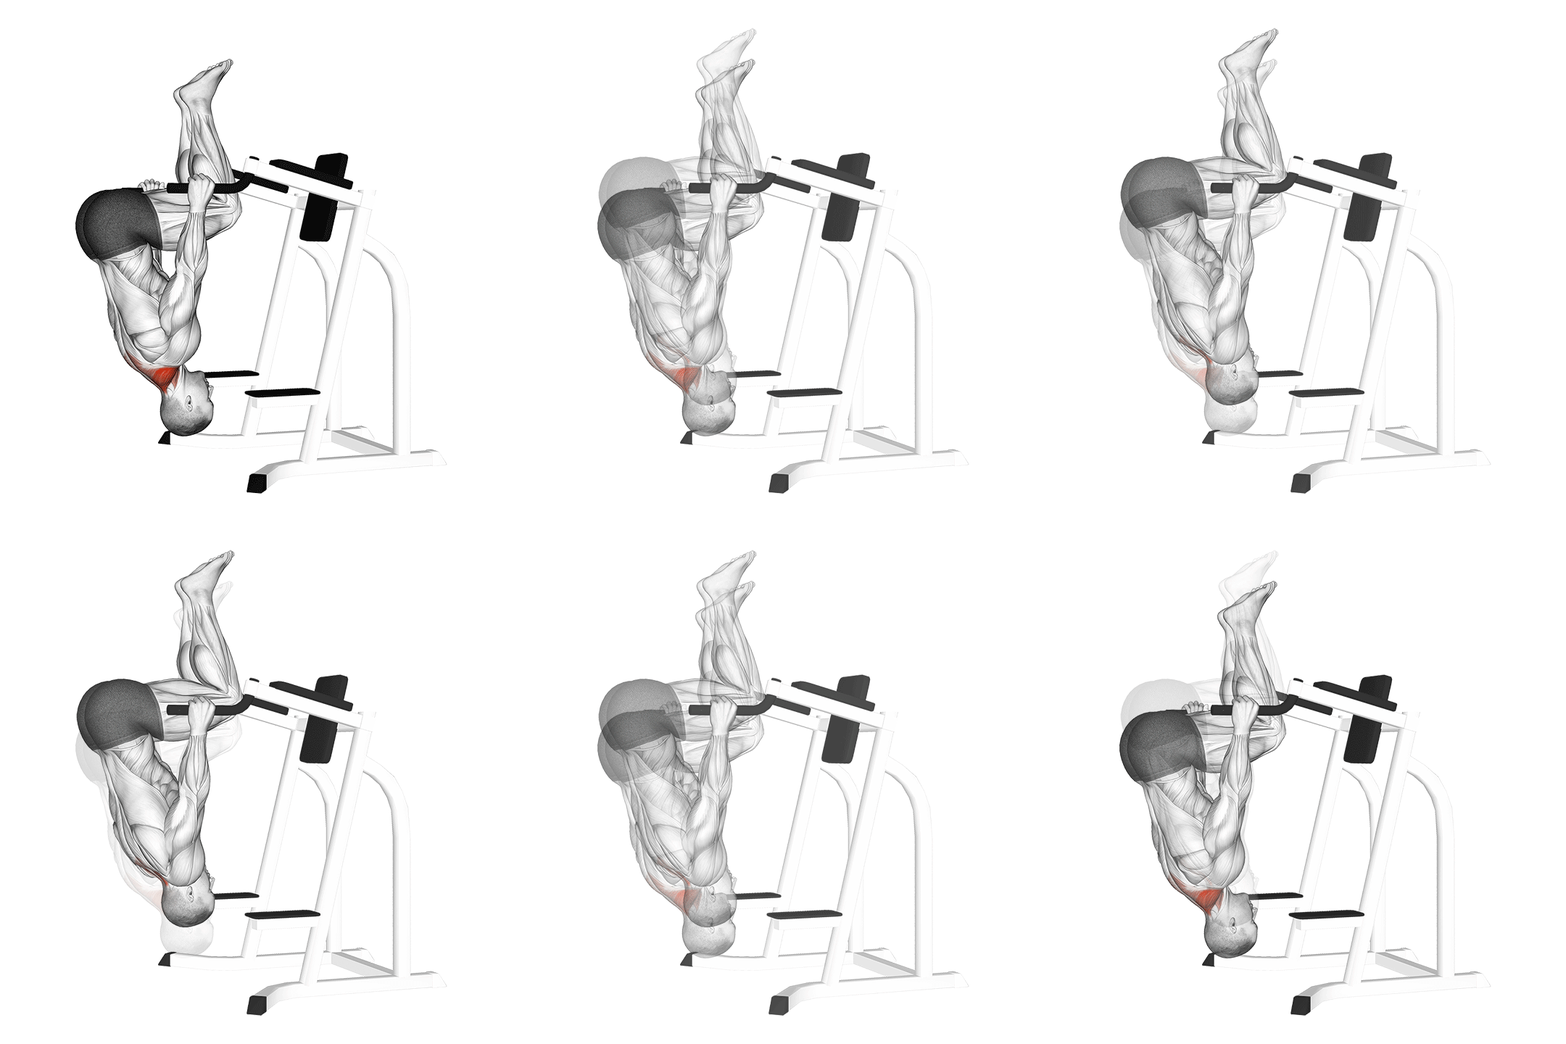
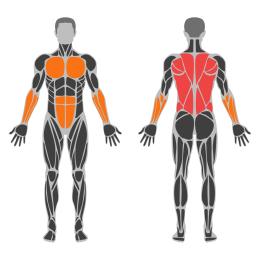
The Inverted Shrug is an exercise primarily targeting the trapezius muscles, particularly the lower traps. It involves hanging from a bar and using shoulder depression to lift your body slightly, engaging the upper back and shoulders. This exercise helps improve shoulder stability and posture.
Muscle focus
Step-by-step cues
- Begin by hanging from a pull-up bar with an overhand grip, hands shoulder-width apart.
- Engage your core and keep your body straight, avoiding any swinging.
- Depress your shoulders by pulling them down away from your ears, lifting your body slightly upward.
- Hold the top position for a moment, focusing on squeezing the lower trapezius muscles.
- Slowly relax your shoulders back to the starting position.
- Repeat for the desired number of repetitions.
Technical tips
- Ensure your grip is secure on the bar to maintain stability throughout the exercise.
- Focus on moving only at the shoulders; avoid bending your elbows or using momentum.
- Keep your core engaged to prevent swinging and maintain proper form.
- Breathe steadily, exhaling as you depress your shoulders and inhaling as you return to the start.
- Start with a few repetitions to master the form before increasing volume.
Cable Kneeling High To Low Fly
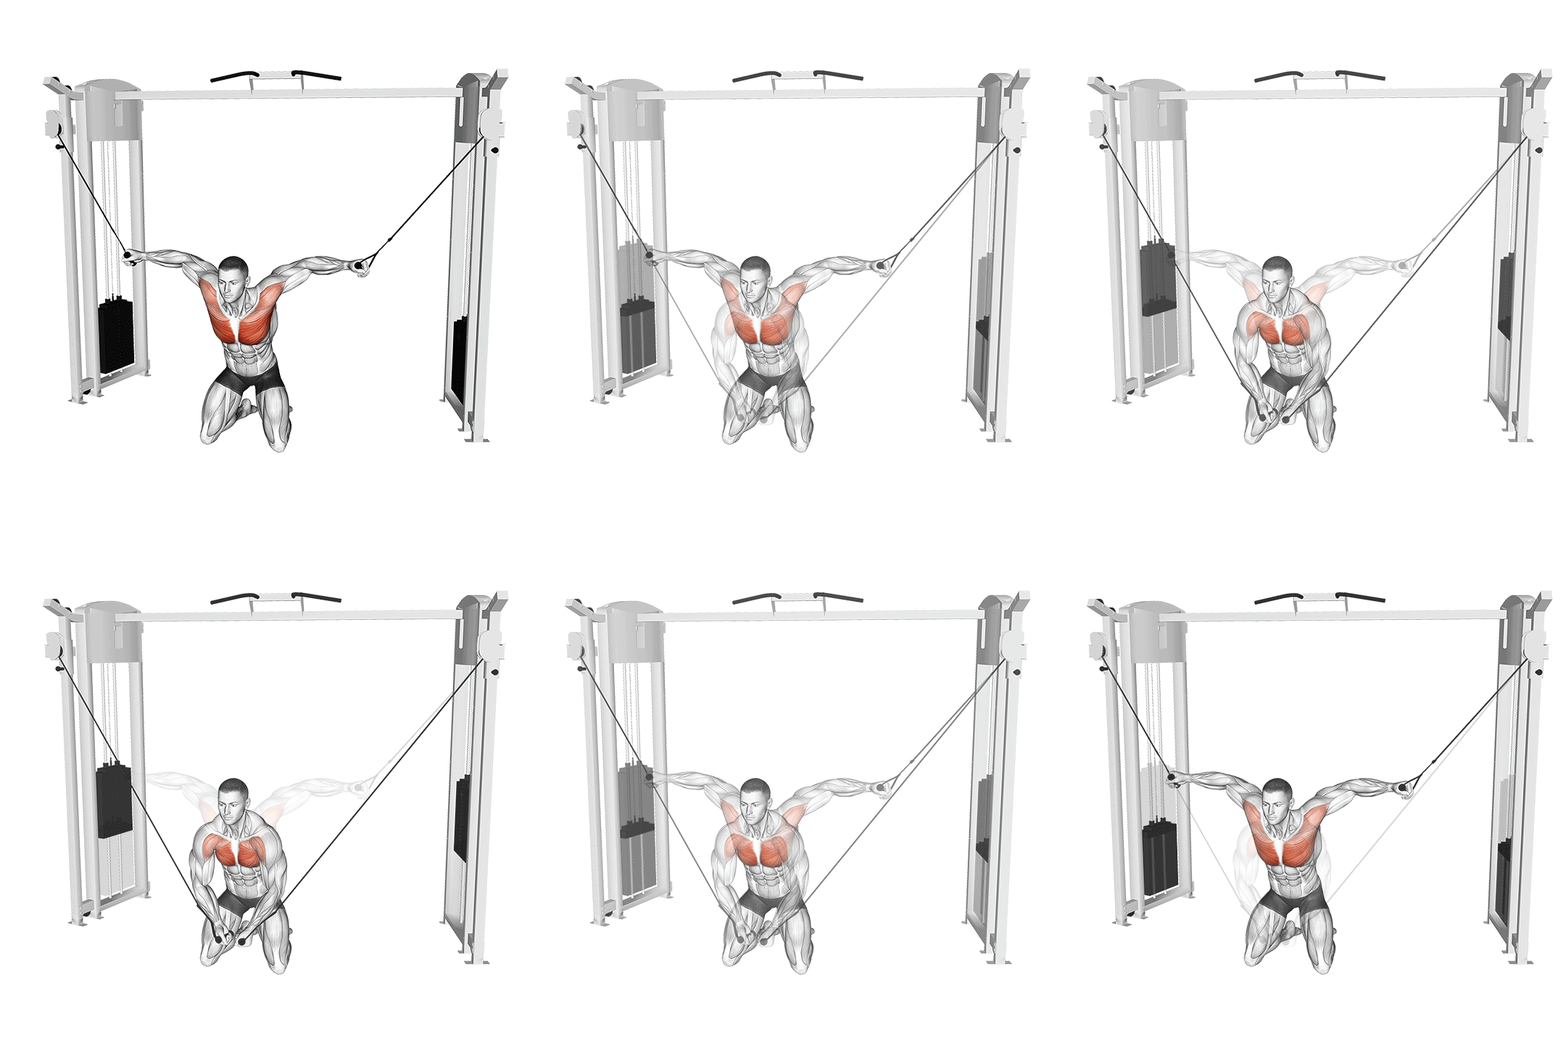
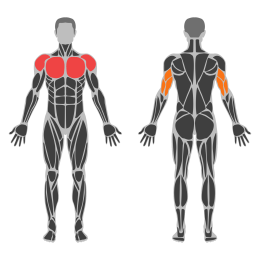
Cable flyes on knees target the chest muscles, specifically the pectoralis major, while also engaging the shoulders and triceps. This exercise is performed using a cable machine with pulleys set at a high position. Kneeling provides stability and focuses the movement on the chest by minimizing leg involvement.
Muscle focus
Step-by-step cues
- Position the pulleys on a cable machine at a high setting.
- Attach handles to the cables and kneel down in the center of the machine.
- Hold a handle in each hand with your arms extended out to the sides, palms facing forward.
- Keep your back straight and core engaged throughout the exercise.
- Slowly bring your hands together in front of your chest in a wide arc, maintaining a slight bend in your elbows.
- Pause briefly when your hands meet, squeezing your chest muscles.
- Slowly return to the starting position, controlling the movement.
- Repeat for the desired number of repetitions.
Technical tips
- Ensure that your knees are comfortably positioned on a mat to avoid discomfort.
- Focus on squeezing your chest muscles at the peak of the movement for maximum engagement.
- Maintain a slight bend in your elbows throughout to protect your joints.
- Keep your movements slow and controlled to maximize muscle tension and prevent injury.
- Engage your core to maintain balance and stability during the exercise.
- Avoid using momentum; let your chest muscles do the work.
Friday
Mobility
Complete 20 minutes of full-body mobility and relaxed walking.
Saturday
Conditioning Circuit
Conditioning Circuit muscle focus
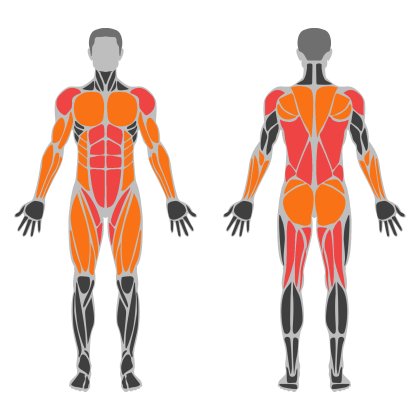
Red marks the primary training focus. Orange marks supporting muscle groups used throughout this session.
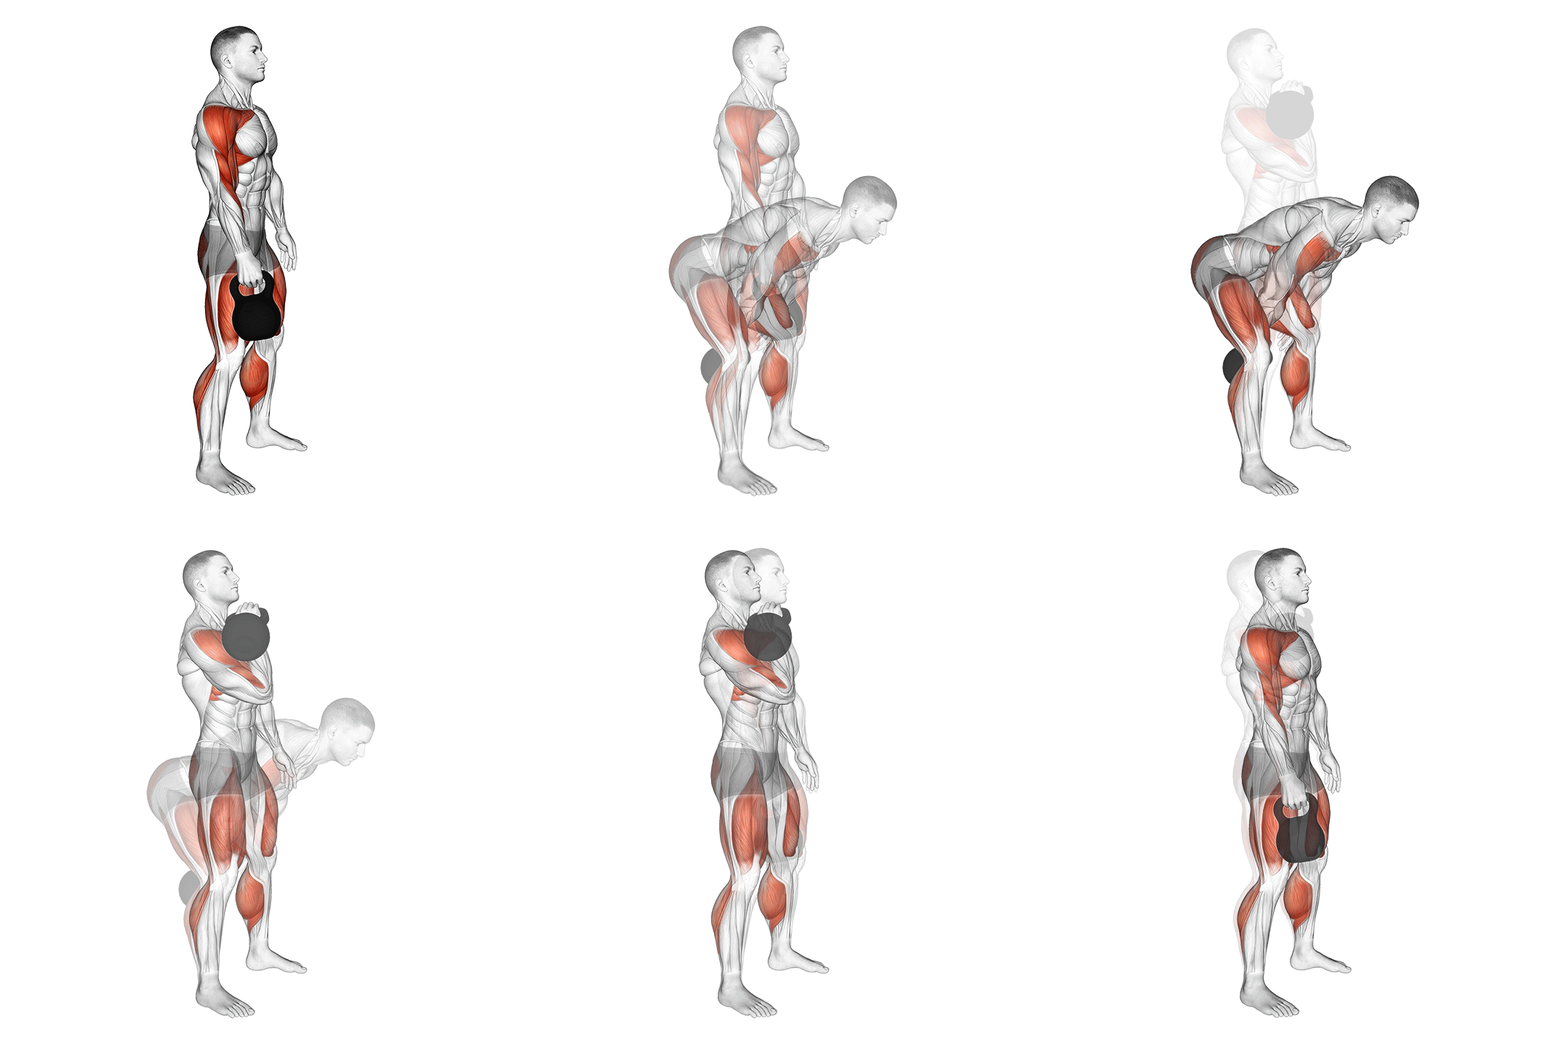
Kettelbell Clean
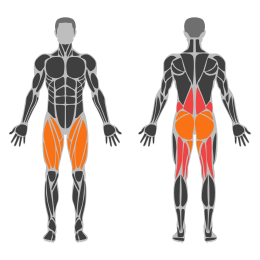
The Kettlebell Clean is a dynamic exercise that involves lifting a kettlebell from the ground to the rack position in one fluid motion. It is designed to improve strength, power, and coordination, primarily targeting the posterior chain, shoulders, and core muscles.
Muscle focus
Step-by-step cues
- Stand with your feet shoulder-width apart and place a kettlebell between your feet.
- Bend at the hips and knees to grip the kettlebell handle with one hand, keeping your back straight and chest up.
- Engage your core and drive through your heels to lift the kettlebell off the ground.
- As the kettlebell rises, pull it close to your body by bending your elbow and rotating your wrist.
- Quickly tuck your elbow into your side and allow the kettlebell to rotate around your forearm into the rack position.
- Stand tall with the kettlebell resting on the outside of your forearm, elbow close to your body.
- Reverse the motion to lower the kettlebell back to the starting position.
Technical tips
- Keep your core engaged throughout the movement to maintain stability.
- Use a smooth, controlled motion to bring the kettlebell into the rack position.
- Avoid swinging the kettlebell away from your body; keep it close during the lift.
- Practice with a lighter weight to master form before progressing to heavier kettlebells.
- Ensure that your wrist remains neutral in the rack position to prevent strain.
- Focus on driving through your heels during the initial lift for maximum power.
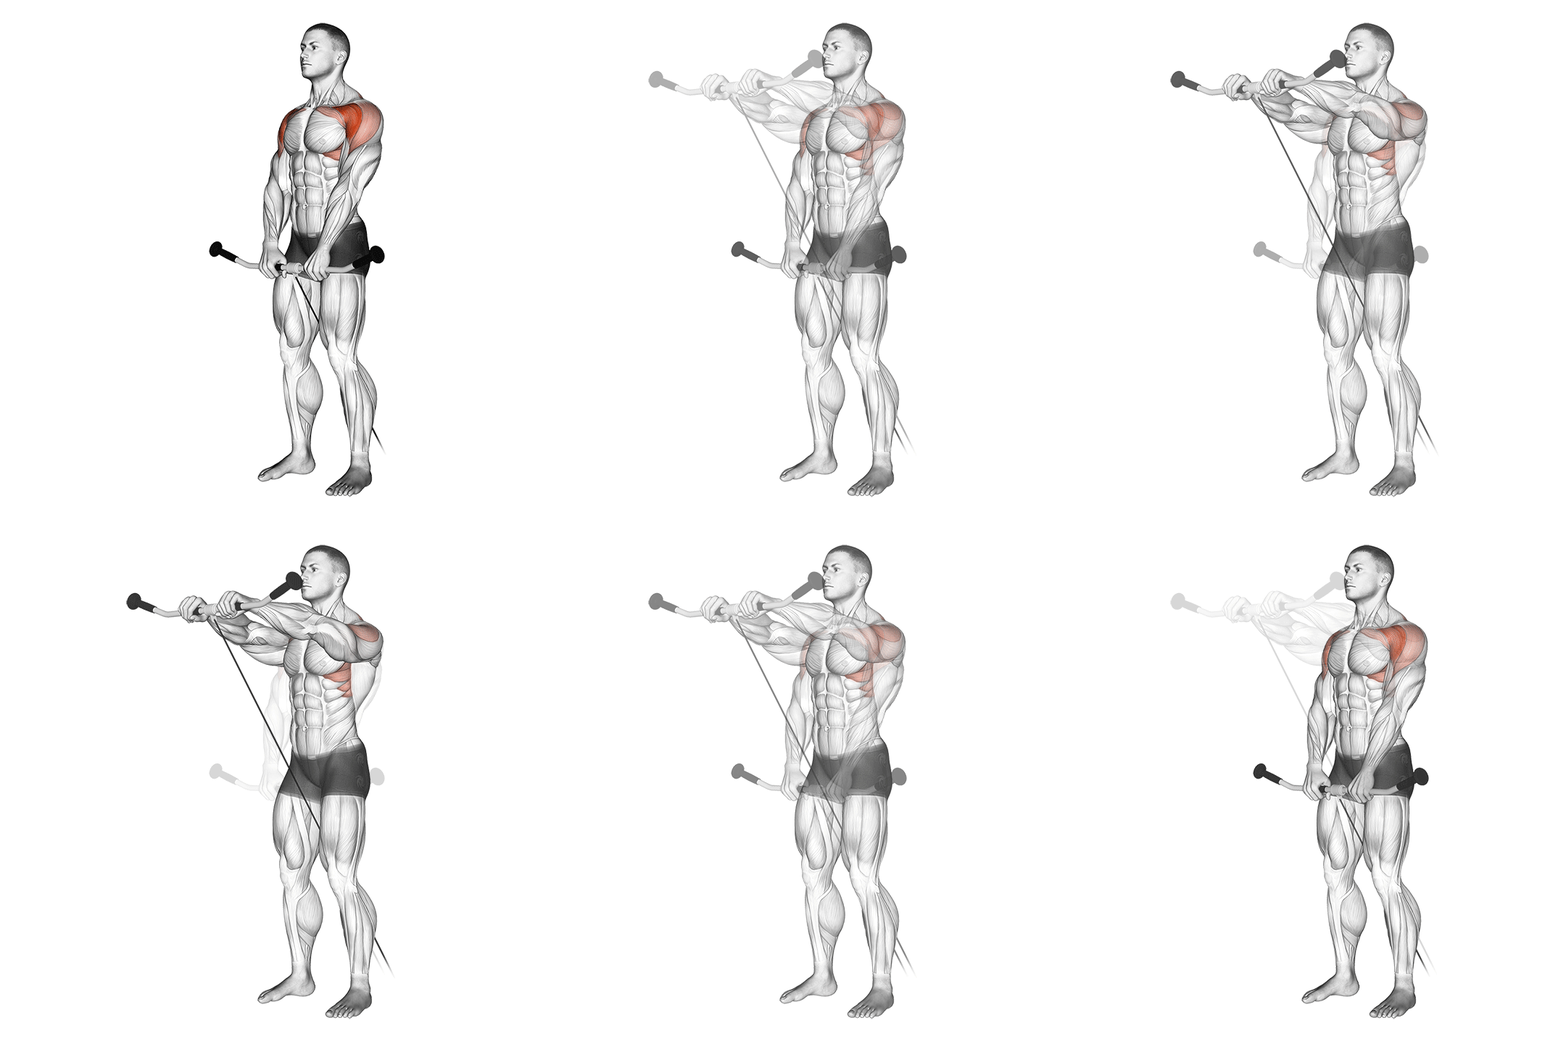
Cable Front Raise
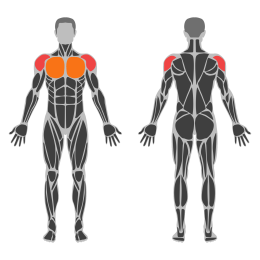
The Cable Front Raise is an isolation exercise targeting the anterior deltoids. It involves lifting a cable handle in front of the body, engaging the shoulder muscles to raise the arm. This exercise helps in building shoulder strength and improving muscle definition.
Muscle focus
Step-by-step cues
- Attach a straight bar or single handle to the low pulley of a cable machine.
- Stand facing away from the machine, feet shoulder-width apart, and grasp the handle with an overhand grip.
- Position your arms straight down in front of your thighs with a slight bend in the elbows.
- Engage your core and keep your back straight throughout the movement.
- Exhale as you lift the handle forward and upward until your arms are parallel to the floor.
- Pause briefly at the top of the movement, ensuring tension in the shoulders.
- Inhale as you slowly lower the handle back to the starting position with control.
- Repeat for the desired number of repetitions.
Technical tips
- Keep your movements slow and controlled to maximize muscle engagement.
- Avoid using momentum; focus on using your shoulder muscles to lift the weight.
- Maintain a slight bend in your elbows throughout to reduce joint strain.
- Ensure your shoulders do not shrug during the lift; keep them down and relaxed.
- Start with a lighter weight to master form before progressing to heavier loads.
- Keep your core tight to stabilize your body and prevent arching of the back.
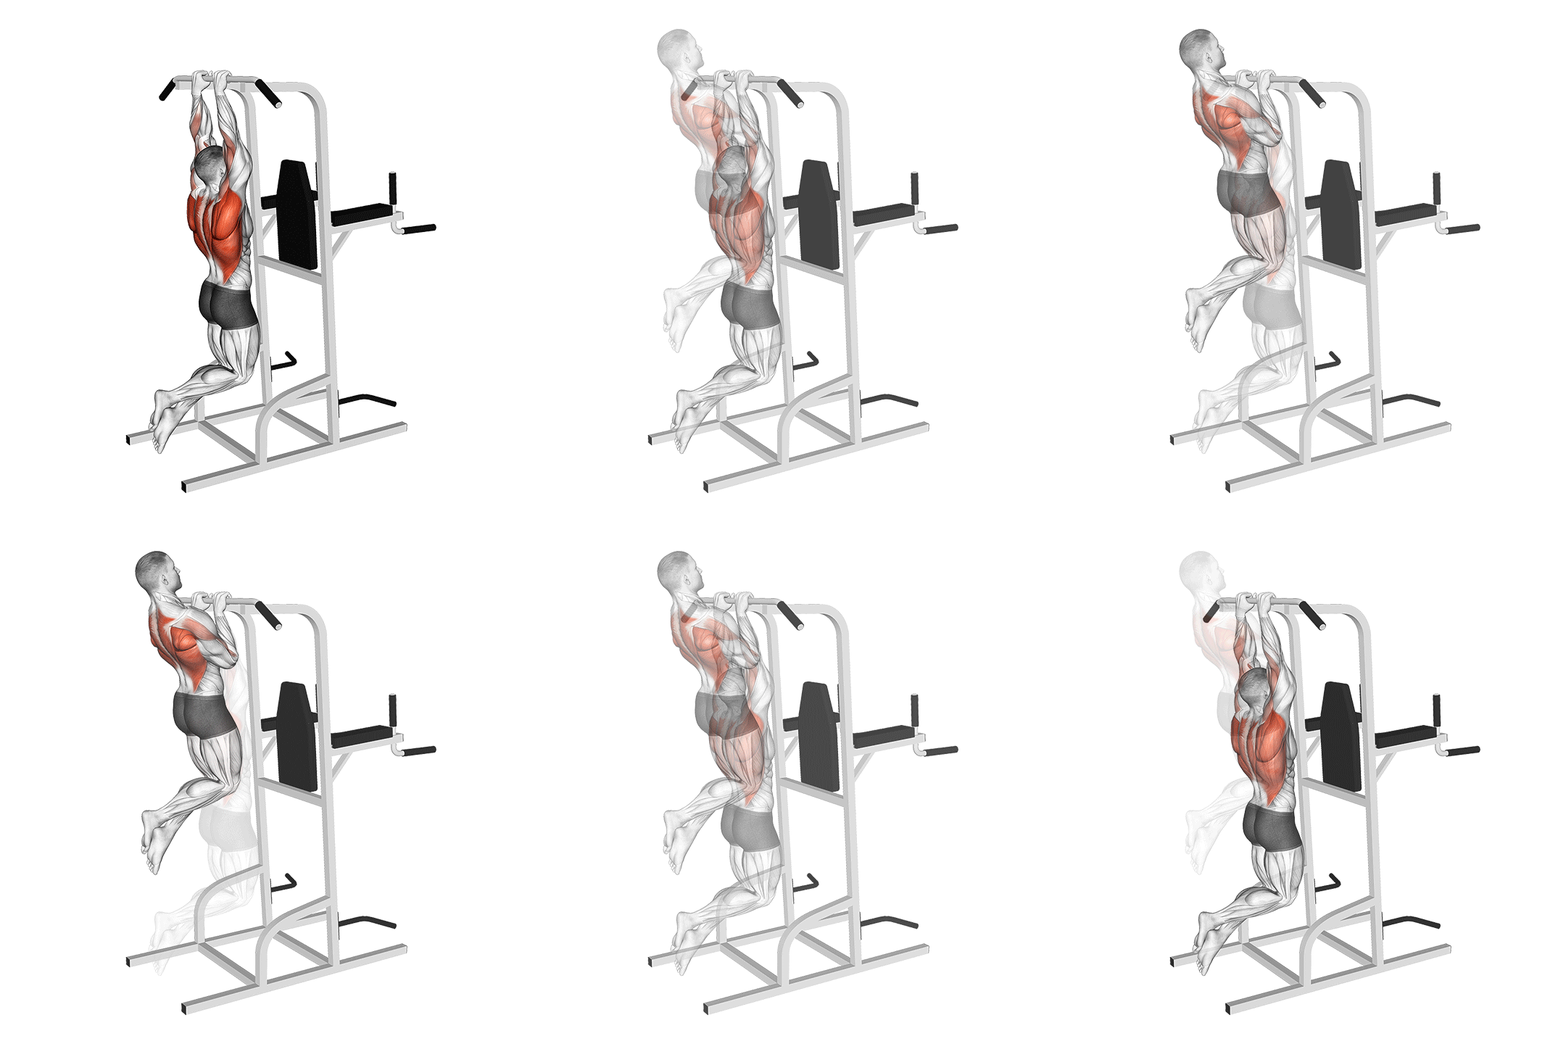
Close Grip Pull Up
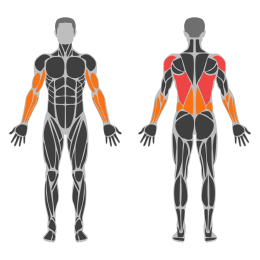
The Close Grip Pull-Up is a bodyweight exercise targeting the upper back, biceps, and forearms. It involves pulling your body upward using a narrow grip on a pull-up bar, emphasizing the inner back muscles and arm flexors.
Muscle focus
Step-by-step cues
- Stand under a pull-up bar and reach up to grasp it with a close grip, palms facing away from you, hands about shoulder-width apart.
- Hang from the bar with your arms fully extended and feet off the ground. Engage your core and keep your body straight.
- Initiate the pull by squeezing your shoulder blades together and pulling your elbows down towards your sides.
- Continue to pull until your chin is above the bar, keeping your elbows close to your body.
- Pause briefly at the top of the movement, then slowly lower yourself back to the starting position with control.
- Repeat for the desired number of repetitions.
Technical tips
- Ensure a full range of motion by fully extending your arms at the bottom of each rep.
- Focus on engaging your lats and biceps throughout the movement for maximum effectiveness.
- Avoid swinging or using momentum to lift yourself; maintain control throughout the exercise.
- If you're unable to perform a full pull-up, use resistance bands or an assisted pull-up machine to build strength.
- Keep your core tight to prevent excessive arching of the lower back during the exercise.
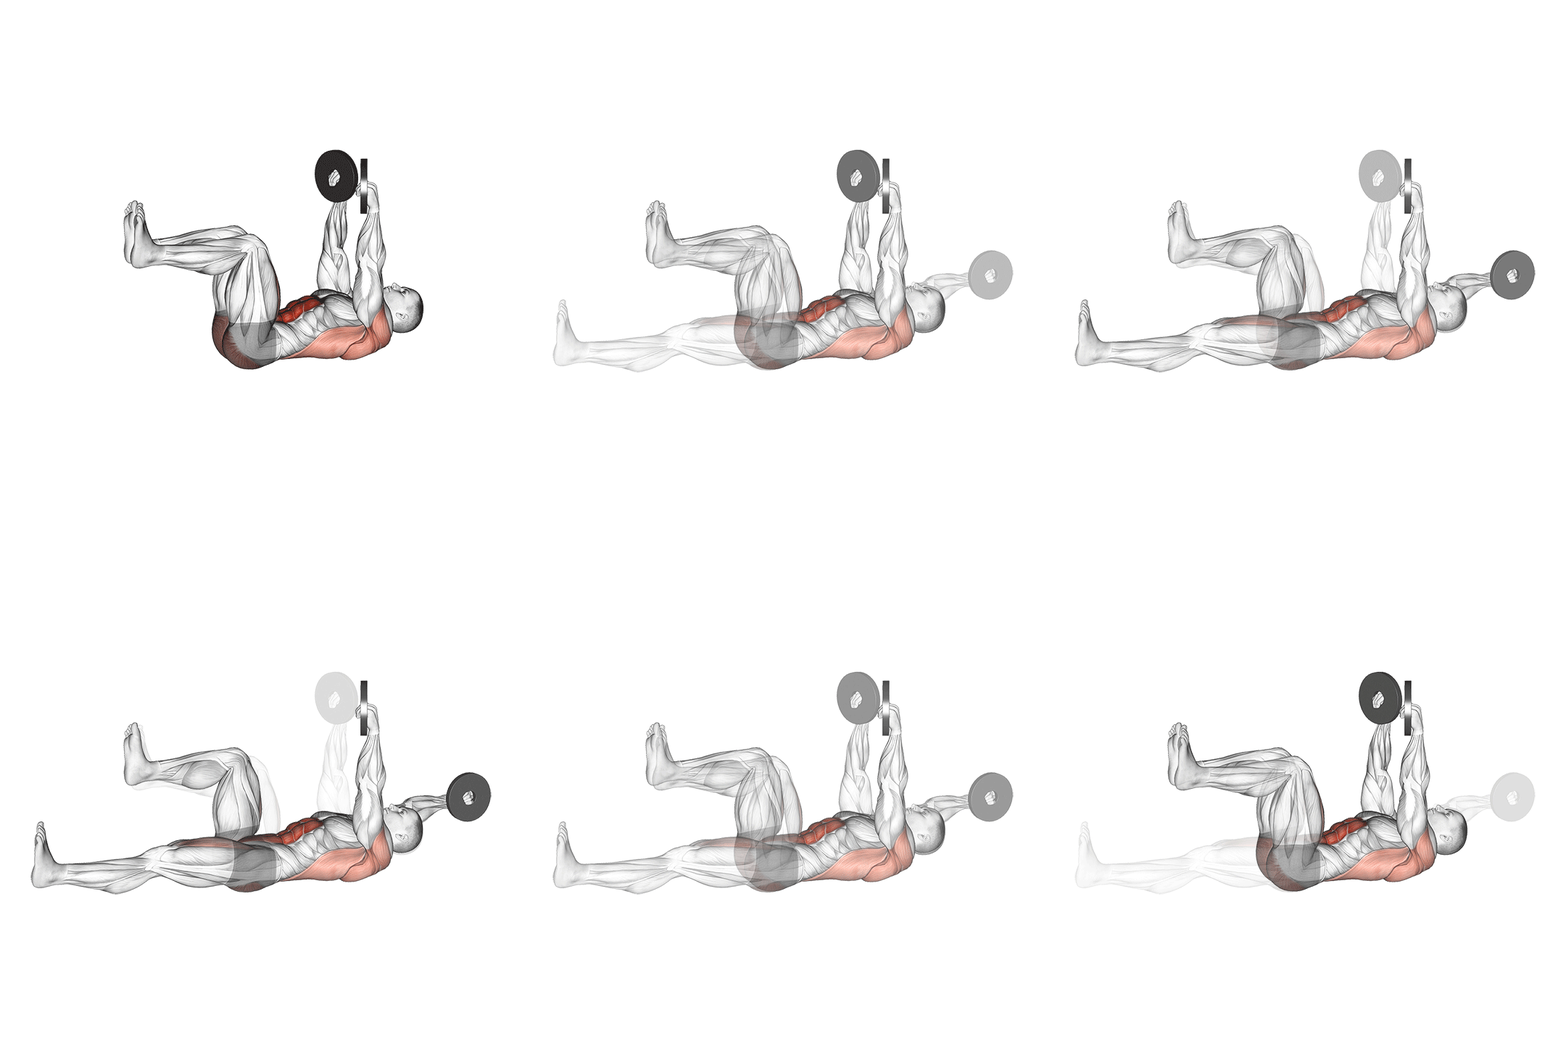
Weighted Dead Bug
The Weighted Dead Bug is a core strengthening exercise that enhances stability and coordination. It involves lying on your back while holding a weight and moving your arms and legs in a controlled manner to engage the abdominal muscles effectively.
Muscle focus
Step-by-step cues
- Lie flat on your back on a mat with your arms extended towards the ceiling, holding a dumbbell or weight plate in both hands.
- Lift your legs off the ground, bending your knees at a 90-degree angle so that your thighs are perpendicular to the floor.
- Engage your core by pulling your belly button towards your spine.
- Slowly lower your right arm and left leg towards the floor simultaneously, keeping your lower back pressed against the mat.
- Return to the starting position and repeat the movement with your left arm and right leg.
- Continue alternating sides for the desired number of repetitions.
Technical tips
- Focus on maintaining a neutral spine throughout the exercise to prevent lower back strain.
- Keep movements slow and controlled to maximize core engagement.
- Ensure that your lower back remains in contact with the mat at all times.
- Start with a lighter weight to master the form before progressing to heavier weights.
- Breathe steadily, exhaling as you lower your limbs and inhaling as you return to the starting position.
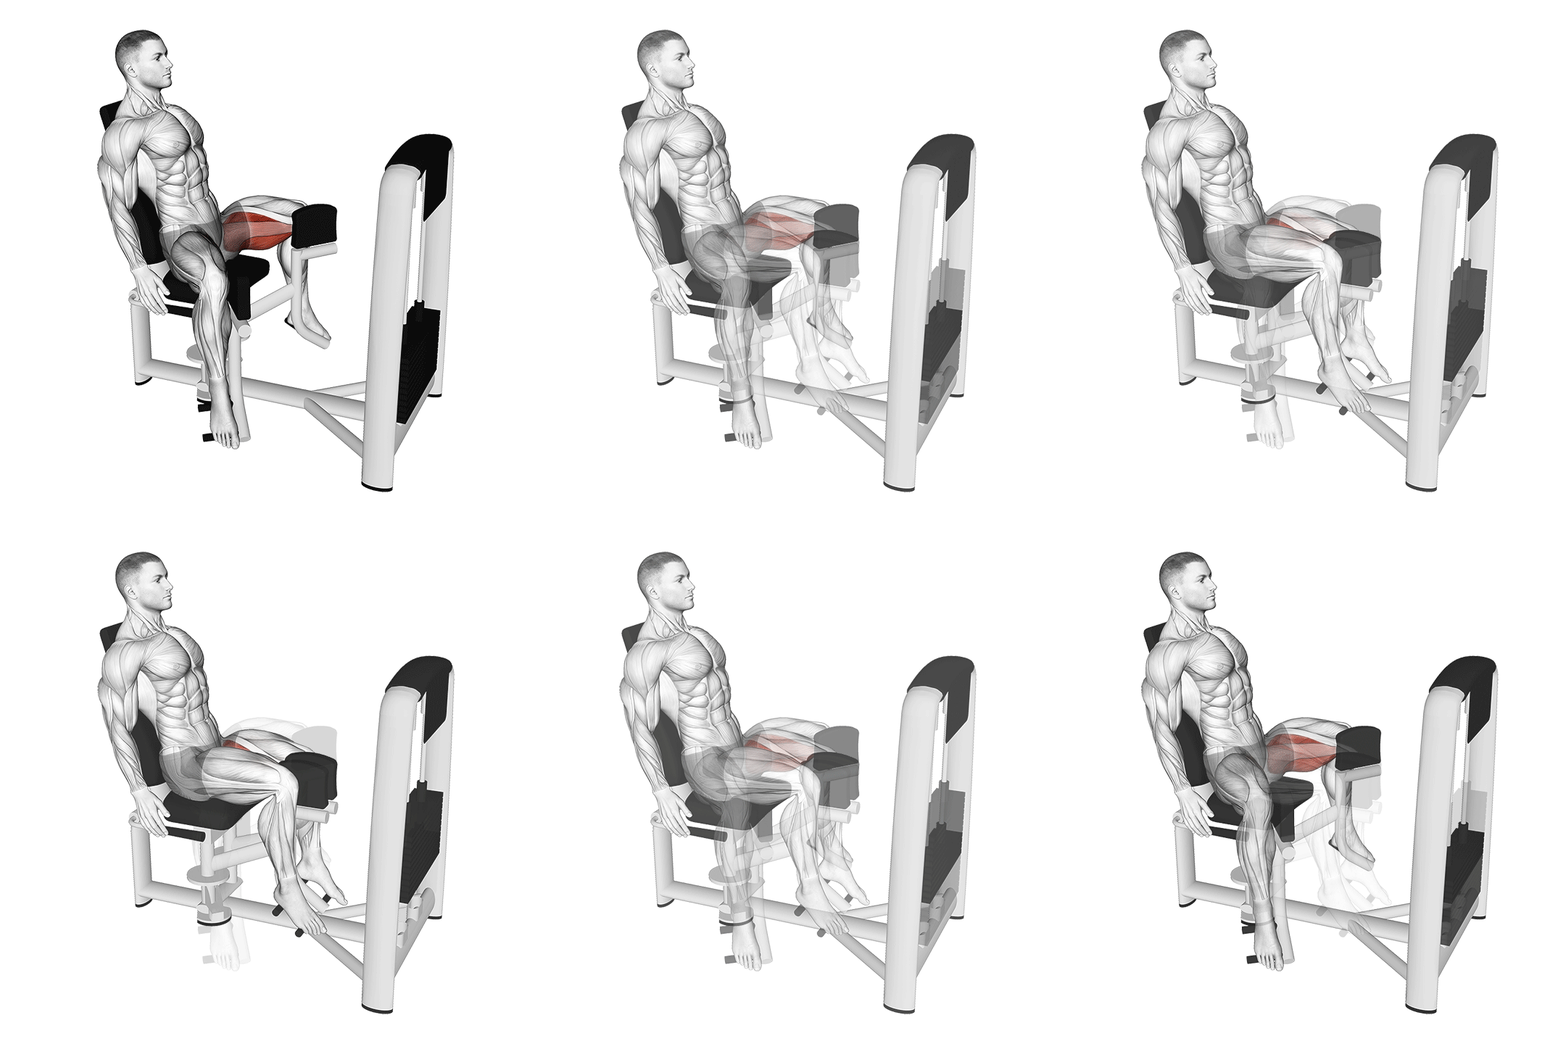
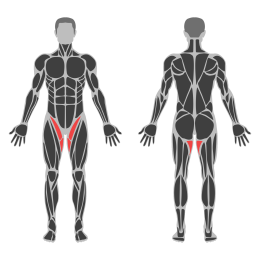
Seated Hip Adduction
The Seated Hip Adduction exercise targets the adductor muscles of the inner thighs. It is performed using a specialized machine that allows you to bring your legs together against resistance. This exercise is beneficial for strengthening and toning the inner thigh muscles, improving stability and balance.
Muscle focus
Step-by-step cues
- Adjust the seat and backrest of the hip adduction machine to ensure comfort and proper alignment.
- Sit on the machine with your back firmly against the backrest and feet placed on the footrests.
- Position your legs apart, placing your knees against the padded levers.
- Grip the handles on either side of the seat for stability.
- Exhale and slowly bring your knees together by contracting your inner thigh muscles.
- Pause briefly at the peak contraction point, ensuring full range of motion.
- Inhale and gradually return to the starting position, controlling the resistance throughout.
- Repeat for the desired number of repetitions.
Technical tips
- Ensure that your back remains straight and pressed against the backrest throughout the exercise to avoid strain.
- Focus on a slow and controlled movement to maximize muscle engagement and prevent injury.
- Start with a light weight to master proper form before progressing to heavier loads.
- Keep your core engaged to maintain stability during the exercise.
- Avoid locking your knees at any point during the movement to protect your joints.
- Breathe out as you bring your knees together and breathe in as you return to the starting position.
One-Arm Dumbbell Lateral Raise
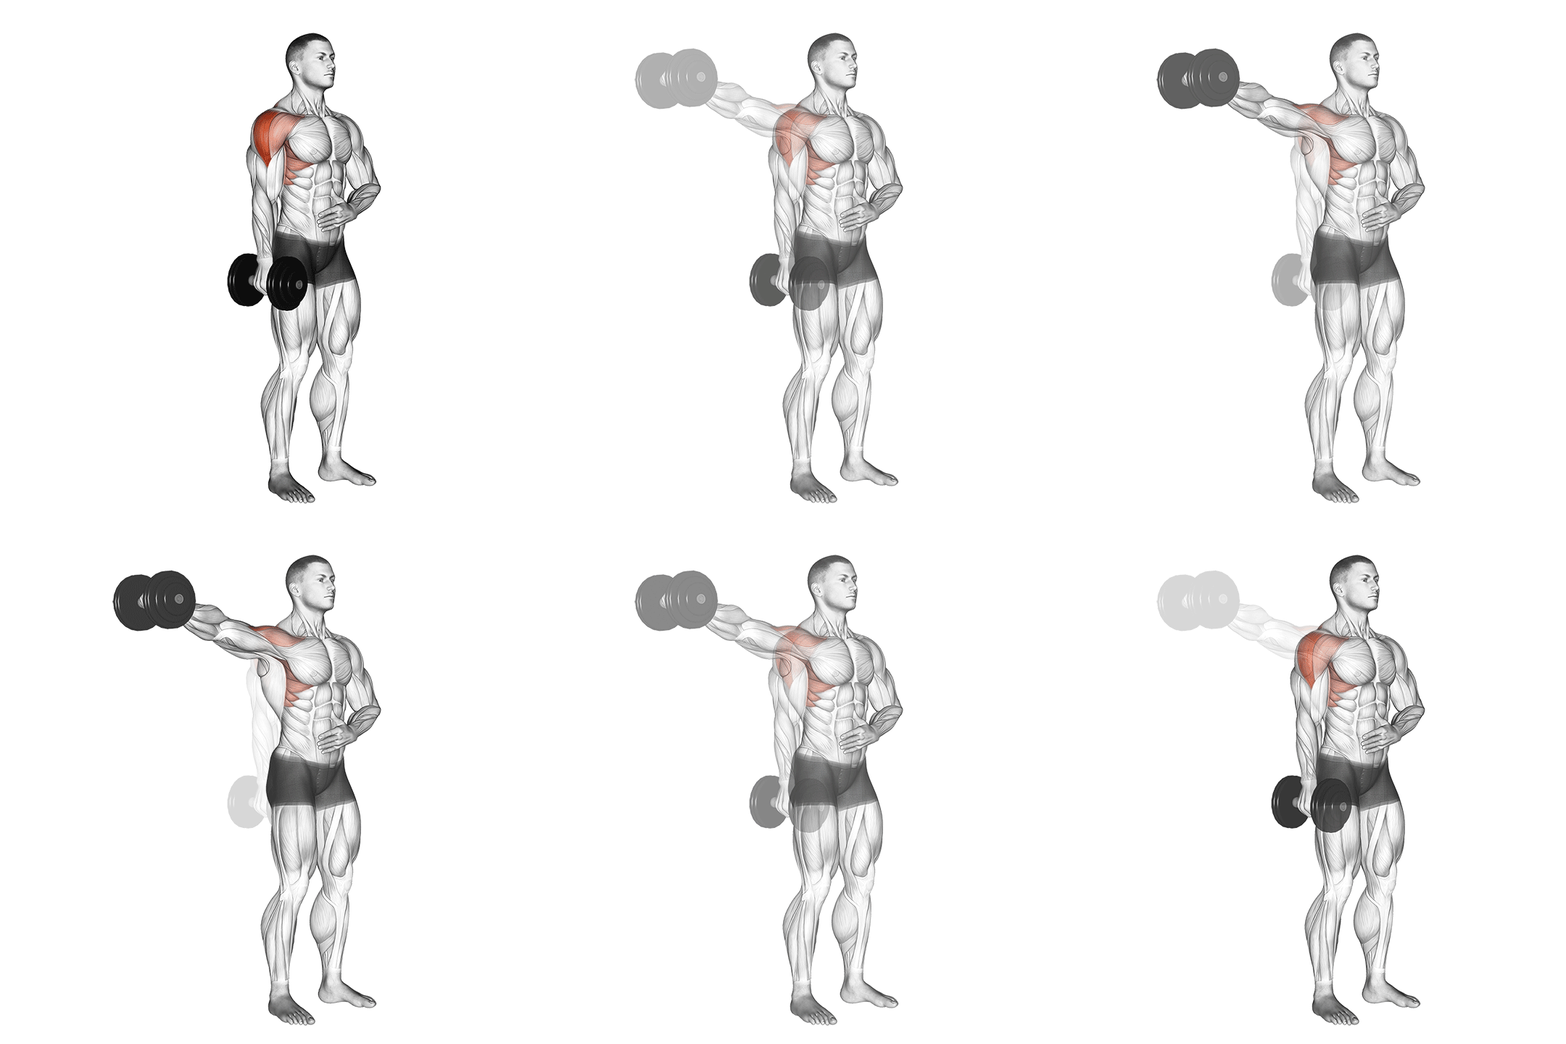
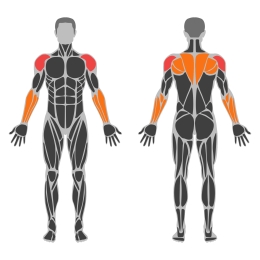
The One Arm Dumbbell Lateral Raise is an isolation exercise targeting the lateral deltoid muscle. It helps in building shoulder width and strength by lifting a dumbbell to the side of the body with one arm. This exercise is typically performed standing, allowing for greater range of motion and unilateral focus.
Muscle focus
Step-by-step cues
- Stand with your feet shoulder-width apart, holding a dumbbell in one hand with a neutral grip.
- Keep your core engaged and maintain a slight bend in your knees.
- Position your working arm slightly bent at the elbow, with the dumbbell resting against your outer thigh.
- Exhale as you raise the dumbbell to the side until your arm is parallel to the floor.
- Pause briefly at the top of the movement, ensuring your wrist is in line with your shoulder.
- Inhale as you slowly lower the dumbbell back to the starting position.
- Complete the desired number of repetitions before switching to the other arm.
Technical tips
- Focus on lifting with your shoulder, not your hand, to effectively target the lateral deltoid.
- Avoid using momentum; control the movement throughout for maximum muscle engagement.
- Keep your torso stationary and avoid leaning to either side during the lift.
- Start with a lighter weight to ensure proper form and gradually increase as you build strength.
- Maintain a slight bend in your elbow throughout the exercise to reduce strain on the joint.
- Perform this exercise in front of a mirror to monitor form and ensure balanced movement on both sides.
Sunday
Full Rest
Recover fully and review sleep, soreness and training quality.
Four-week progression
Nutrition guidance

- Start near maintenance calories and adjust slowly using training performance, hunger and body-weight trends.
- Target roughly 1.6-2.0 g of protein per kg of body weight per day across three to five meals.
- Use carbohydrates around training and include vegetables, fruit and healthy fats every day.
- Hydrate consistently and avoid treating one meal or one day as success or failure.
Use these numbers as practical starting ranges, not medical prescriptions. Adjust for your health, body size and activity, and consult a qualified professional when needed.