4-Week Glutes and Legs Shape Program: Progression Cycle 10
A progressive lower-body program for stronger glutes and legs with enough upper-body balance and recovery.
How to use this plan
Follow the days in order, log every working set, and finish each set with one to three good repetitions still available. Use the exercise animations to learn the movement and open the video when you need a full demonstration.
Monday
Glute Strength
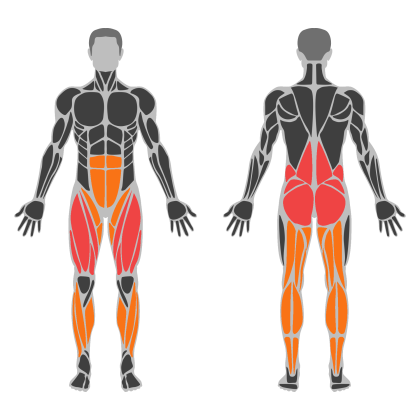
Glute Strength muscle focus
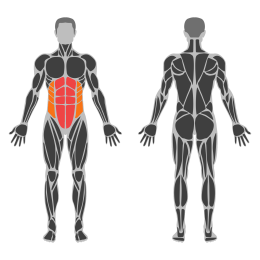
Red marks the primary training focus. Orange marks supporting muscle groups used throughout this session.
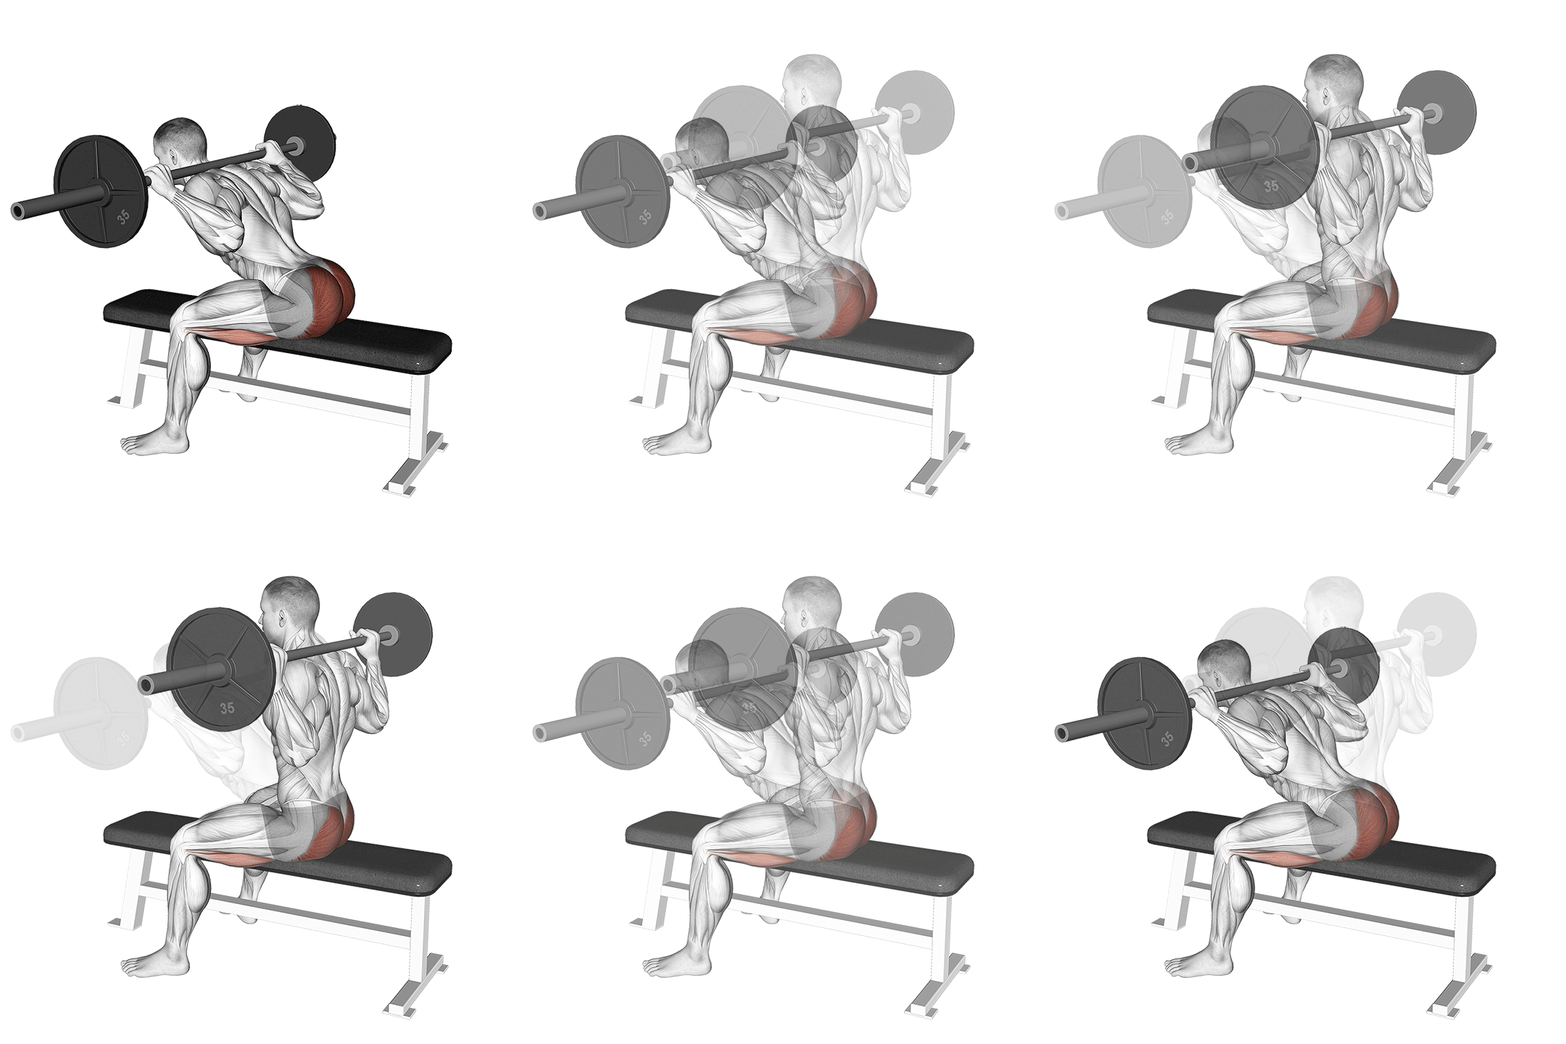
Seated Good Morning
The Seated Good Morning is a compound exercise targeting the lower back, glutes, and hamstrings. It involves bending at the hips while maintaining a straight back, performed while seated to isolate the posterior chain muscles more effectively.
Muscle focus
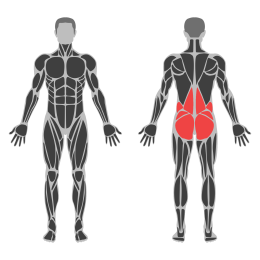
Step-by-step cues
- Sit on a bench with your feet flat on the floor, shoulder-width apart.
- Hold a barbell across your upper back, ensuring it is not resting on your neck.
- Engage your core and keep your chest up.
- Inhale deeply, then hinge forward at the hips, keeping your back straight and head aligned with your spine.
- Lower your torso until it is nearly parallel to the floor or as far as your flexibility allows.
- Exhale as you return to the starting position by contracting your glutes and hamstrings.
- Repeat for the desired number of repetitions.
Technical tips
- Ensure the barbell is securely positioned on your upper back, avoiding any pressure on the neck.
- Maintain a neutral spine throughout the movement to prevent injury.
- Focus on hinging at the hips rather than bending at the waist to engage the correct muscle groups.
- Control the descent and ascent to maximize muscle engagement and avoid momentum.
- Start with a lighter weight to master form before progressing to heavier loads.
- Keep your feet firmly planted to provide stability during the exercise.
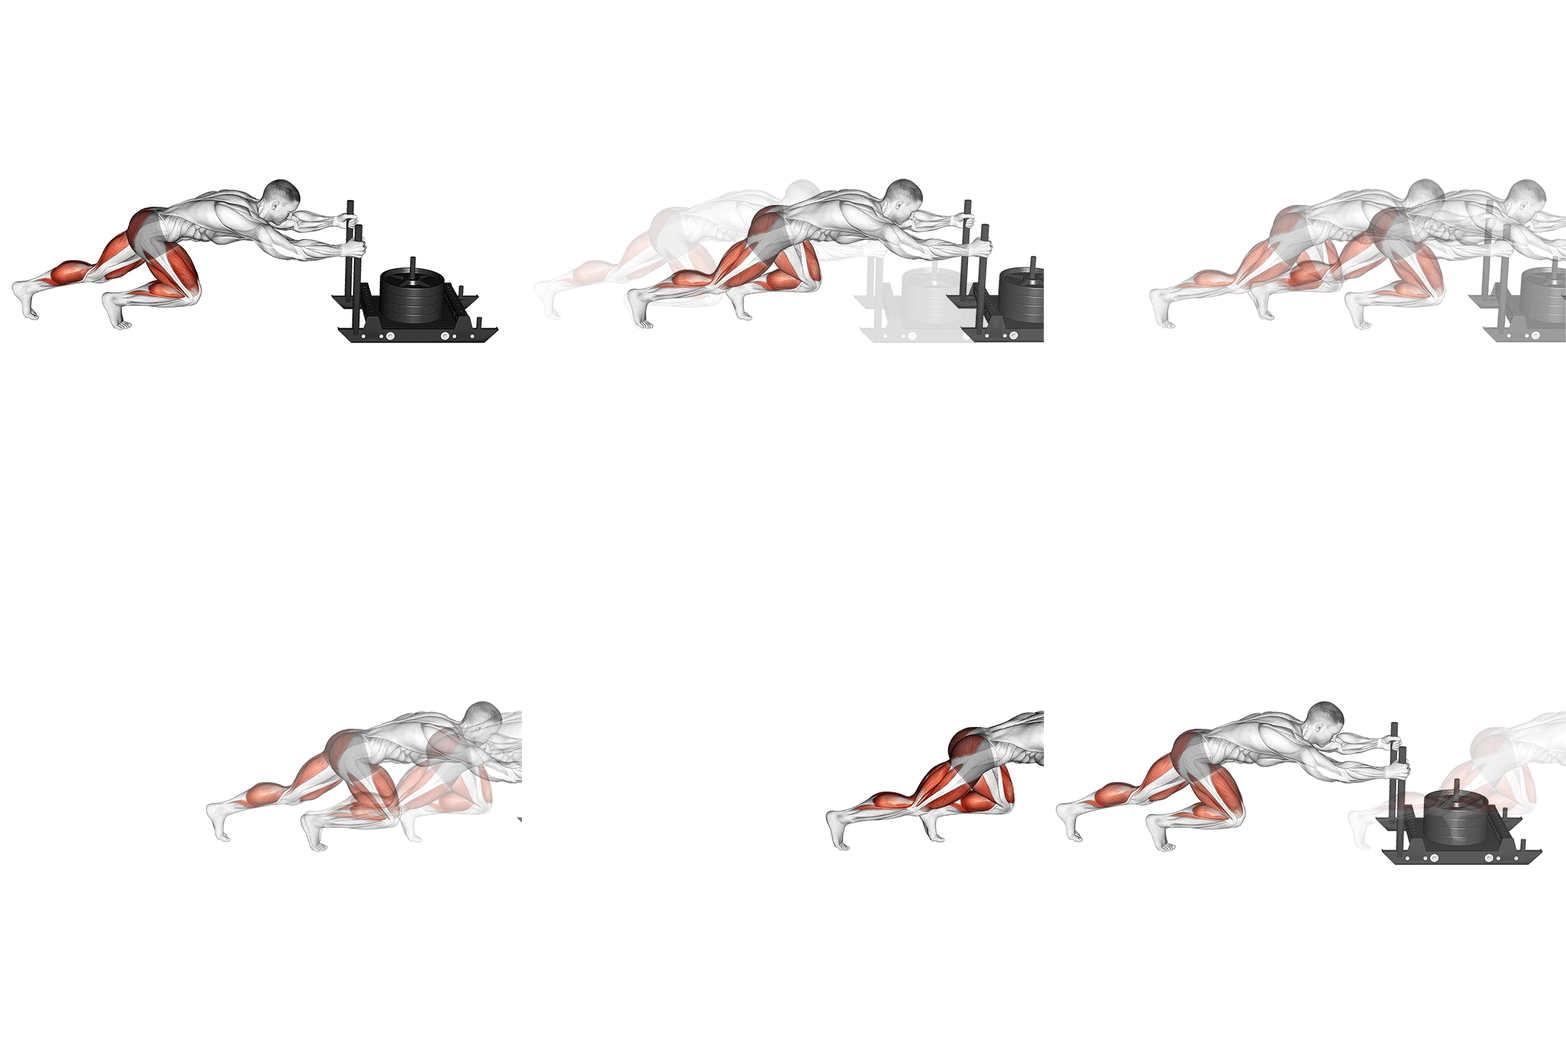
Prowler Sled
The Prowler Sled is a versatile piece of equipment used for strength and conditioning. It involves pushing or pulling a weighted sled across a surface, engaging multiple muscle groups including the legs, core, and upper body. This exercise is excellent for building power, endurance, and cardiovascular fitness.
Muscle focus
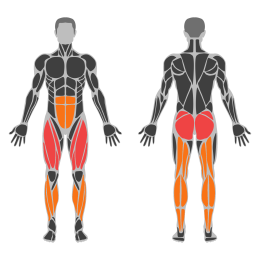
Step-by-step cues
- Begin by loading the sled with an appropriate amount of weight. Start light if you are new to this exercise.
- Position yourself behind the sled. Place your hands on the handles or the horizontal bar, depending on the sled design.
- Adopt a forward-leaning stance with your back straight and core engaged. Keep your feet shoulder-width apart.
- Drive through your legs and push the sled forward using powerful strides. Maintain a steady pace and control throughout.
- To pull the sled, attach straps to the sled and hold them securely. Walk backward or forward while pulling, keeping your core tight and movements controlled.
Technical tips
- Focus on maintaining a strong core throughout the movement to prevent lower back strain.
- Keep your strides consistent and avoid overextending your legs; this helps maintain balance and control.
- Start with lighter weights to perfect your form before increasing the load.
- Ensure you have enough space to perform the exercise safely, free from obstacles.
- Use this exercise as part of a circuit for conditioning or as a standalone for strength building.
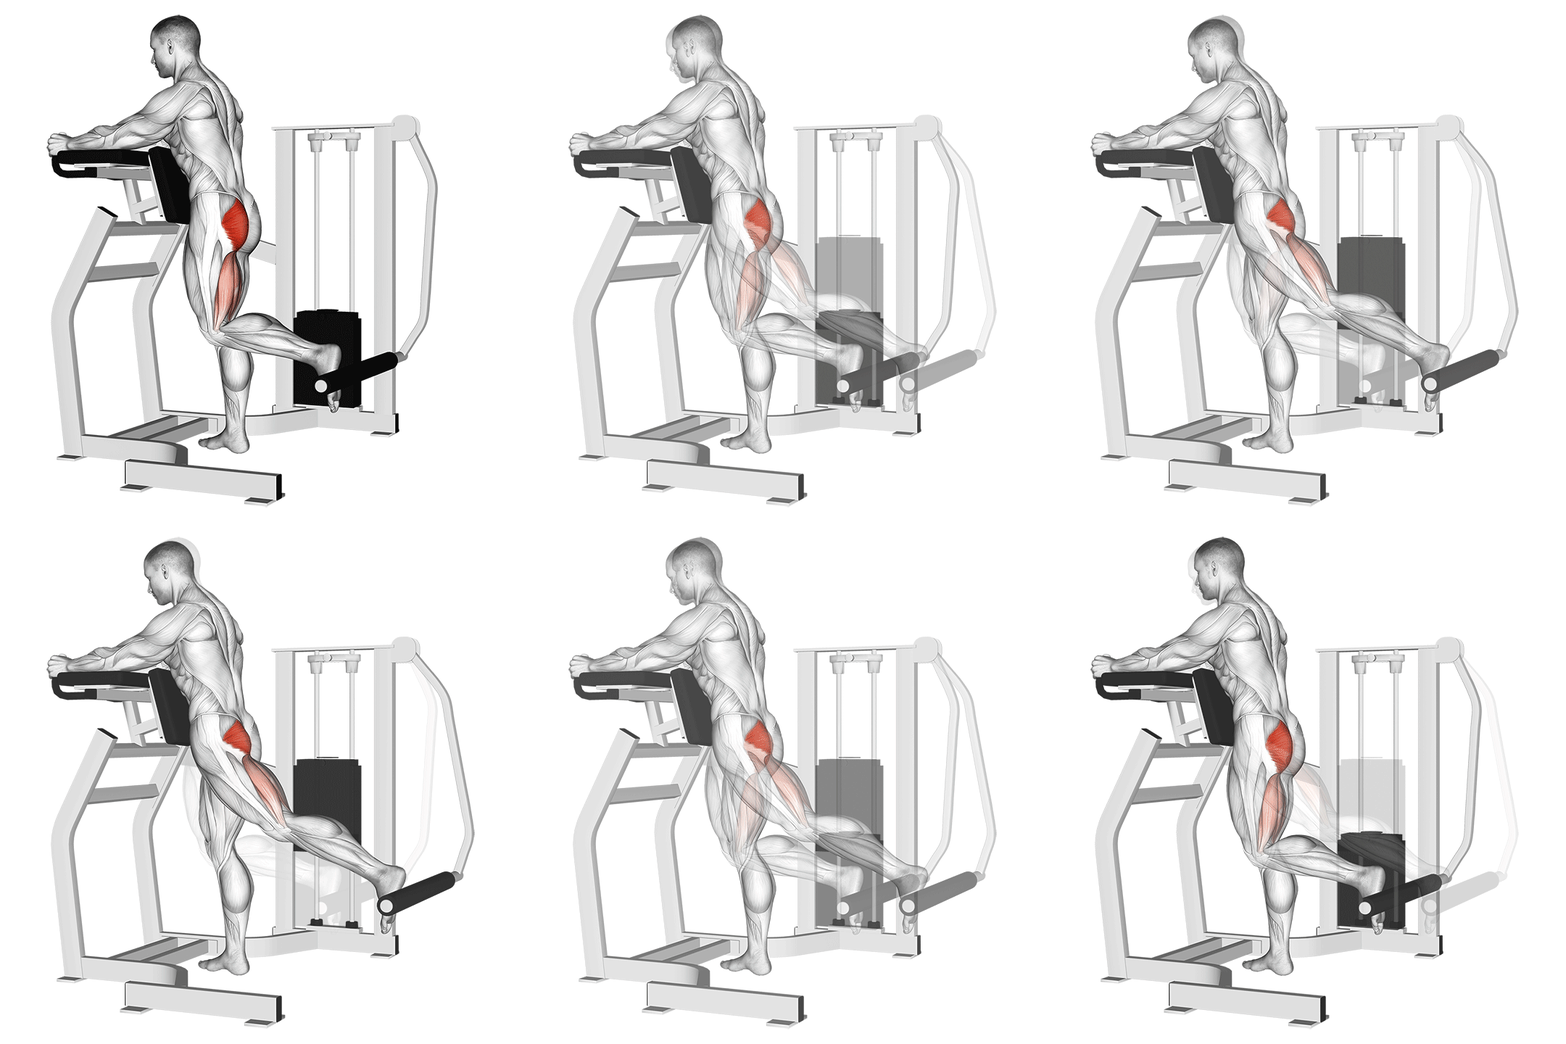
Glute Machine Kickback
The Glute Machine Kickback is an isolation exercise targeting the gluteus maximus. It involves extending the leg backward against resistance, focusing on strengthening and toning the glutes. This exercise is typically performed using a specialized machine designed to provide controlled resistance.
Muscle focus
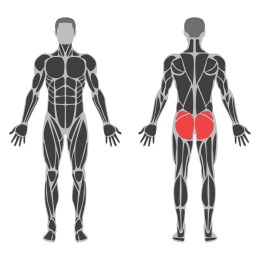
Step-by-step cues
- Adjust the machine settings to fit your height and secure the ankle strap around your lower leg.
- Stand facing the machine, holding onto the handles for support.
- Place one foot on the platform or pad, ensuring your knee is slightly bent.
- Engage your core and maintain a straight posture throughout the movement.
- Extend your leg backward in a controlled motion, squeezing your glutes at the top of the movement.
- Slowly return to the starting position without letting the weight stack touch down completely.
- Complete the desired number of repetitions before switching to the other leg.
Technical tips
- Focus on squeezing your glutes at the top of each kickback for maximum activation.
- Keep your movements slow and controlled to maintain tension on the muscles.
- Avoid arching your back; keep your core engaged to support proper posture.
- Adjust the machine settings if you feel discomfort or improper alignment.
- Start with a lighter weight to perfect your form before increasing resistance.
- Breathe out as you extend your leg and inhale as you return to the starting position.
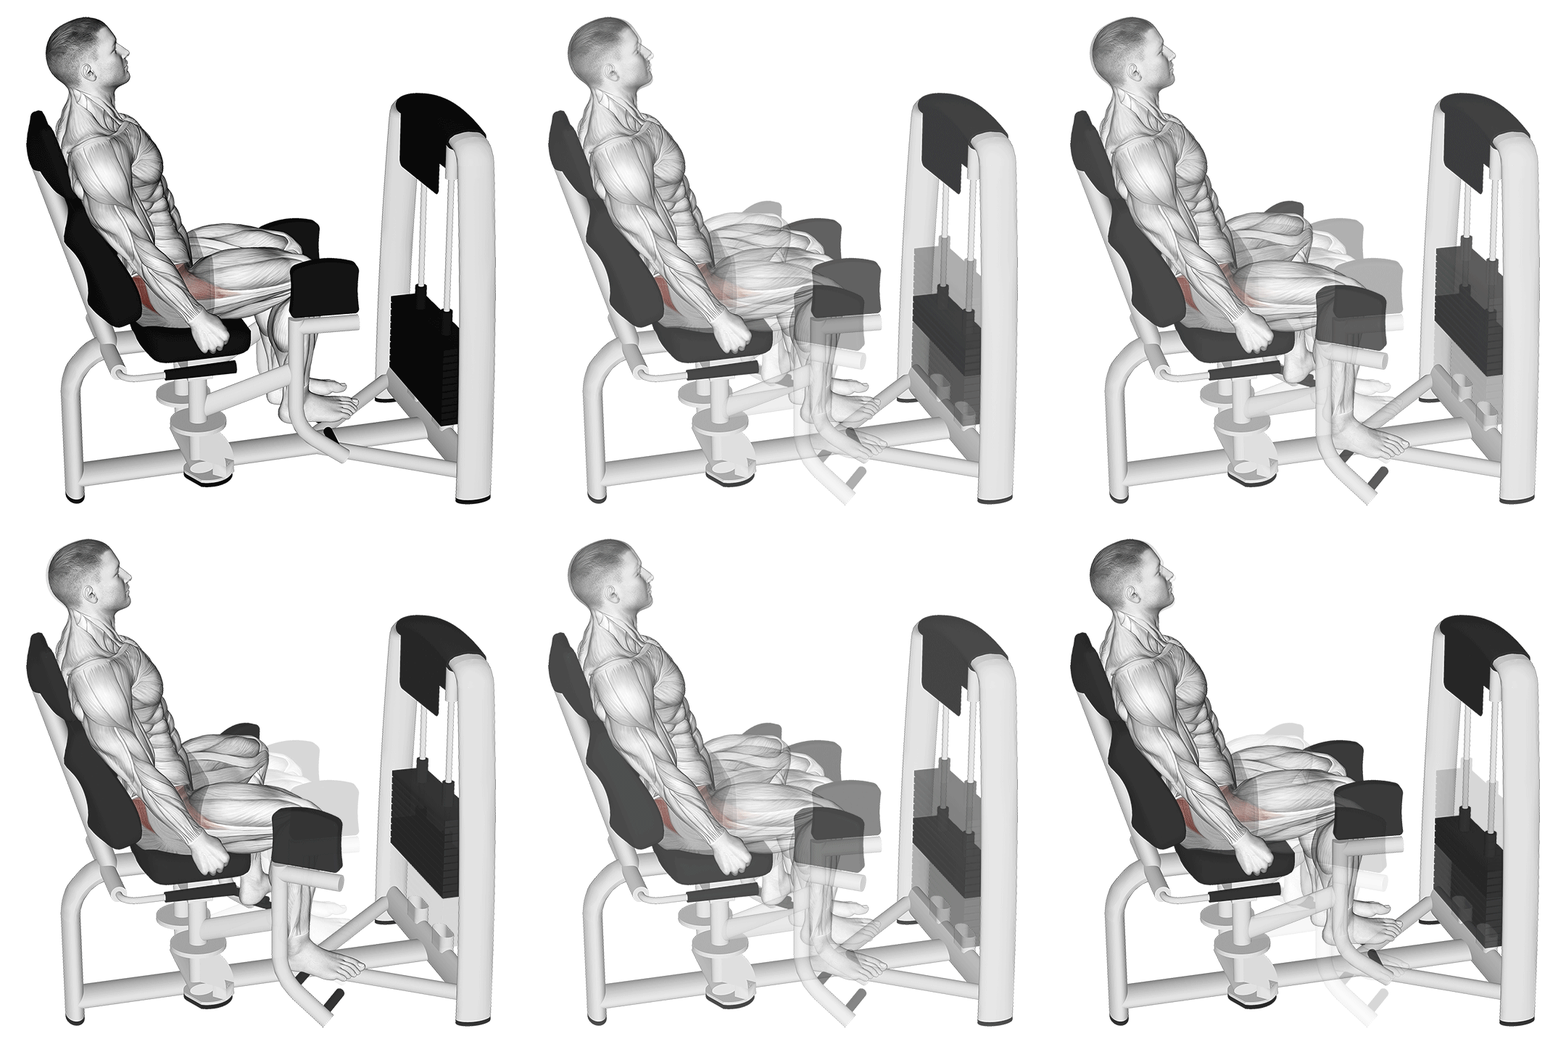
Seated Hip Abduction
The Seated Hip Abduction exercise targets the hip abductor muscles, primarily the gluteus medius and minimus. It is performed using a specialized machine where you sit with your legs together and push them apart against resistance. This exercise helps improve hip stability, balance, and overall lower body strength.
Muscle focus
Step-by-step cues
- Adjust the seat and backrest of the machine to ensure your knees are aligned with the pivot point of the machine.
- Sit on the machine with your back straight and feet flat on the footrests.
- Place your knees inside the padded levers, keeping them together.
- Grip the handles or sides of the seat for stability.
- Exhale and slowly push your knees apart as far as comfortable, engaging your hip abductors.
- Pause briefly at the widest point, ensuring tension in the muscles.
- Inhale and slowly return to the starting position with control.
- Repeat for the desired number of repetitions.
Technical tips
- Maintain a neutral spine throughout the exercise to avoid strain on your lower back.
- Focus on using your hip muscles rather than pushing with your feet or legs.
- Control the movement both when separating and bringing your knees together to maximize muscle engagement.
- Start with a lighter weight to ensure proper form before increasing resistance.
- Avoid locking your knees at any point during the exercise to maintain continuous tension on the muscles.
- Keep your breathing steady; exhale during exertion and inhale when returning to start.
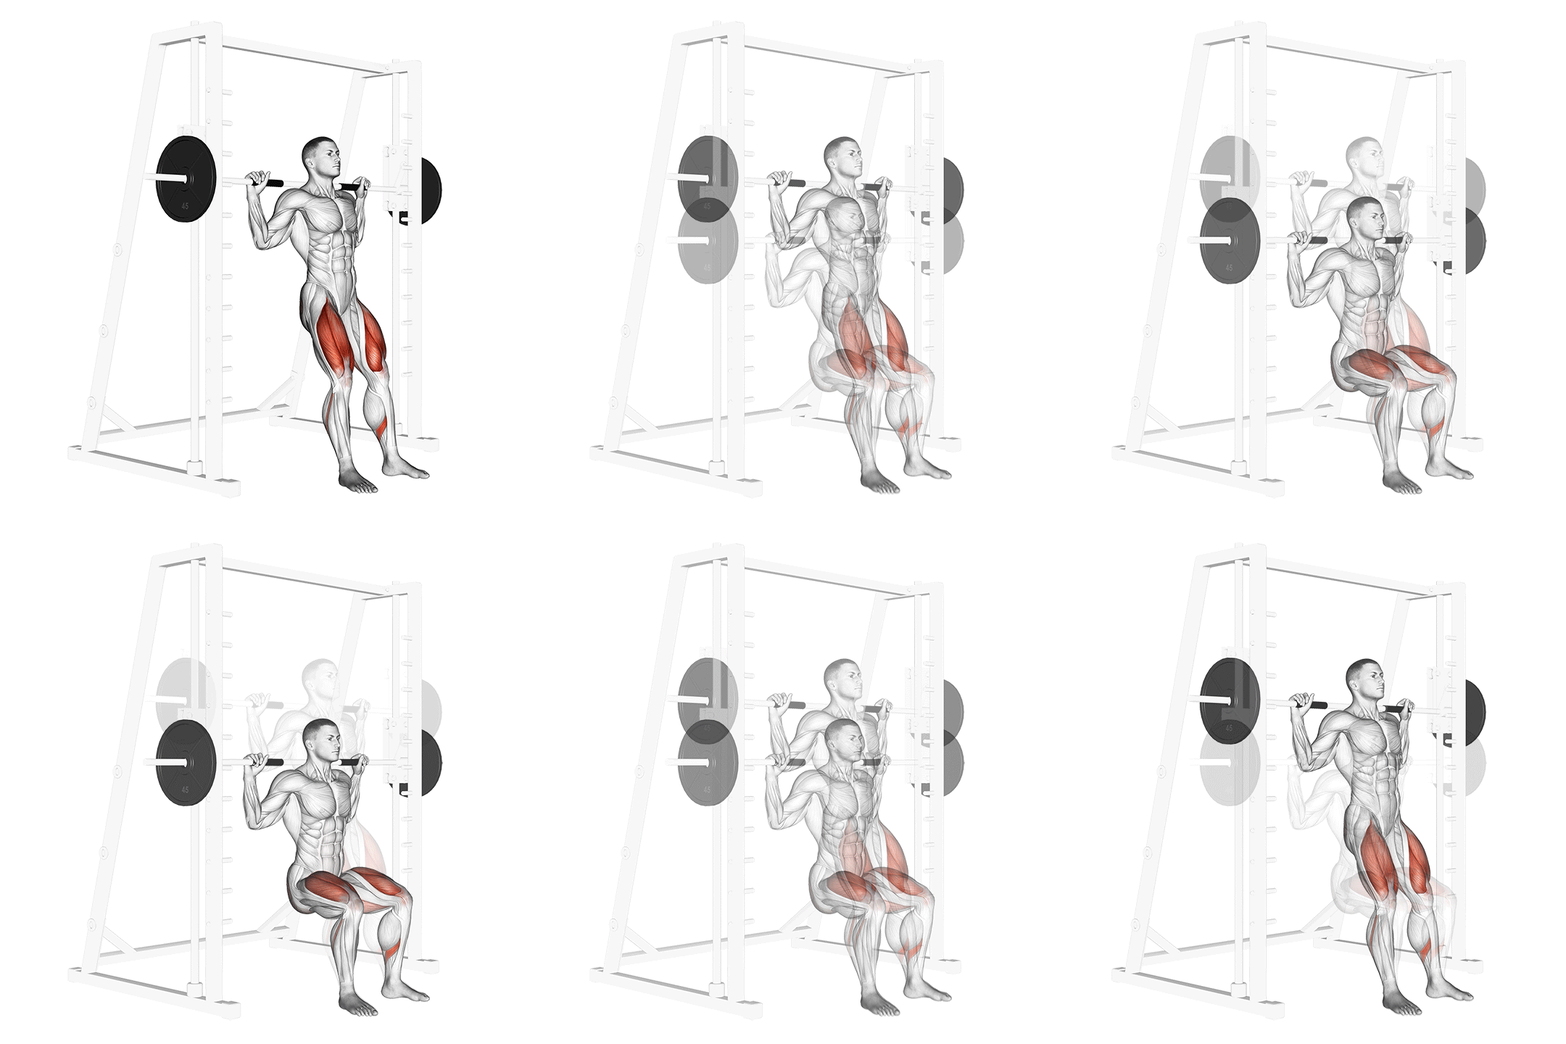
Smith Chair Squat
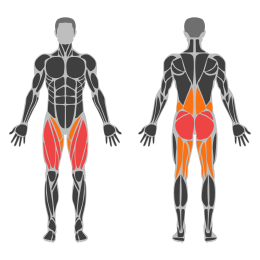
The Smith Chair Squat is a lower body exercise performed using a Smith machine. It targets the quadriceps, hamstrings, glutes, and calves. The exercise involves squatting down as if sitting on an imaginary chair, providing stability and control through the guided bar path of the Smith machine.
Muscle focus
Step-by-step cues
- Set the Smith machine bar to shoulder height and lock it in place.
- Stand with your feet shoulder-width apart, positioning yourself under the bar so it rests comfortably across your upper back.
- Grip the bar with both hands slightly wider than shoulder-width apart.
- Unlatch the bar by rotating it forward and step back slightly to clear the safety stops.
- Engage your core and keep your chest up as you begin to lower your body by bending at the hips and knees.
- Descend until your thighs are parallel to the ground or slightly below, ensuring your knees do not extend past your toes.
- Pause briefly at the bottom of the movement, maintaining tension in your legs.
- Push through your heels to return to the starting position, fully extending your hips and knees.
- Repeat for the desired number of repetitions.
Technical tips
- Keep your back straight and chest lifted throughout the movement to avoid unnecessary strain on your lower back.
- Ensure that your knees track over your toes during the squat to maintain proper alignment and prevent injury.
- Focus on engaging your core muscles to stabilize your torso during the exercise.
- Adjust the foot placement if necessary to find a comfortable position that allows for a full range of motion without compromising form.
- Control the descent and ascent speed to maximize muscle engagement and reduce risk of injury.
- Use a spotter or safety stops if you're lifting heavy weights for added security.
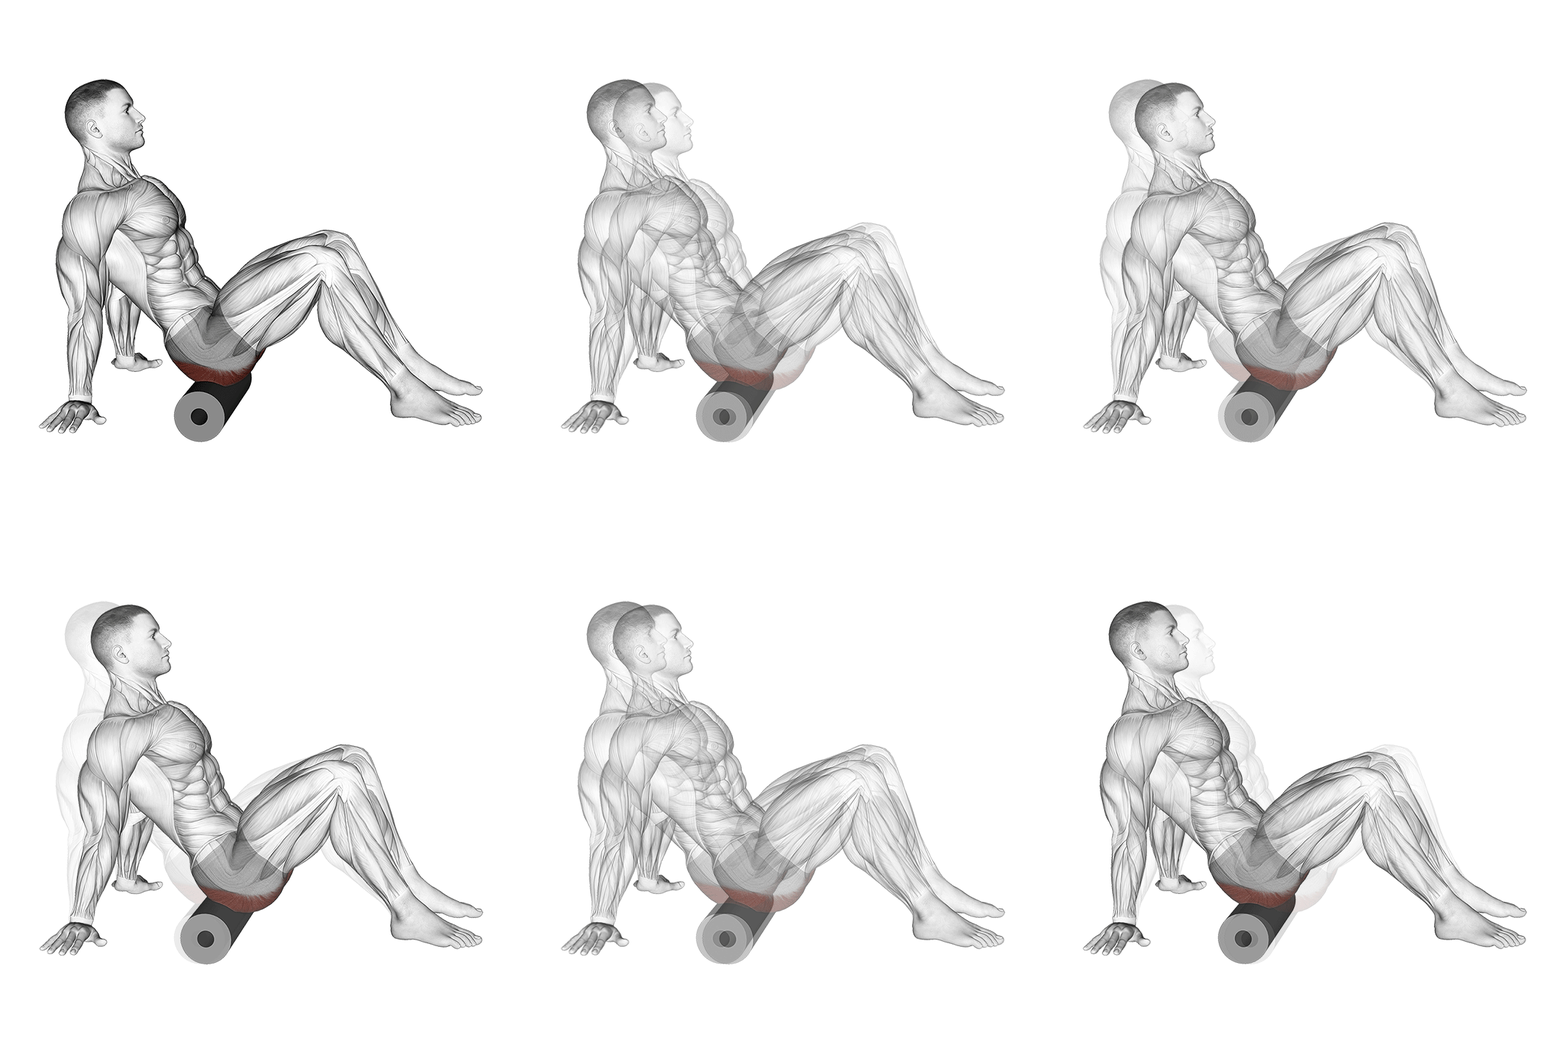
Glutes Roll
The Glutes Roll is a self-myofascial release exercise targeting the gluteal muscles. It involves using a foam roller to apply pressure to the glutes, helping to release tension, improve flexibility, and enhance muscle recovery.
Muscle focus
Step-by-step cues
- Sit on the floor with your legs extended and place a foam roller under your glutes.
- Bend your knees and place your feet flat on the floor.
- Cross your right ankle over your left knee to target the right glute.
- Place your hands on the floor behind you for support.
- Shift your weight onto the right glute and slowly roll back and forth from the top of the glute to the bottom.
- Continue rolling for 30-60 seconds, focusing on any tight or tender areas.
- Switch sides by crossing your left ankle over your right knee and repeat the process for the left glute.
Technical tips
- Maintain a steady pace while rolling to effectively target muscle tension.
- If you find a particularly tight spot, pause and hold pressure for 20-30 seconds to help release tension.
- Keep your core engaged to maintain stability during the exercise.
- Breathe deeply and relax your muscles as much as possible while rolling.
- Adjust the pressure by shifting more or less of your body weight onto the foam roller.
Tuesday
Recovery Walk
Walk for 30-45 minutes and complete hip mobility.
Wednesday
Upper Body Balance
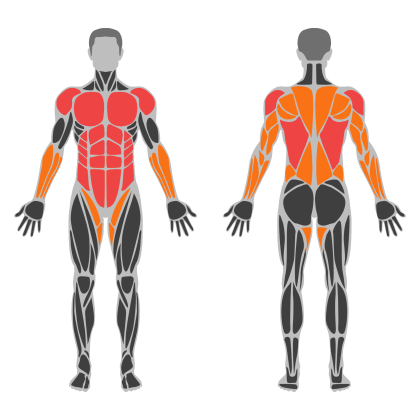
Upper Body Balance muscle focus
Red marks the primary training focus. Orange marks supporting muscle groups used throughout this session.
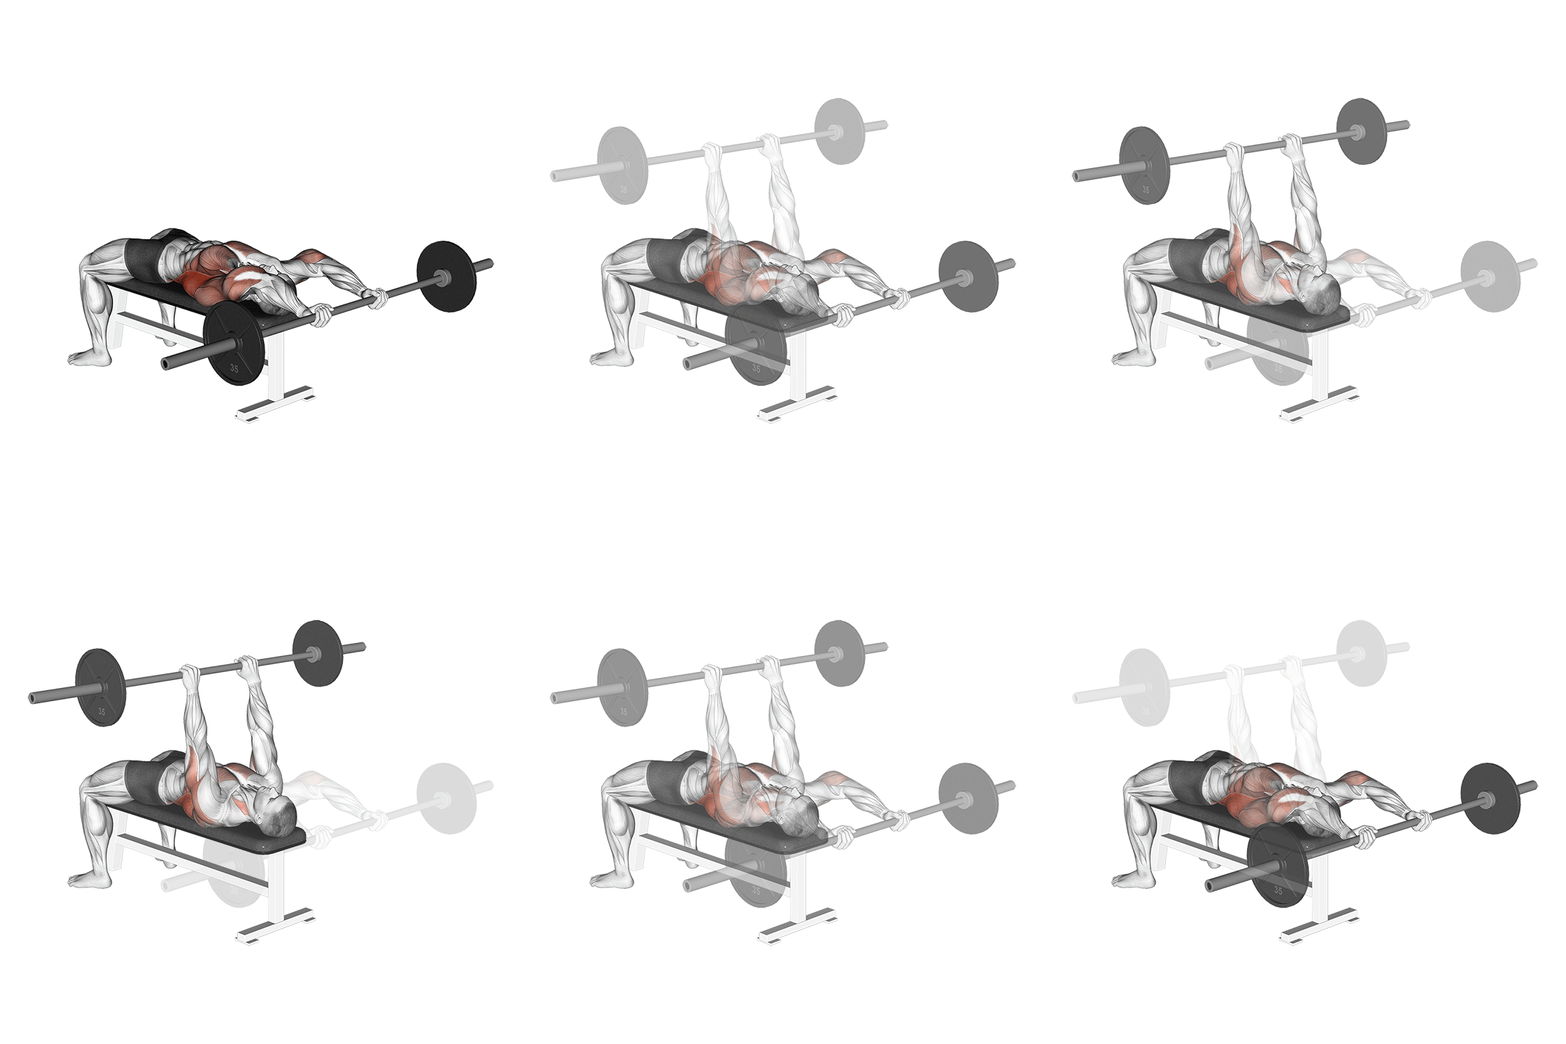
Barbell Pullover
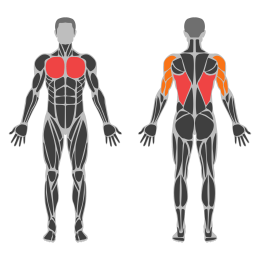
The barbell pullover is a compound exercise that primarily targets the chest and latissimus dorsi, while also engaging the triceps, shoulders, and core. It is performed lying on a bench with a barbell held above the chest, then lowering it behind the head in an arc motion.
Muscle focus
Step-by-step cues
- Lie flat on a bench with your feet firmly planted on the ground.
- Grip the barbell with both hands, shoulder-width apart, and hold it above your chest with arms extended.
- Engage your core and keep your back flat against the bench.
- Slowly lower the barbell in an arc over your head until you feel a stretch in your chest and lats.
- Pause briefly at the bottom of the movement.
- Return to the starting position by reversing the motion, keeping control of the barbell throughout.
- Repeat for the desired number of repetitions.
Technical tips
- Maintain a slight bend in your elbows throughout the exercise to reduce strain on the joints.
- Focus on controlled movements to maximize muscle engagement and reduce injury risk.
- Keep your core engaged to prevent arching of the lower back during the exercise.
- Use a weight that allows you to perform the exercise with proper form; it's better to start light and increase gradually.
- Ensure that your head and neck remain in a neutral position during the movement.
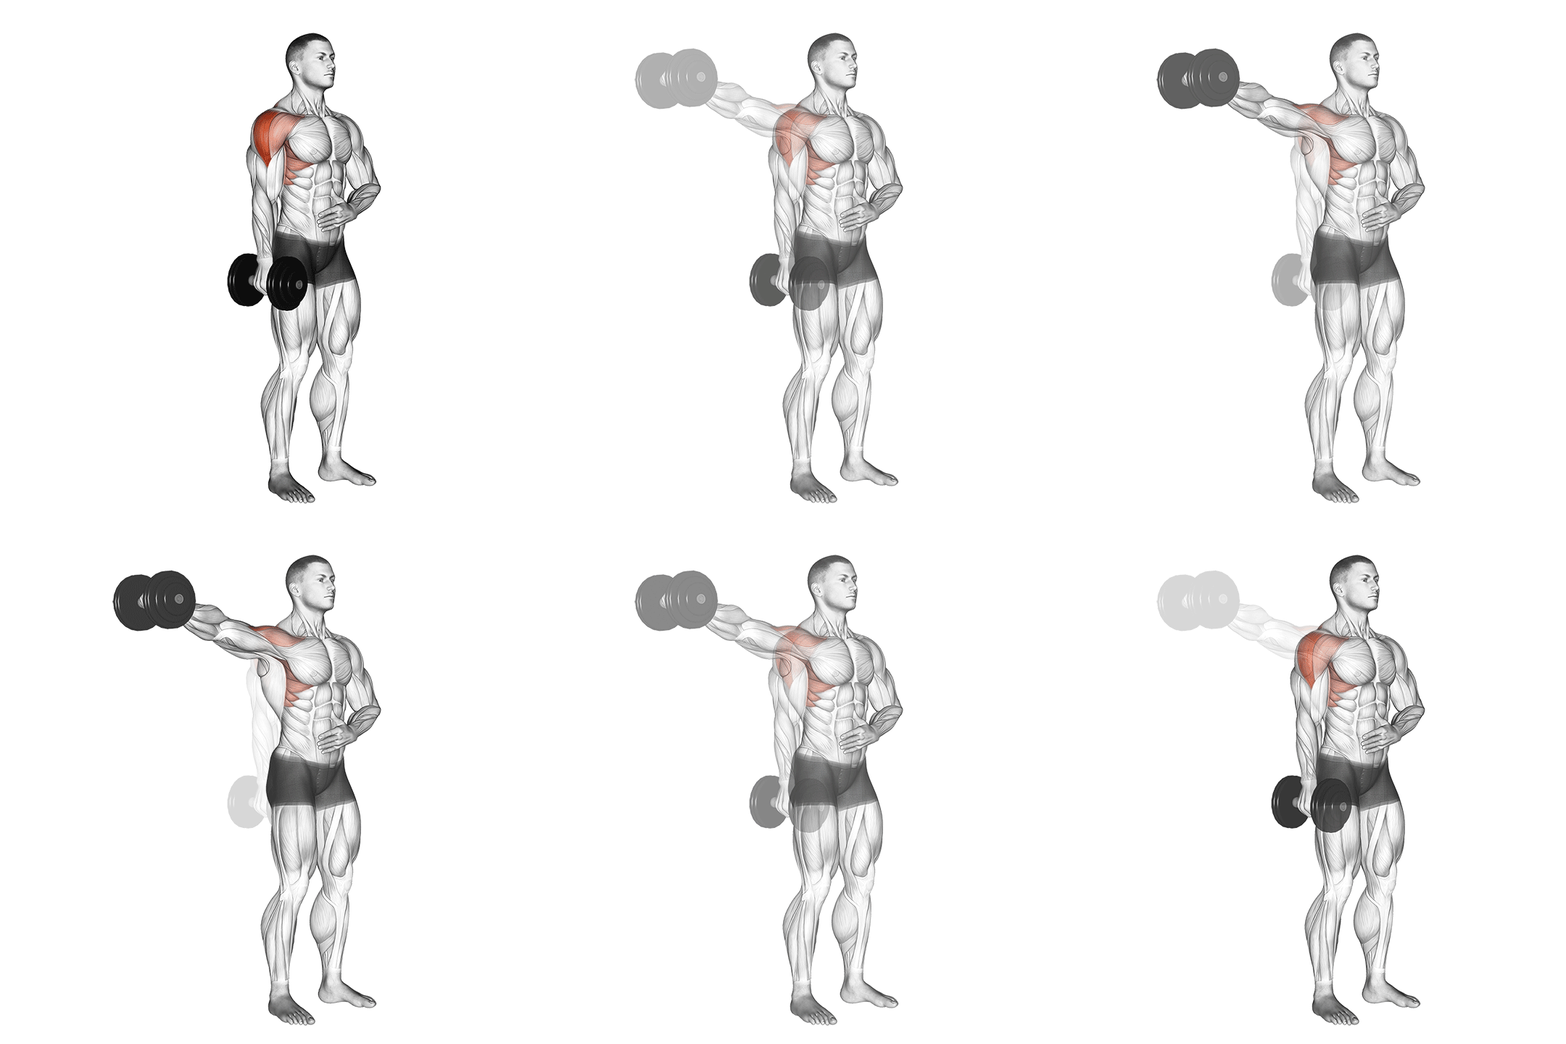
One-Arm Dumbbell Lateral Raise
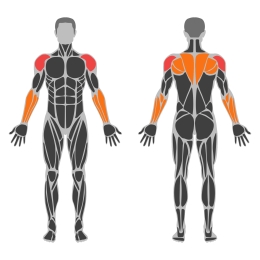
The One Arm Dumbbell Lateral Raise is an isolation exercise targeting the lateral deltoid muscle. It helps in building shoulder width and strength by lifting a dumbbell to the side of the body with one arm. This exercise is typically performed standing, allowing for greater range of motion and unilateral focus.
Muscle focus
Step-by-step cues
- Stand with your feet shoulder-width apart, holding a dumbbell in one hand with a neutral grip.
- Keep your core engaged and maintain a slight bend in your knees.
- Position your working arm slightly bent at the elbow, with the dumbbell resting against your outer thigh.
- Exhale as you raise the dumbbell to the side until your arm is parallel to the floor.
- Pause briefly at the top of the movement, ensuring your wrist is in line with your shoulder.
- Inhale as you slowly lower the dumbbell back to the starting position.
- Complete the desired number of repetitions before switching to the other arm.
Technical tips
- Focus on lifting with your shoulder, not your hand, to effectively target the lateral deltoid.
- Avoid using momentum; control the movement throughout for maximum muscle engagement.
- Keep your torso stationary and avoid leaning to either side during the lift.
- Start with a lighter weight to ensure proper form and gradually increase as you build strength.
- Maintain a slight bend in your elbow throughout the exercise to reduce strain on the joint.
- Perform this exercise in front of a mirror to monitor form and ensure balanced movement on both sides.
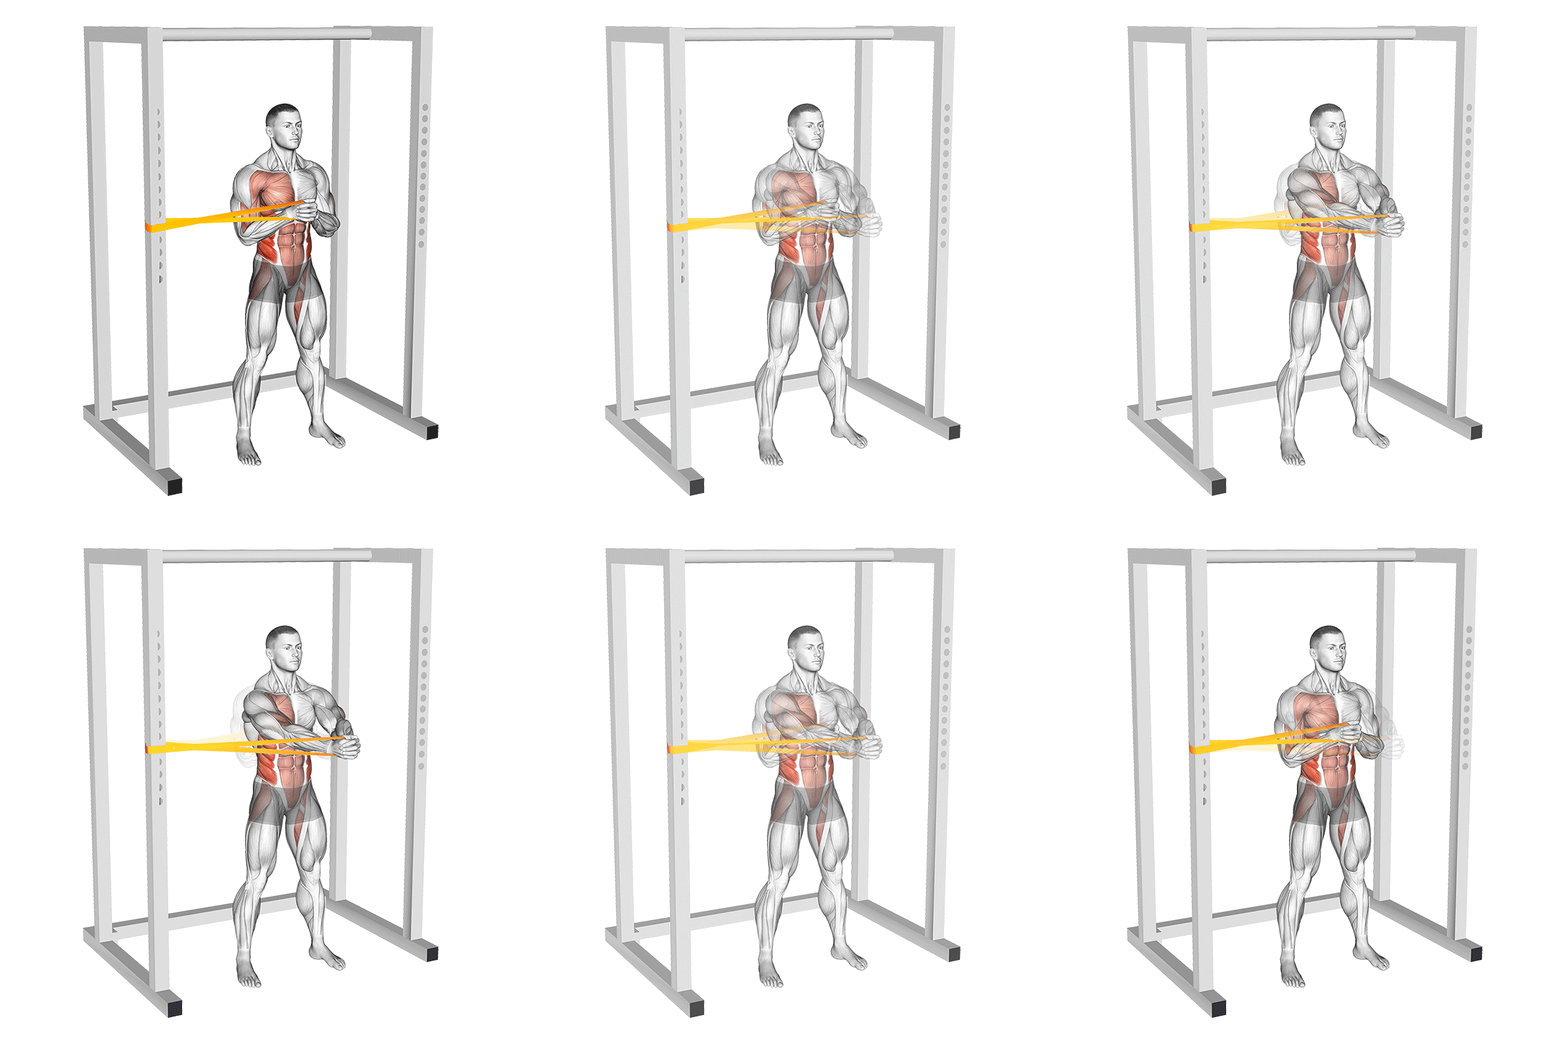
Band Pallof Press
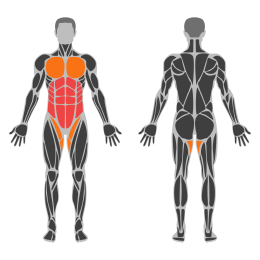
The Band Pallof Press is an anti-rotation core exercise that targets the obliques, transverse abdominis, and rectus abdominis. It also engages the shoulders, chest, and glutes to maintain stability. This exercise is performed using a resistance band and is excellent for improving core strength and stability.
Muscle focus
Step-by-step cues
- Attach a resistance band to a stable anchor point at chest height.
- Stand perpendicular to the anchor point with your feet shoulder-width apart.
- Hold the band with both hands, keeping your arms extended in front of your chest.
- Step away from the anchor point to create tension in the band.
- Engage your core and glutes to maintain a stable posture.
- Press the band straight out in front of you, keeping your arms parallel to the floor.
- Hold the extended position briefly while resisting rotation.
- Slowly return your hands to the starting position.
- Repeat for the desired number of repetitions before switching sides.
Technical tips
- Keep your shoulders down and back to avoid unnecessary strain.
- Maintain a slight bend in your knees for better stability.
- Focus on keeping your torso upright and avoid leaning towards the anchor point.
- Control your breathing by exhaling as you press out and inhaling as you return.
- Ensure that the resistance band is taut throughout the movement for optimal effectiveness.
- Start with lighter resistance and gradually increase as your core strength improves.
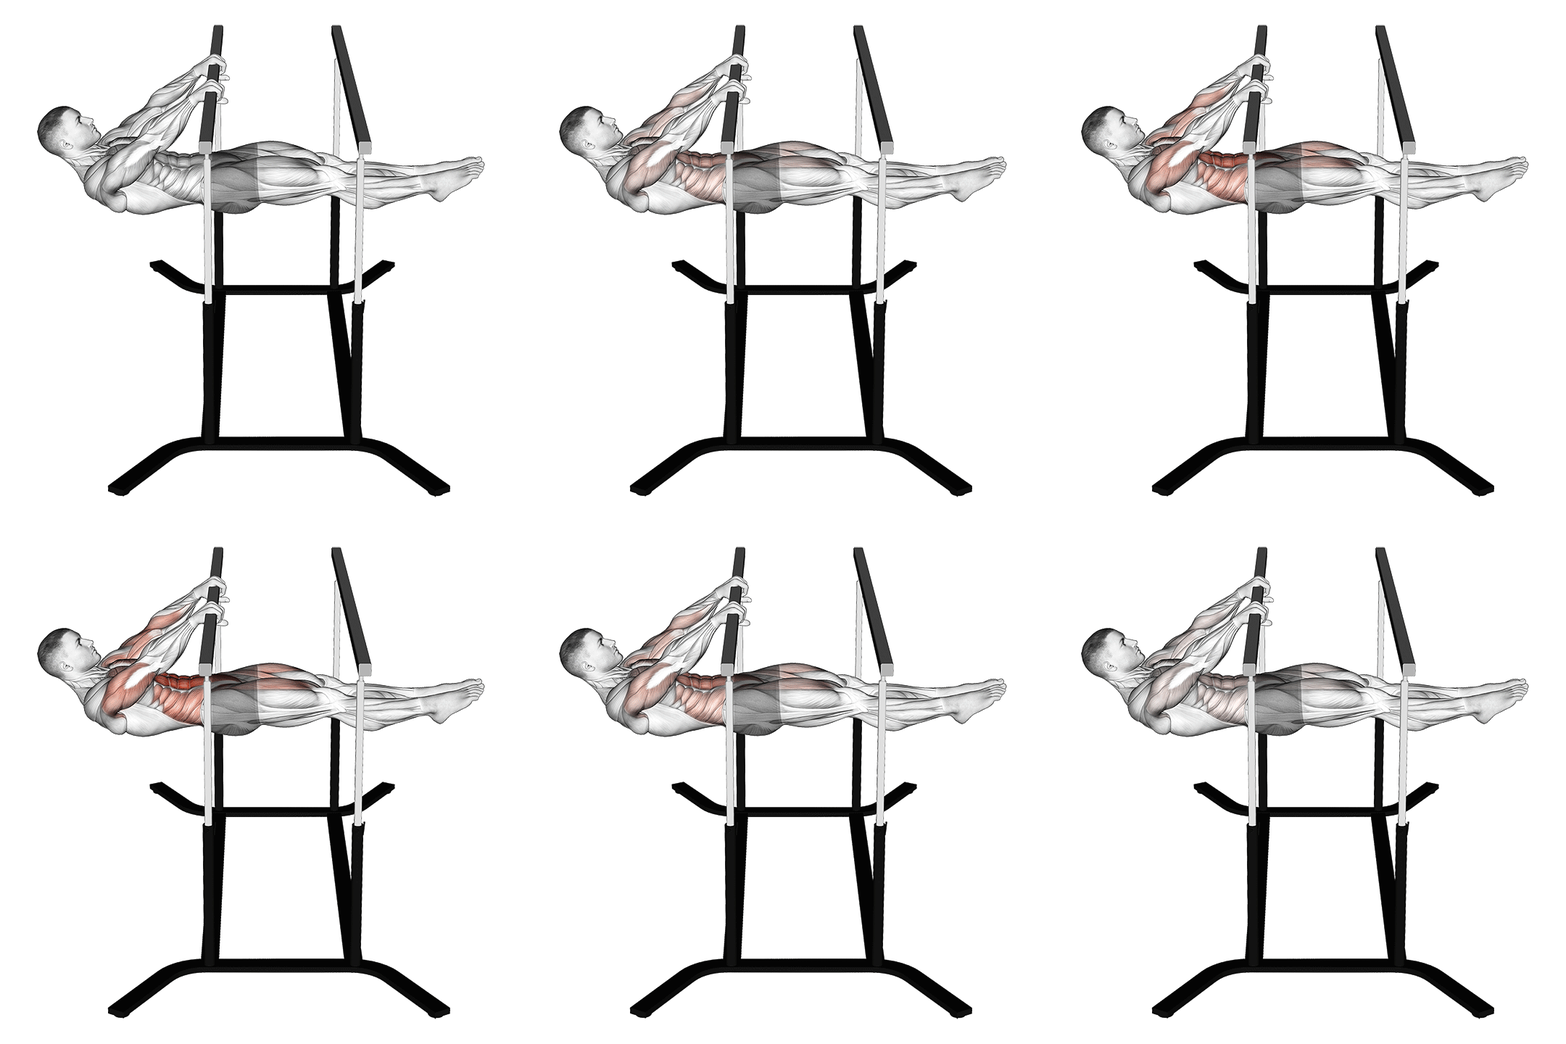
Front Lever
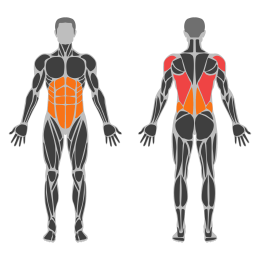
The Front Lever is an advanced calisthenics exercise that requires significant core, back, and shoulder strength. It involves holding the body in a horizontal position parallel to the ground while hanging from a bar. This exercise primarily targets the latissimus dorsi, core muscles, and shoulders, with secondary engagement of the biceps and forearms.
Muscle focus
Step-by-step cues
- Begin by hanging from a pull-up bar with an overhand grip, hands shoulder-width apart.
- Engage your core and lats to lift your legs and torso until your body is parallel to the ground.
- Keep your arms straight and maintain a hollow body position with your shoulders retracted.
- Hold the position for as long as possible while maintaining control and proper form.
- Slowly lower your body back to the starting position.
Technical tips
- Start with tuck front levers to build strength before attempting the full front lever.
- Focus on engaging your core and lats throughout the movement to maintain stability.
- Practice scapular retraction by pulling your shoulder blades down and together.
- Keep your body in a straight line from head to toes to ensure proper form.
- Incorporate negative reps by lowering slowly from the front lever position to build strength.
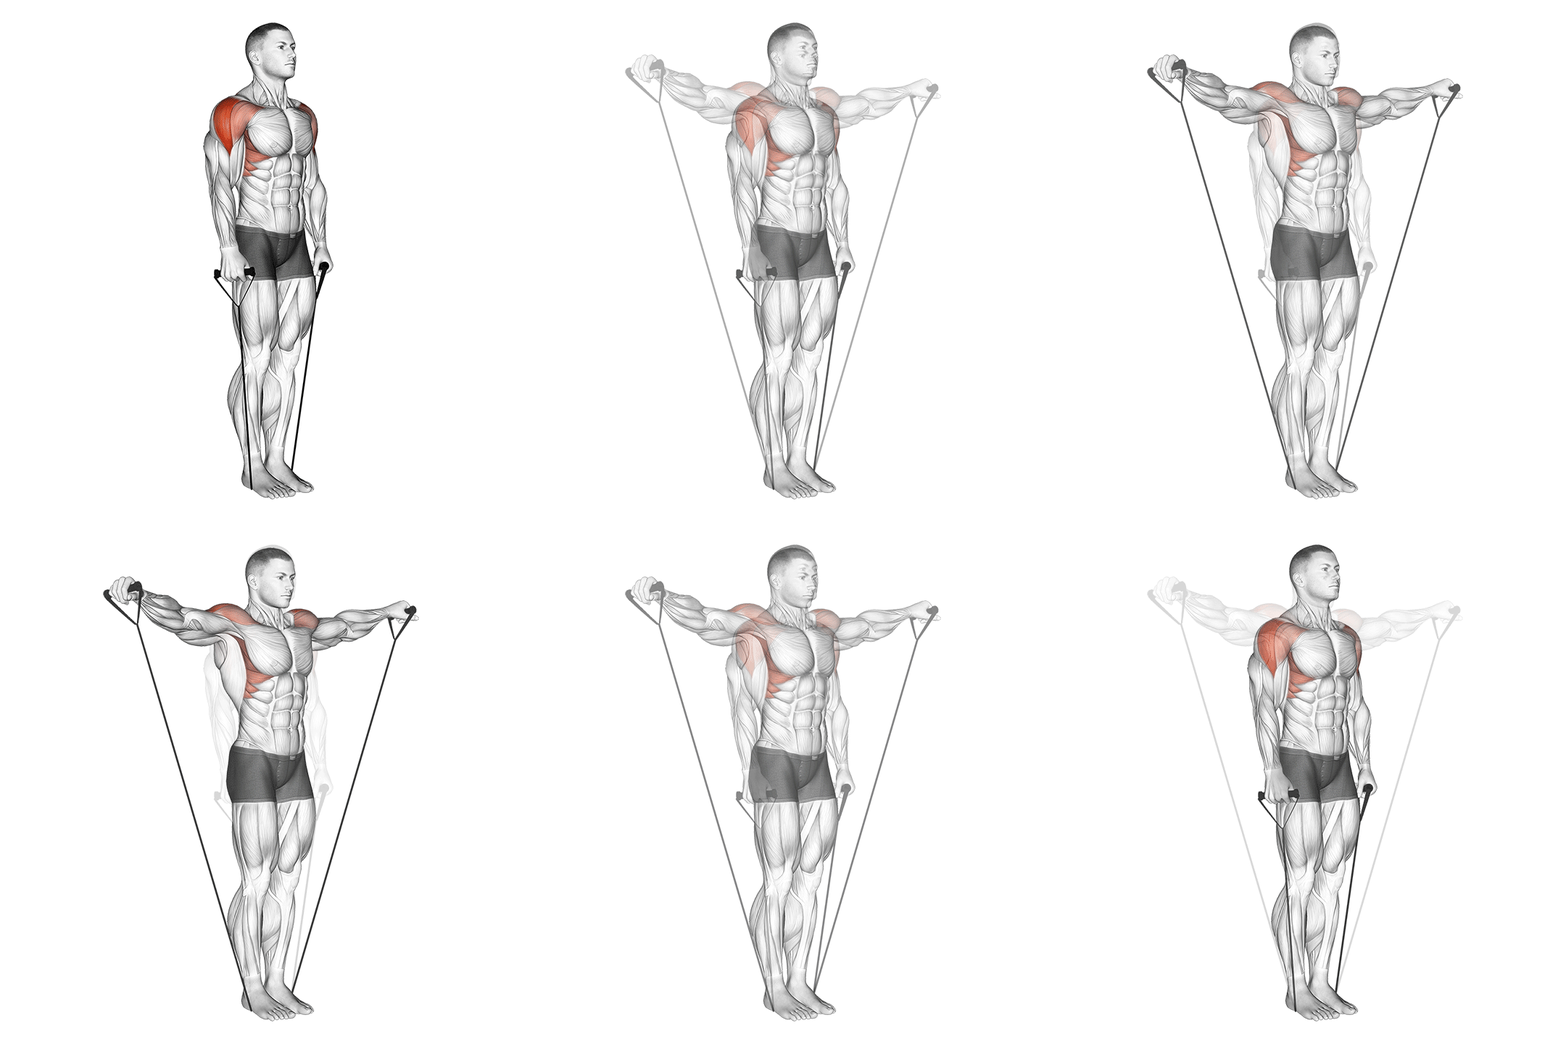
Band Lateral Raise
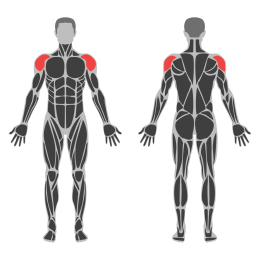
The Band Lateral Raise is an isolation exercise targeting the lateral deltoid muscles, which are part of the shoulder. It involves lifting the arms to the side against the resistance of a band, helping to build shoulder strength and stability.
Muscle focus
Step-by-step cues
- Stand with your feet shoulder-width apart, placing the middle of a resistance band under your feet.
- Hold one end of the band in each hand, arms at your sides with palms facing inward.
- Keep a slight bend in your elbows as you raise your arms to the sides until they are parallel to the floor.
- Pause briefly at the top of the movement, ensuring your shoulders are not shrugged.
- Slowly lower your arms back to the starting position.
- Repeat for the desired number of repetitions.
Technical tips
- Maintain a slight bend in your elbows throughout the exercise to reduce joint strain.
- Focus on using your shoulder muscles rather than swinging your body for momentum.
- Keep your core engaged to maintain balance and support proper posture.
- Control the movement both on the way up and down to maximize muscle engagement.
- Start with a lighter resistance band if you are new to this exercise to ensure proper form.
Thursday
Rest
Keep steps comfortable and avoid intense lower-body work.
Friday
Legs and Glute Volume
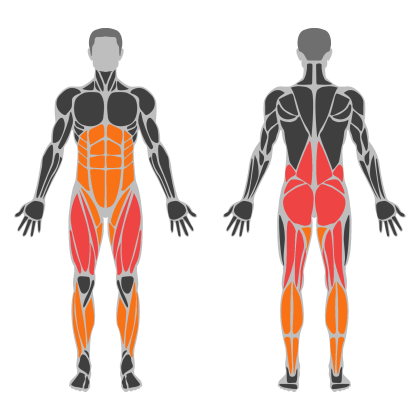
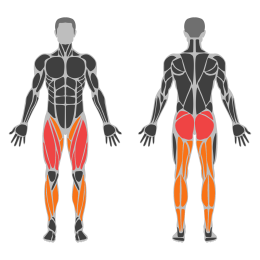
Legs and Glute Volume muscle focus
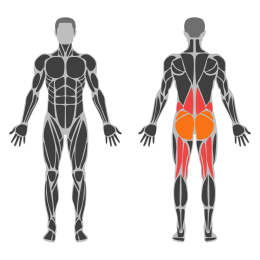
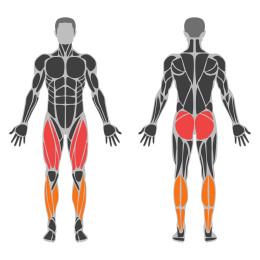
Red marks the primary training focus. Orange marks supporting muscle groups used throughout this session.
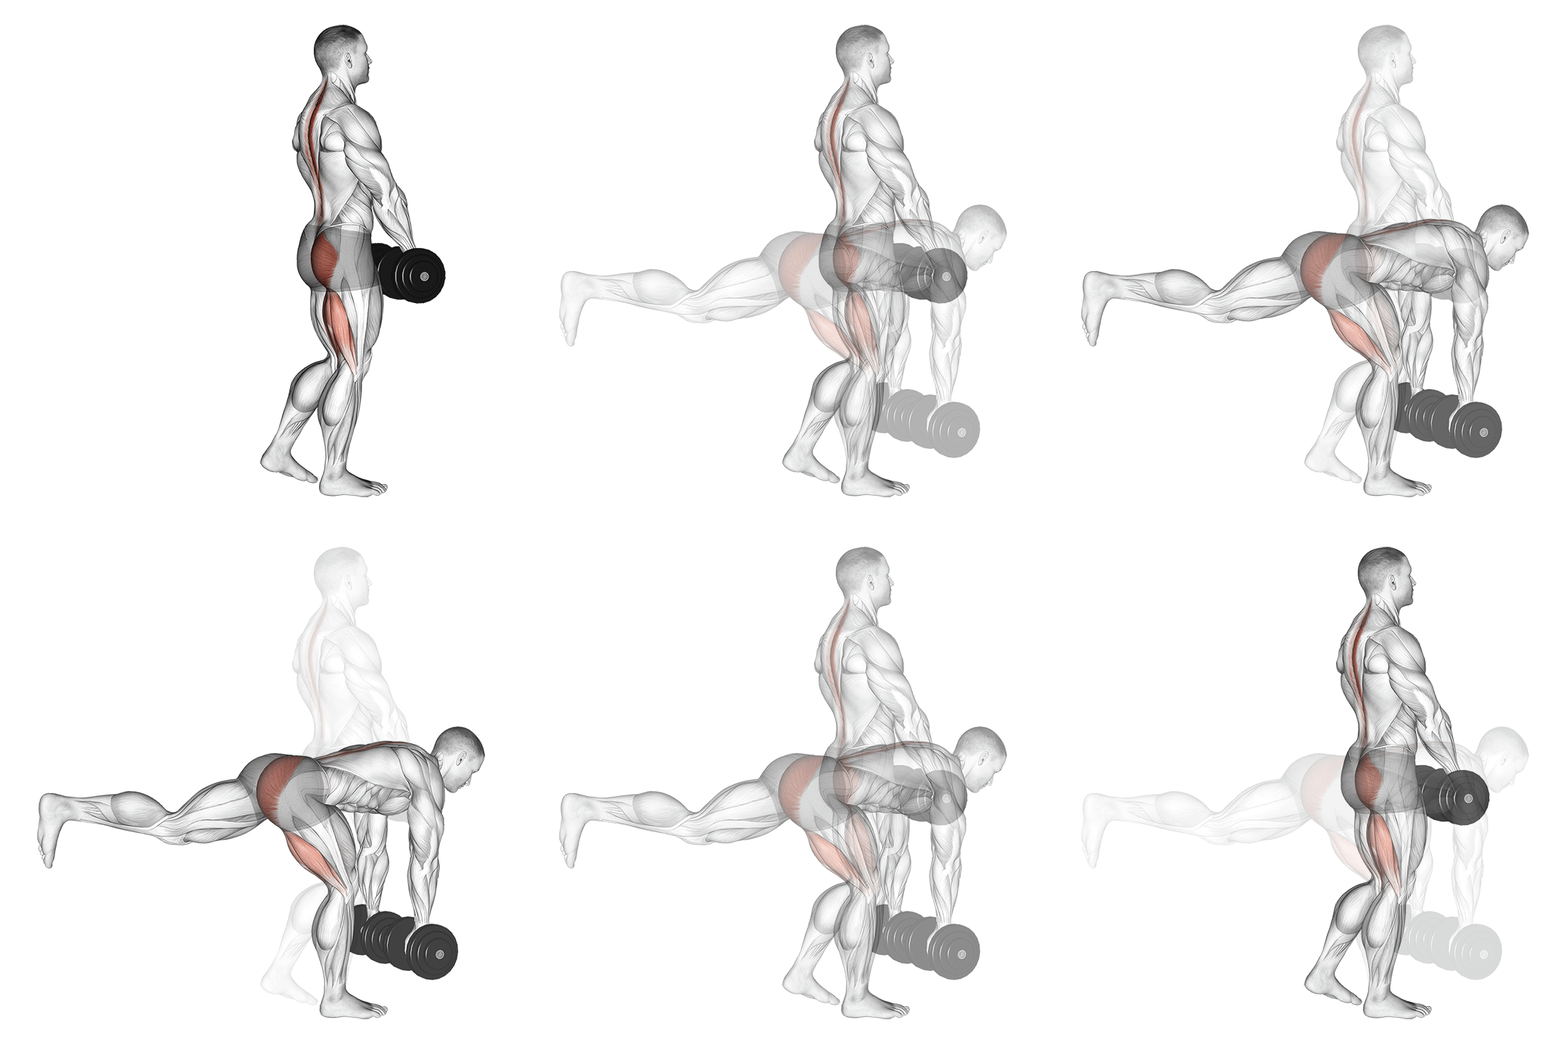
Single Leg Dumbbell Deadlift
The Single Leg Dumbbell Deadlift is a unilateral exercise targeting the hamstrings, glutes, and core. It enhances balance, stability, and coordination while improving lower body strength. This exercise requires a dumbbell and focuses on maintaining proper form to prevent injury.
Muscle focus
Step-by-step cues
- Stand upright with feet hip-width apart, holding a dumbbell in your right hand.
- Shift your weight onto your left leg, keeping a slight bend in the knee.
- Hinge at the hips to lower the dumbbell towards the ground while extending your right leg straight behind you.
- Keep your back flat and core engaged throughout the movement.
- Lower the dumbbell until your torso is parallel to the ground or as far as your flexibility allows.
- Return to the starting position by driving through your left heel and bringing your right leg forward.
- Repeat for the desired number of repetitions before switching sides.
Technical tips
- Focus on maintaining a neutral spine throughout the exercise to avoid lower back strain.
- Engage your core muscles to help stabilize your body during the movement.
- Control the descent and ascent of the dumbbell to maximize muscle engagement.
- Keep your gaze fixed on a point on the floor to help maintain balance.
- Start with a lighter weight to perfect your form before progressing to heavier dumbbells.
- Ensure that your supporting knee remains slightly bent and does not lock out during the exercise.
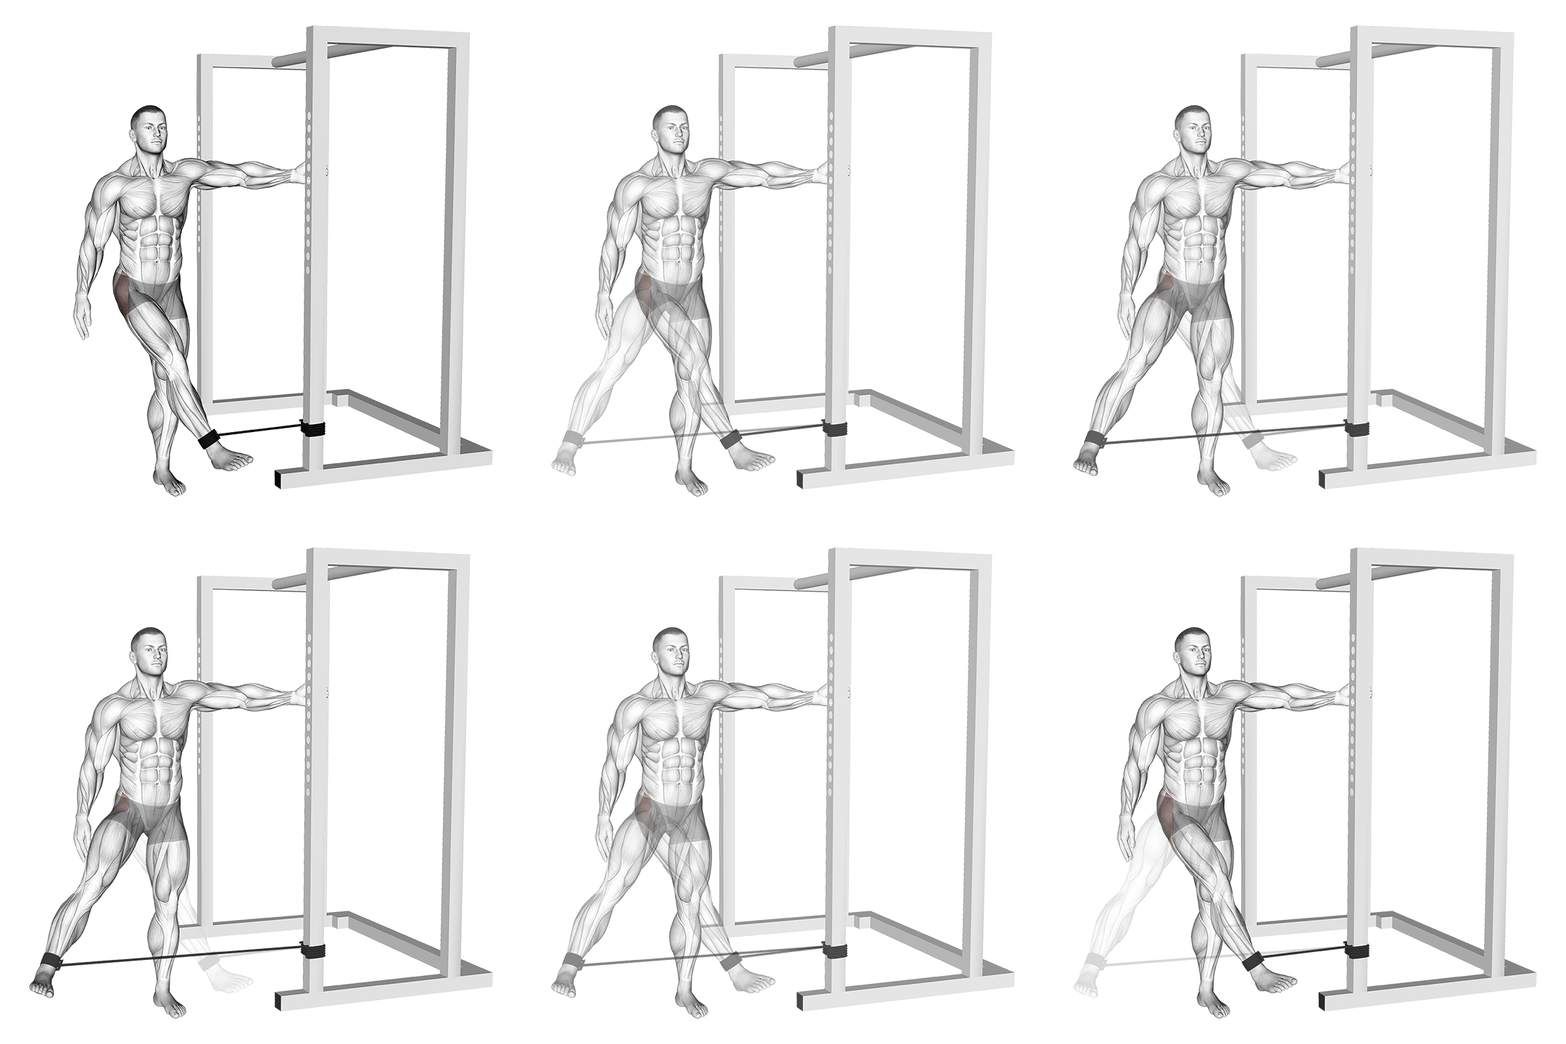
Band Hip Abduction
The Band Hip Abduction is an exercise targeting the gluteus medius and minimus muscles, as well as the tensor fasciae latae. It involves using a resistance band to create tension, which helps in strengthening and stabilizing the hips. This exercise is beneficial for improving hip stability, enhancing athletic performance, and preventing injuries.
Muscle focus
Step-by-step cues
- Place a resistance band around your legs, just above your knees.
- Stand with your feet shoulder-width apart and slightly bend your knees.
- Engage your core and keep your back straight.
- Slowly move one leg out to the side against the resistance of the band, keeping your toes pointing forward.
- Pause briefly at the top of the movement, ensuring maximum tension on the band.
- Return your leg to the starting position with control.
- Repeat for the desired number of repetitions, then switch to the other leg.
Technical tips
- Ensure the resistance band is tight enough to provide adequate tension throughout the movement.
- Focus on maintaining a stable core and avoid leaning to one side.
- Keep your movements slow and controlled to maximize muscle engagement.
- Breathe steadily throughout the exercise, exhaling as you abduct your leg.
- To increase difficulty, use a heavier resistance band or perform more repetitions.
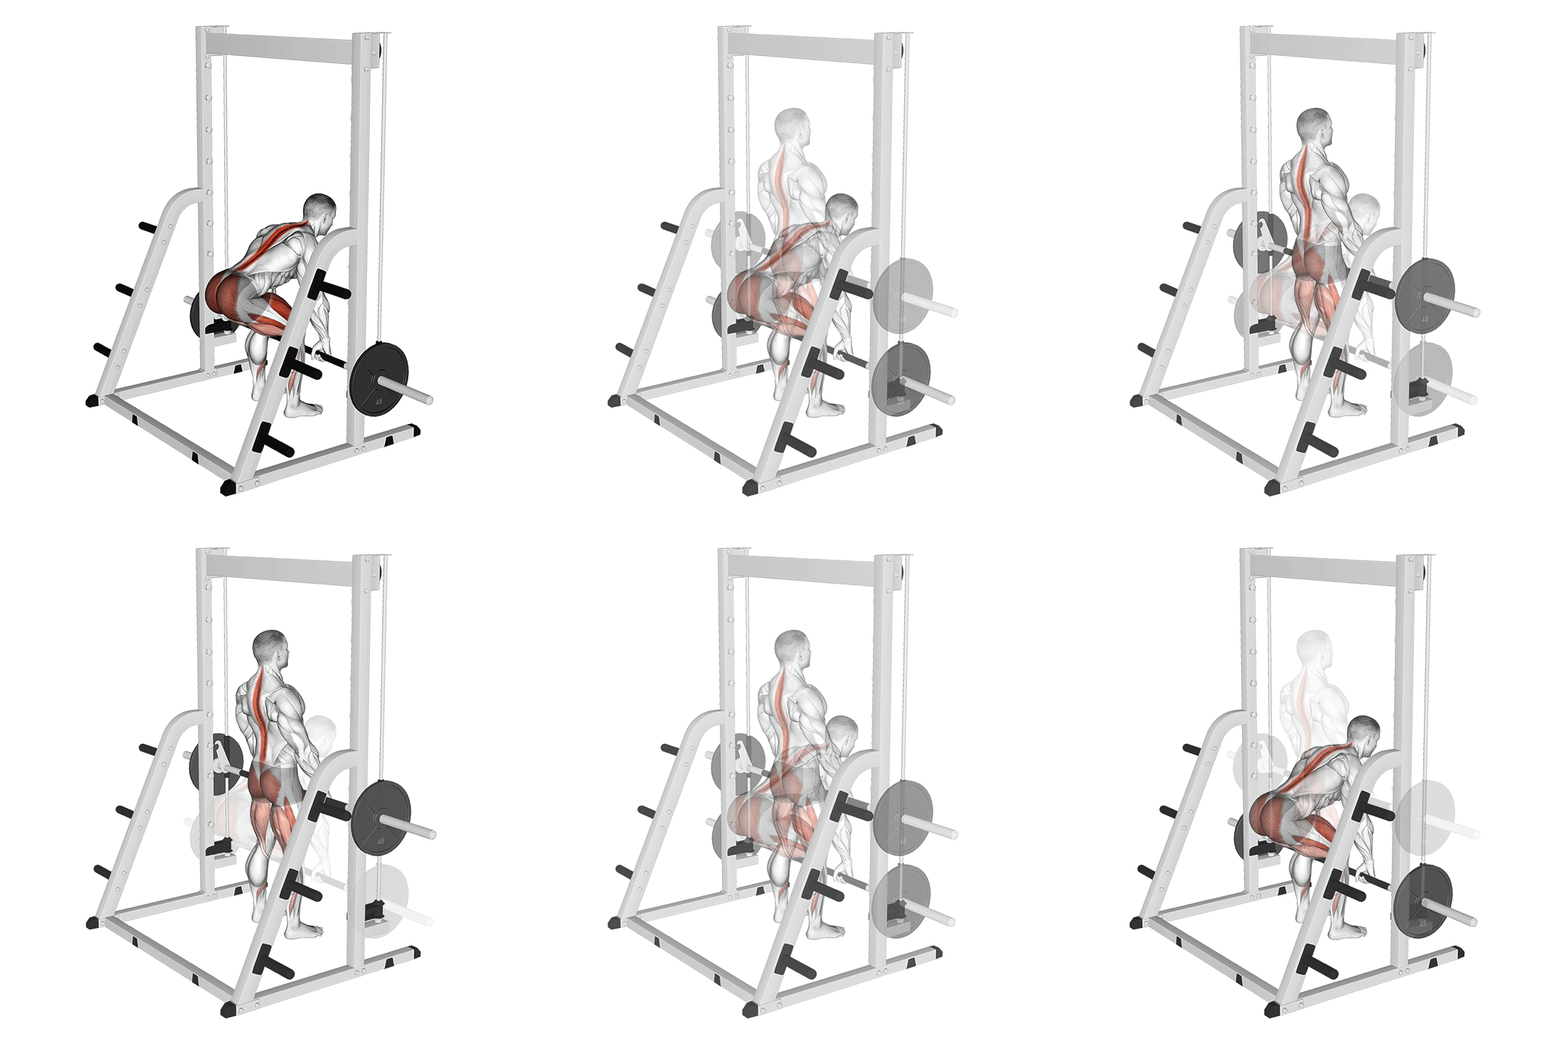
Smith Romanian Deadlift
The Smith Romanian Deadlift is a compound exercise targeting the hamstrings, glutes, and lower back. Utilizing the Smith machine provides stability and control, allowing for a focused stretch and contraction of the posterior chain muscles. This exercise is beneficial for developing strength and muscle mass in the lower body while minimizing the risk of injury due to the guided bar path.
Muscle focus
Step-by-step cues
- Set the Smith machine bar to a height just below your hips.
- Stand with your feet hip-width apart, toes pointing forward, and position yourself under the bar.
- Grip the bar with an overhand grip, hands slightly wider than shoulder-width apart.
- Unlock the bar by rotating it forward and step back slightly to clear the safety stops.
- Keep your knees slightly bent and maintain a neutral spine throughout the movement.
- Hinge at the hips, lowering the bar along your thighs while pushing your hips back.
- Lower until you feel a stretch in your hamstrings, keeping the bar close to your legs.
- Reverse the motion by driving your hips forward and returning to the starting position.
Technical tips
- Focus on hinging at the hips rather than bending at the waist to protect your lower back.
- Maintain a slight bend in your knees throughout the exercise to keep tension on your hamstrings.
- Keep your core engaged to stabilize your spine and prevent rounding of the back.
- Control the movement speed, especially during the lowering phase, to maximize muscle engagement.
- Ensure that your shoulders remain retracted and avoid letting them round forward.
- Use a mirror or ask for feedback to ensure proper form and alignment during execution.
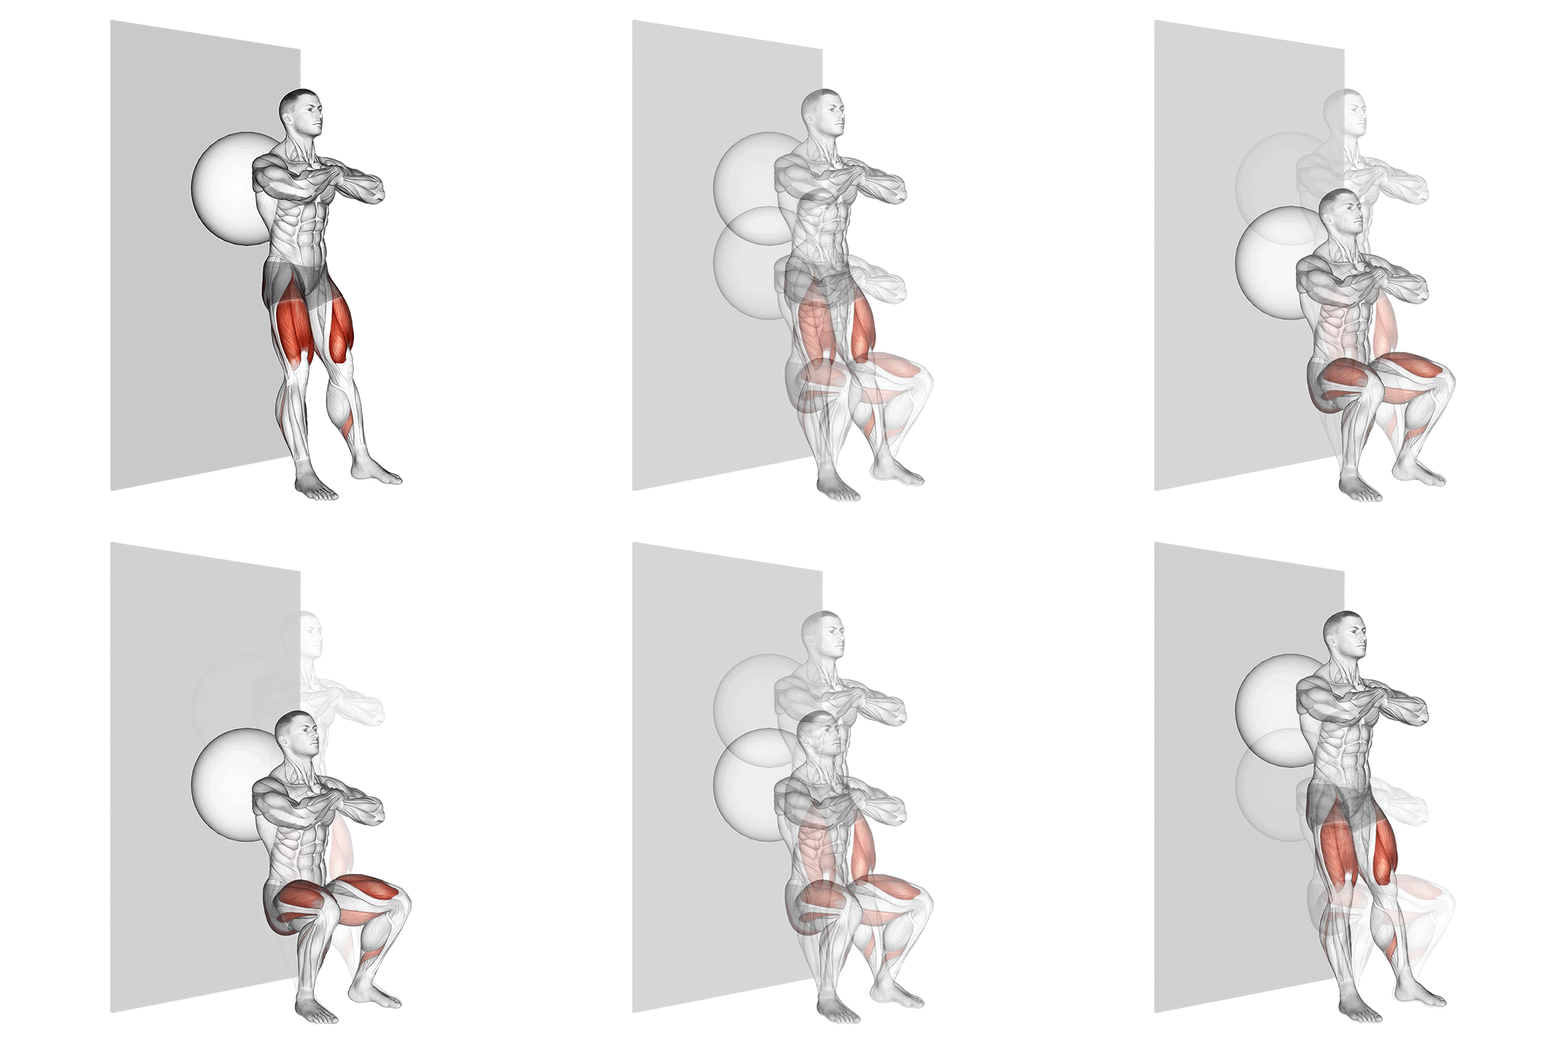
Stabillity Ball Wall Squat
The Stability Ball Wall Squat is an exercise that targets the quadriceps, hamstrings, glutes, and core muscles. It involves using a stability ball placed between your lower back and a wall to perform a squat with added support and balance challenge.
Muscle focus
Step-by-step cues
- Stand with your feet shoulder-width apart, positioning a stability ball between your lower back and a wall.
- Lean back slightly against the ball, ensuring it is secure and stable.
- Engage your core muscles and keep your chest up.
- Slowly bend your knees and lower your body into a squat position, keeping your knees aligned with your toes.
- Descend until your thighs are parallel to the ground or as low as comfortable without losing form.
- Pause briefly at the bottom of the squat.
- Push through your heels to return to the starting position, keeping the movement controlled.
- Repeat for the desired number of repetitions.
Technical tips
- Ensure the stability ball is properly inflated for optimal support.
- Keep your weight distributed evenly through your heels to maintain balance.
- Avoid letting your knees extend past your toes during the squat to protect your joints.
- Maintain a neutral spine throughout the movement to prevent strain on your back.
- Focus on engaging your core muscles to enhance stability and control.
- Perform the exercise slowly to maximize muscle engagement and minimize risk of injury.
- Adjust foot placement if necessary to find a comfortable and stable position.
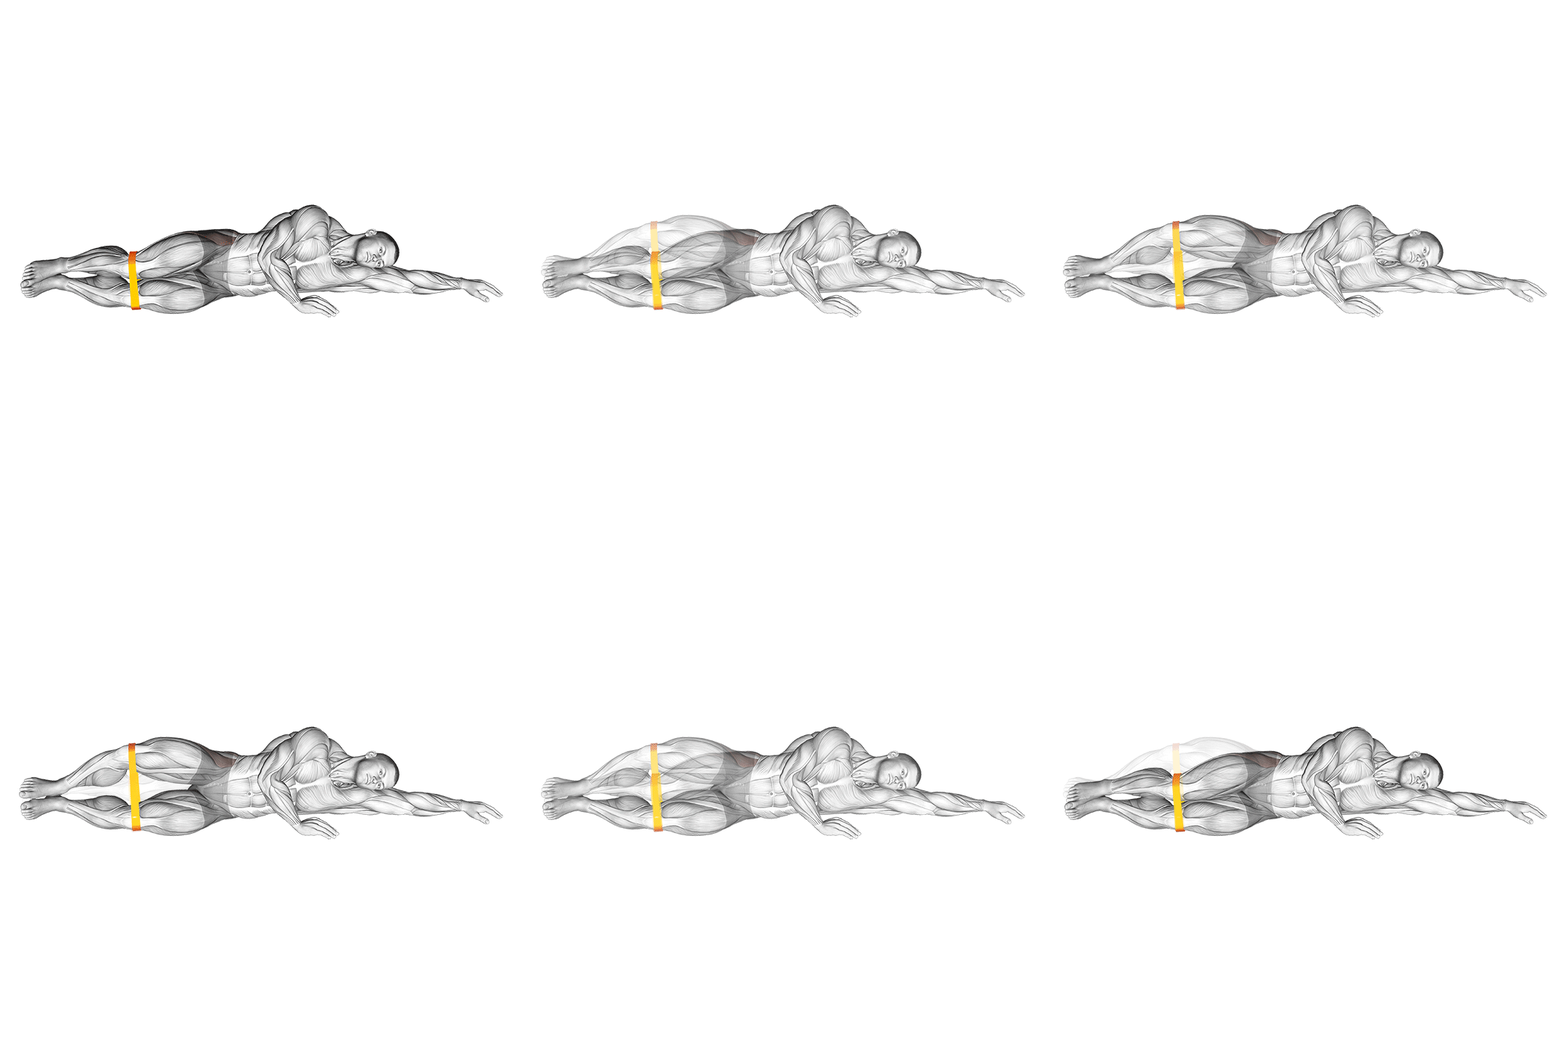
Band Lying Clamshells
Band Lying Clamshells are a resistance exercise targeting the gluteus medius and hip abductors. This exercise helps improve hip stability, strengthen the glutes, and enhance overall lower body function. It is performed by lying on your side with a resistance band looped around your thighs, just above the knees.
Muscle focus
Step-by-step cues
- Lie on your side with your legs stacked and knees bent at a 90-degree angle.
- Place a resistance band around your thighs, just above the knees.
- Rest your head on your lower arm and place your upper hand on the floor in front of you for support.
- Keep your feet together and engage your core.
- Lift your top knee as high as possible without moving your pelvis or separating your feet.
- Pause at the top of the movement, then slowly lower the knee back to the starting position.
- Repeat for the desired number of repetitions before switching sides.
Technical tips
- Ensure that your hips remain stacked and do not roll backward during the movement.
- Focus on squeezing your glutes as you lift your knee.
- Maintain tension in the resistance band throughout the exercise for maximum effectiveness.
- Perform the movement slowly and with control to engage the targeted muscles fully.
- Keep your core engaged to stabilize your body and prevent unnecessary movement.
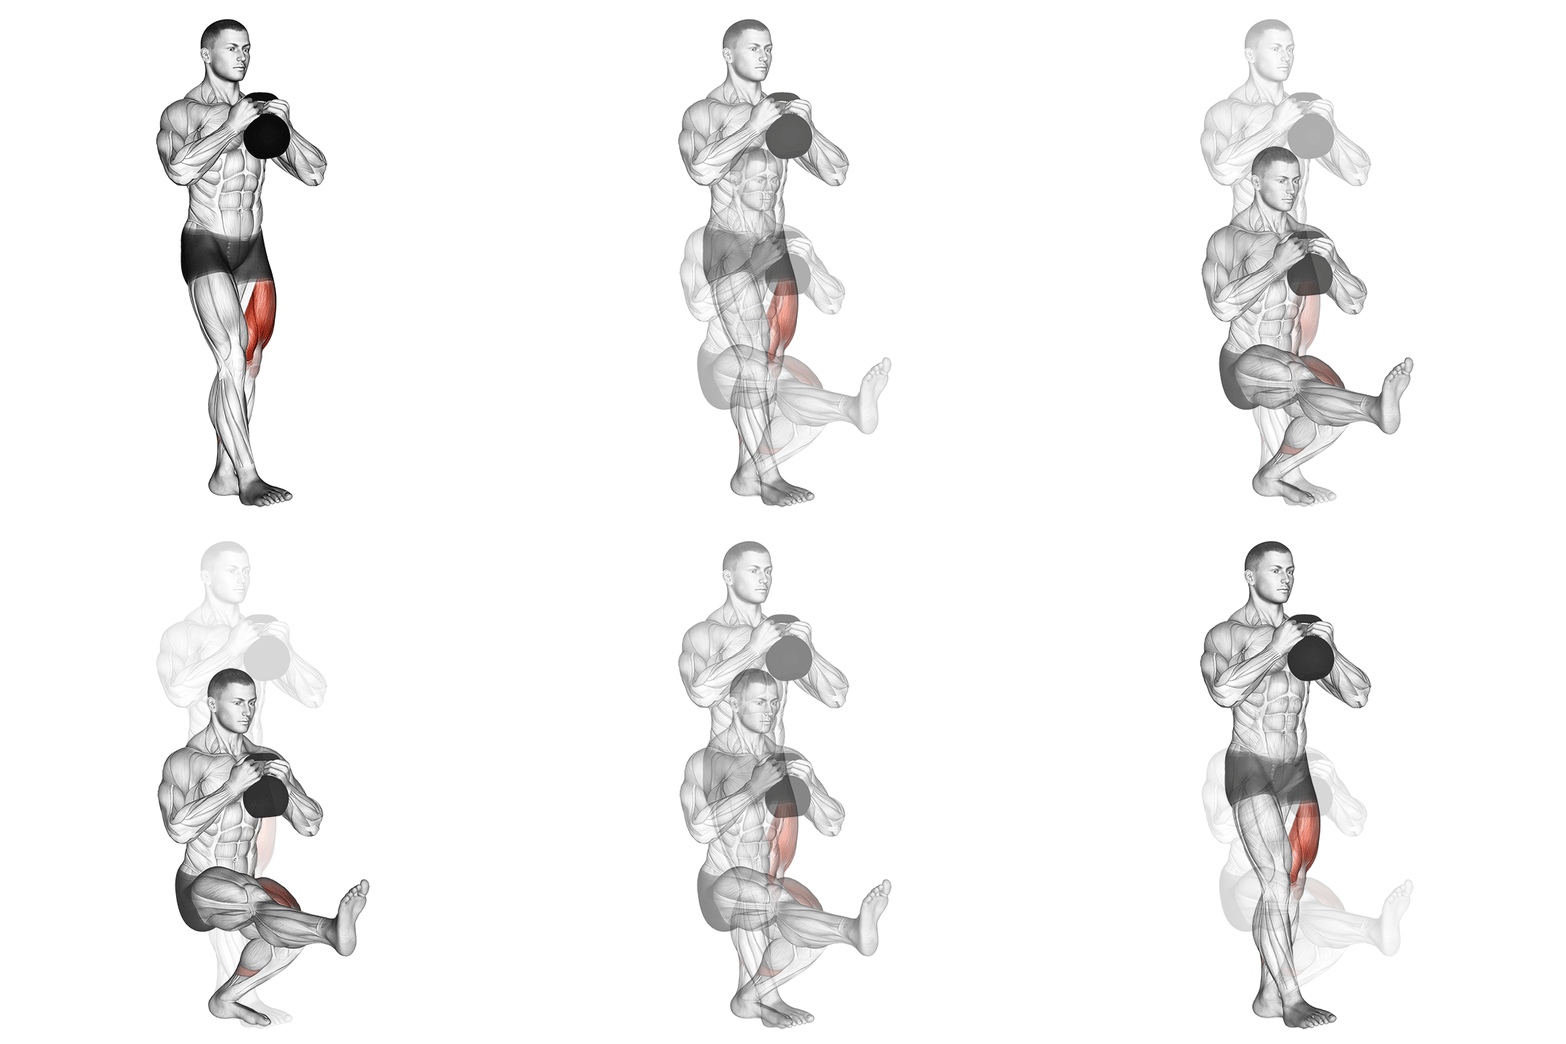
Weighted Pistol Squat
The Weighted Pistol Squat is an advanced lower body exercise that targets the quadriceps, glutes, hamstrings, and core. It involves performing a single-leg squat while holding a weight, enhancing strength, balance, and coordination. This exercise requires significant flexibility and stability, making it suitable for experienced athletes.
Muscle focus
Step-by-step cues
- Begin by standing upright with your feet hip-width apart and hold a dumbbell or kettlebell close to your chest.
- Extend one leg forward, keeping it straight and off the ground.
- Engage your core and slowly lower your body into a squat on the supporting leg, keeping your chest up and back straight.
- Descend until your thigh is parallel to the ground or as low as your flexibility allows.
- Pause briefly at the bottom of the movement, then press through your heel to return to the starting position.
- Complete the desired number of repetitions on one leg before switching to the other.
Technical tips
- Maintain a tight core throughout the movement to ensure balance and stability.
- Focus on keeping your knee aligned with your toes to prevent injury.
- If you're new to this exercise, start without weights to master the form before adding resistance.
- Use a bench or box for support if needed when learning the movement.
- Control the descent and ascent to maximize muscle engagement and avoid using momentum.
Saturday
Core and Conditioning
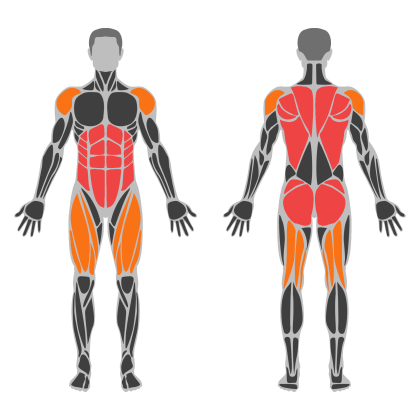
Core and Conditioning muscle focus
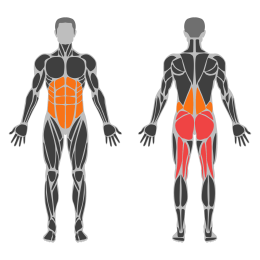
Red marks the primary training focus. Orange marks supporting muscle groups used throughout this session.
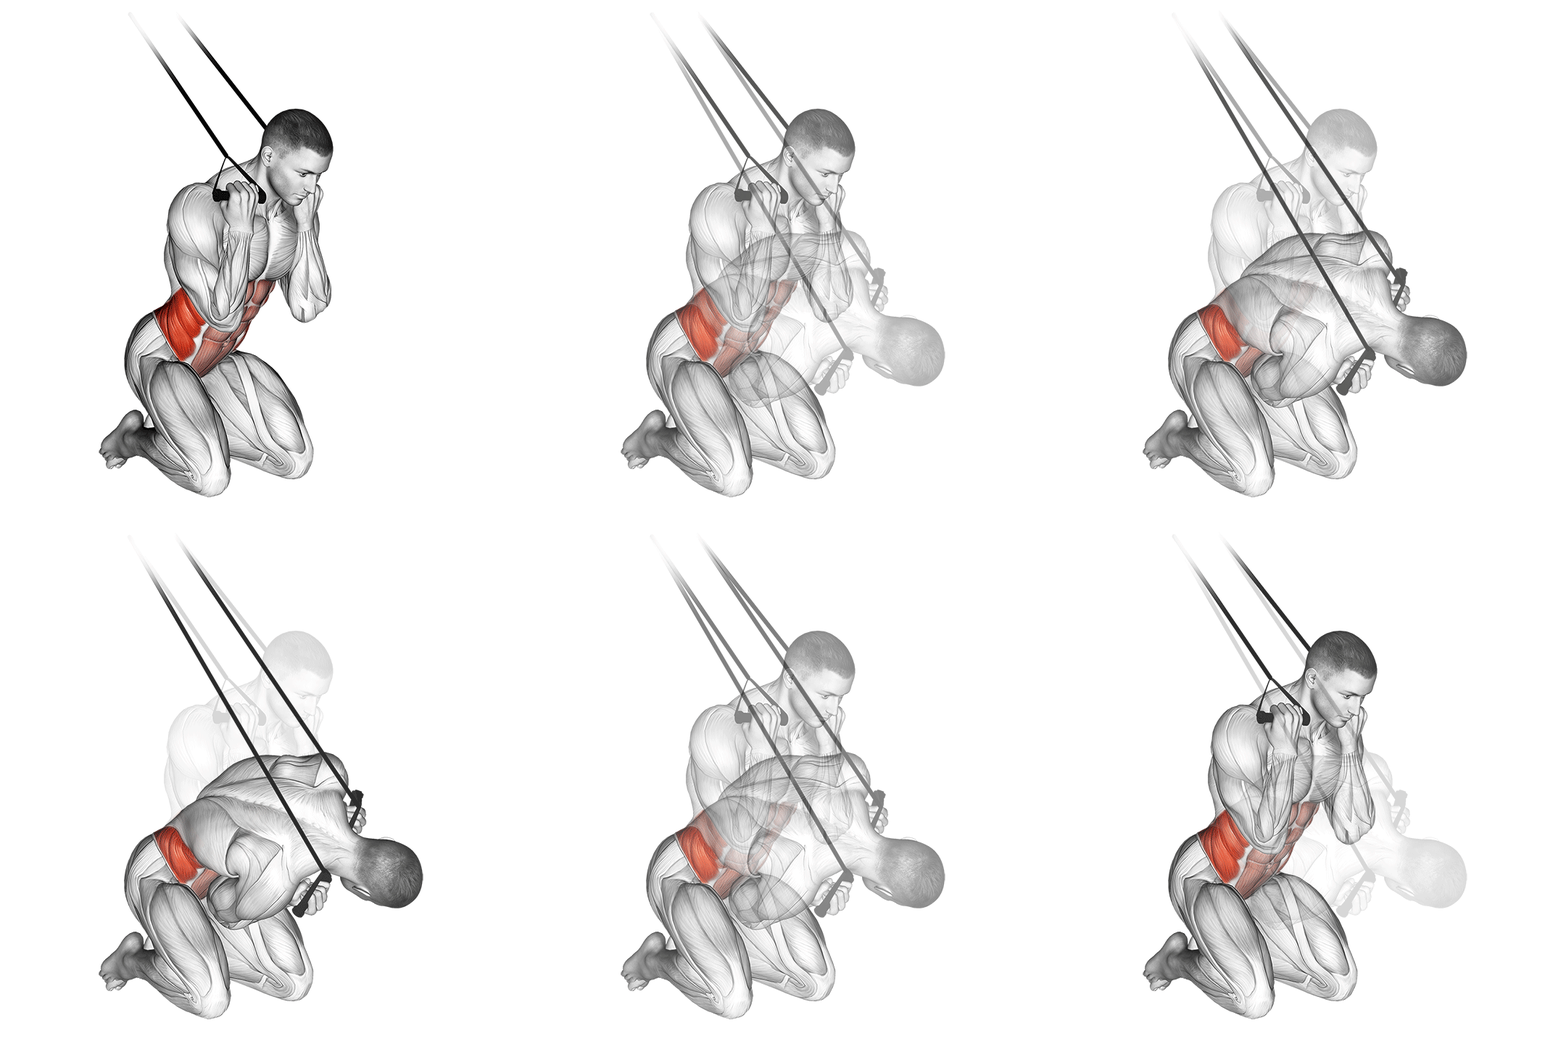
Band Kneeling Twisting Crunch
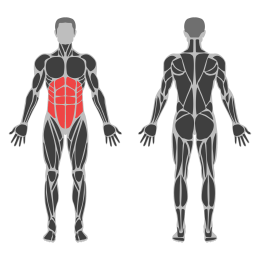
The Band Kneeling Twisting Crunch is a core exercise that targets the obliques and abdominal muscles. It involves using a resistance band to add tension, enhancing muscle engagement during the twisting motion. This exercise is performed in a kneeling position, which helps stabilize the lower body while focusing on the rotational movement of the torso.
Muscle focus
Step-by-step cues
- Attach a resistance band to a stable anchor point at shoulder height.
- Kneel on the floor with your side facing the anchor point, holding the band with both hands.
- Engage your core and keep your back straight.
- Twist your torso away from the anchor point, pulling the band across your body.
- Pause briefly at the end of the twist, ensuring maximum contraction of the obliques.
- Slowly return to the starting position with control.
- Complete the desired number of repetitions before switching sides.
Technical tips
- Ensure the resistance band is securely attached to prevent it from snapping back.
- Focus on using your core muscles to twist, rather than relying on arm strength.
- Maintain a steady breathing pattern, exhaling as you twist and inhaling as you return.
- Keep your hips stable and avoid excessive movement in the lower body.
- Start with a lighter resistance band if you're new to this exercise to master the form before increasing tension.
- Perform this exercise slowly to maximize muscle engagement and control.
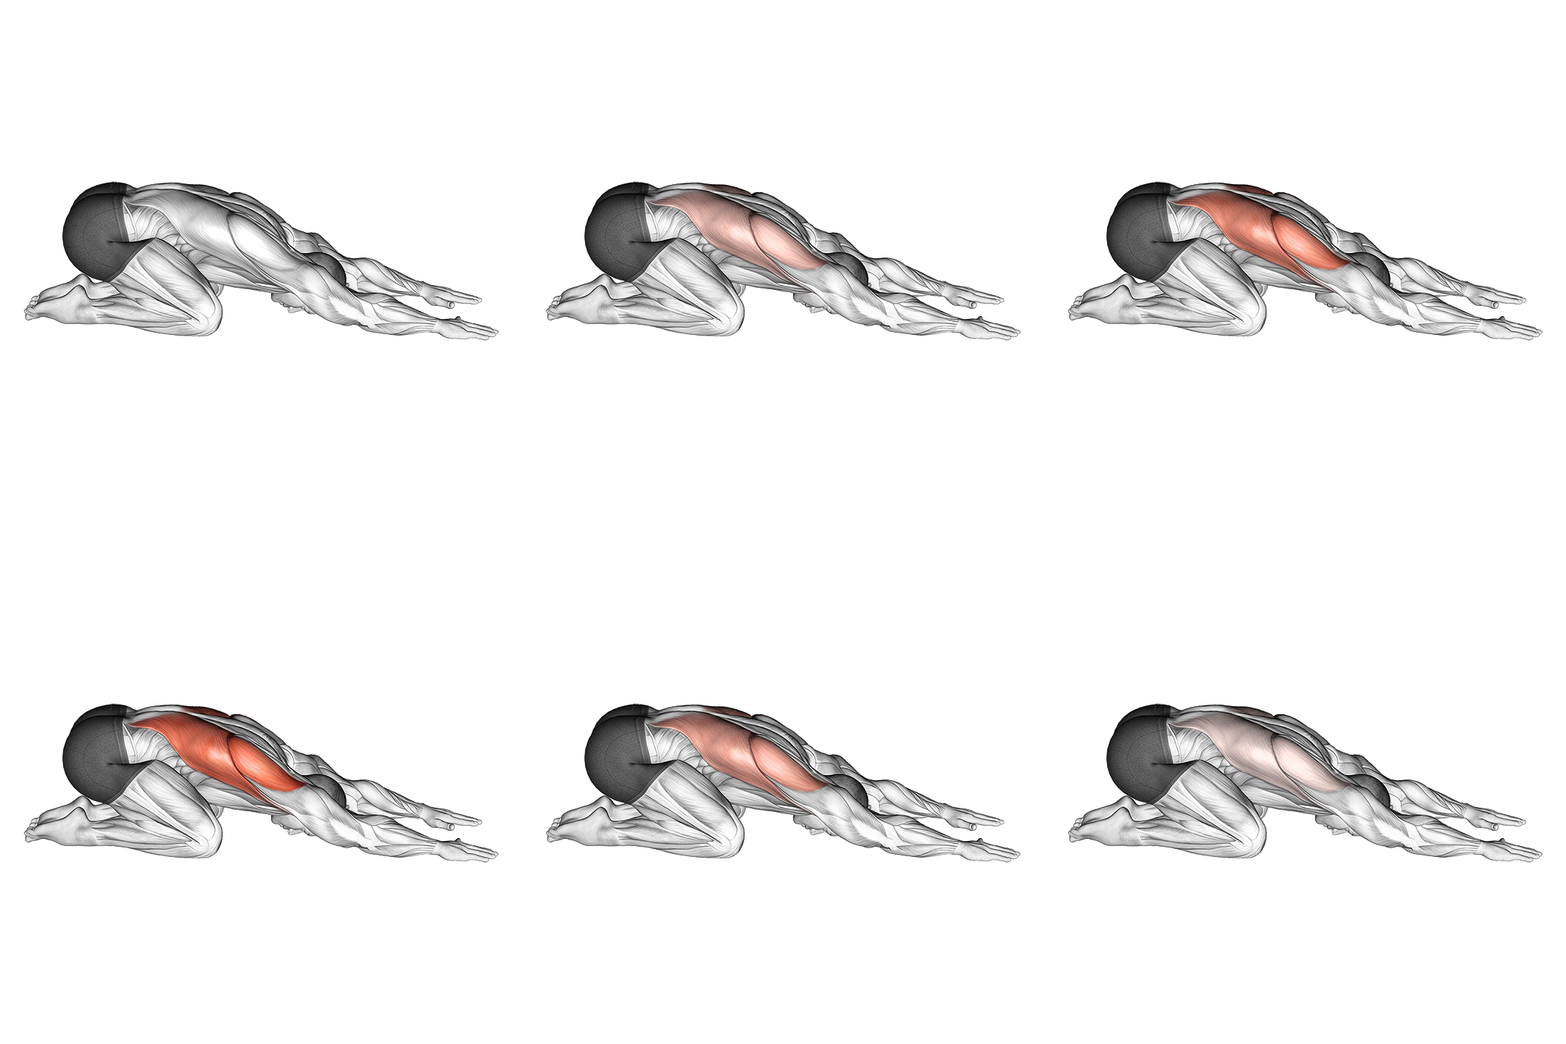
Child’s Pose
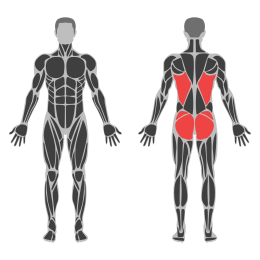
Child’s Pose, or Balasana, is a resting yoga posture that gently stretches the hips, thighs, and ankles while calming the mind and relieving stress. It is often used as a counterpose to more strenuous exercises or as a resting position during a workout.
Muscle focus
Step-by-step cues
- Begin by kneeling on the floor with your big toes touching and knees spread apart about hip-width.
- Sit back on your heels and slowly bend forward, extending your arms in front of you on the floor.
- Lower your torso between your thighs and rest your forehead on the mat.
- Keep your arms extended forward with palms facing down or alongside your body with palms facing up.
- Hold the position for several breaths, focusing on deep, even breathing.
Technical tips
- If you have tight hips, keep your knees closer together for comfort.
- To deepen the stretch in your shoulders, keep your arms extended forward.
- Use a cushion or folded blanket under your torso or forehead for added support if needed.
- Focus on relaxing your entire body and breathing deeply to enhance the calming effects of the pose.
- If you experience discomfort in your knees, place a rolled towel behind them for additional support.
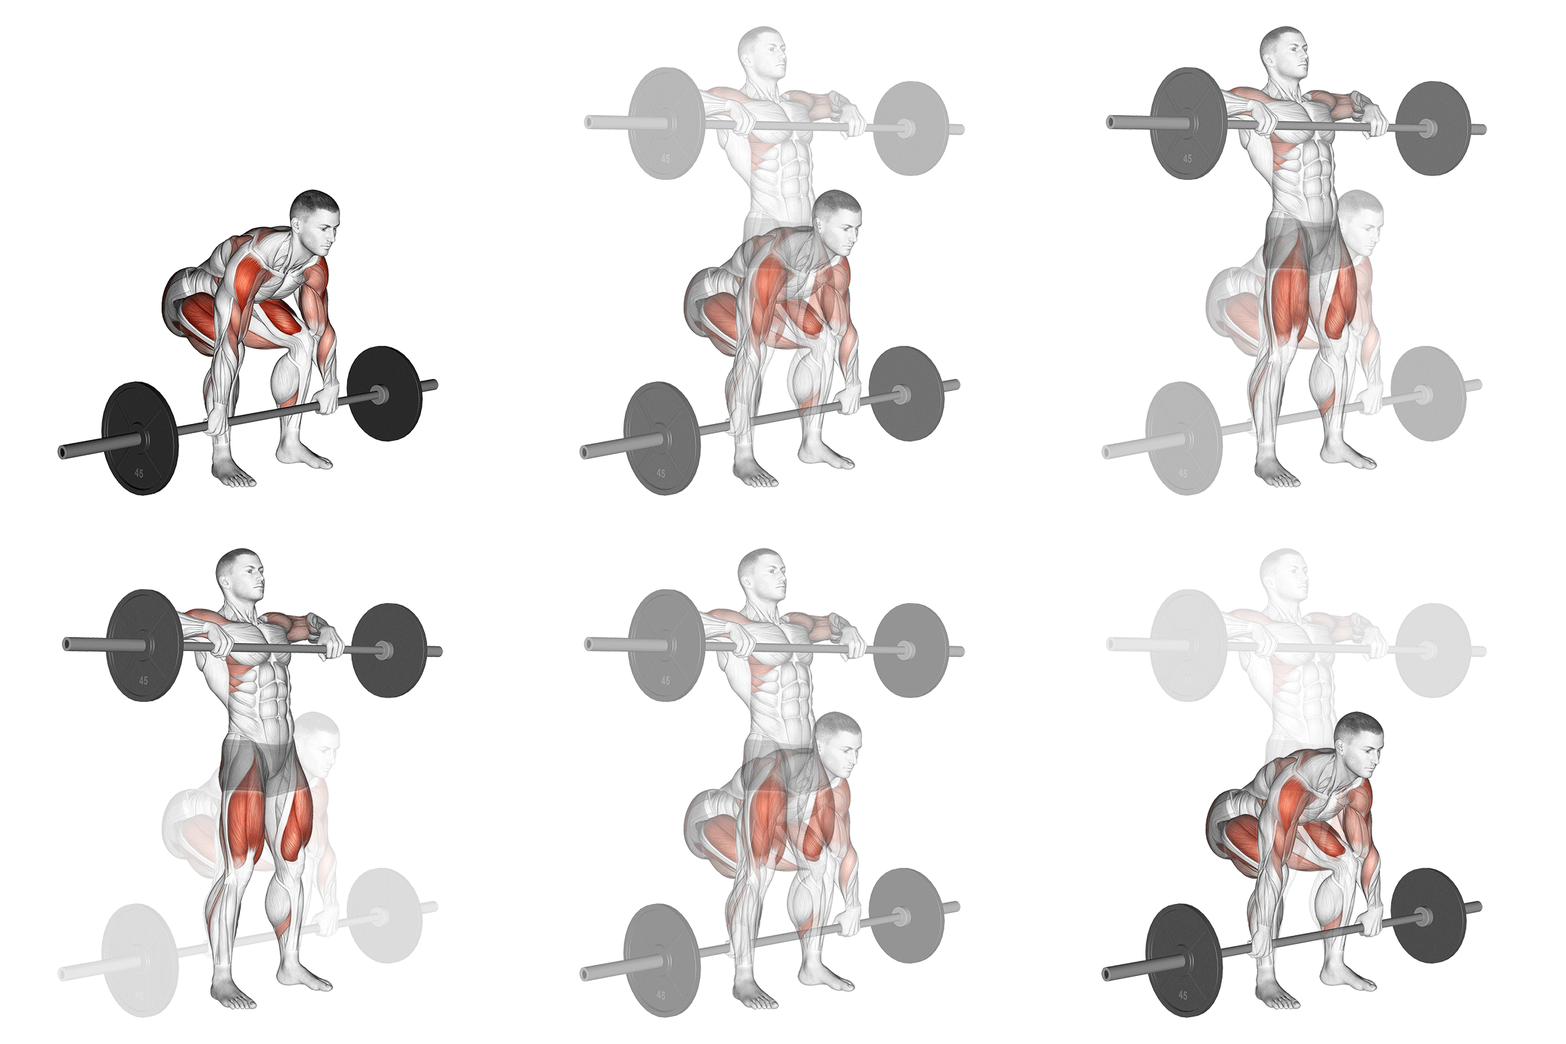
Snatch Pull
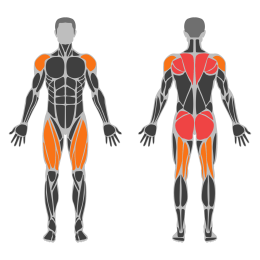
The Snatch Pull is a weightlifting exercise that focuses on developing explosive power, strength, and technique for the snatch lift. It targets the posterior chain, including the hamstrings, glutes, lower back, traps, and shoulders. This exercise is crucial for improving the second pull phase of the snatch by emphasizing speed and power through the hips and legs.
Muscle focus
Step-by-step cues
- Start by standing with your feet hip-width apart, with the barbell over your mid-foot.
- Bend at the hips and knees to grip the barbell with a wide, overhand grip.
- Set your back by retracting your shoulder blades and engaging your core.
- Initiate the lift by extending your knees and hips simultaneously, keeping the bar close to your body.
- As the bar passes your knees, explosively extend your hips and knees while shrugging your shoulders upward.
- Keep your arms straight until you reach full extension, then allow a slight bend as you pull the bar to chest height.
- Control the bar back to the starting position for the next repetition.
Technical tips
- Focus on maintaining a strong back position throughout the lift to prevent injury.
- Keep the barbell close to your body to maximize power transfer.
- Use a hook grip for better control of the barbell during explosive movements.
- Engage your core muscles to stabilize your torso during the lift.
- Practice with lighter weights to perfect technique before increasing load.
- Visualize driving through your heels to generate maximum force from the ground up.
- Ensure a smooth transition from knee extension to hip extension for optimal power output.
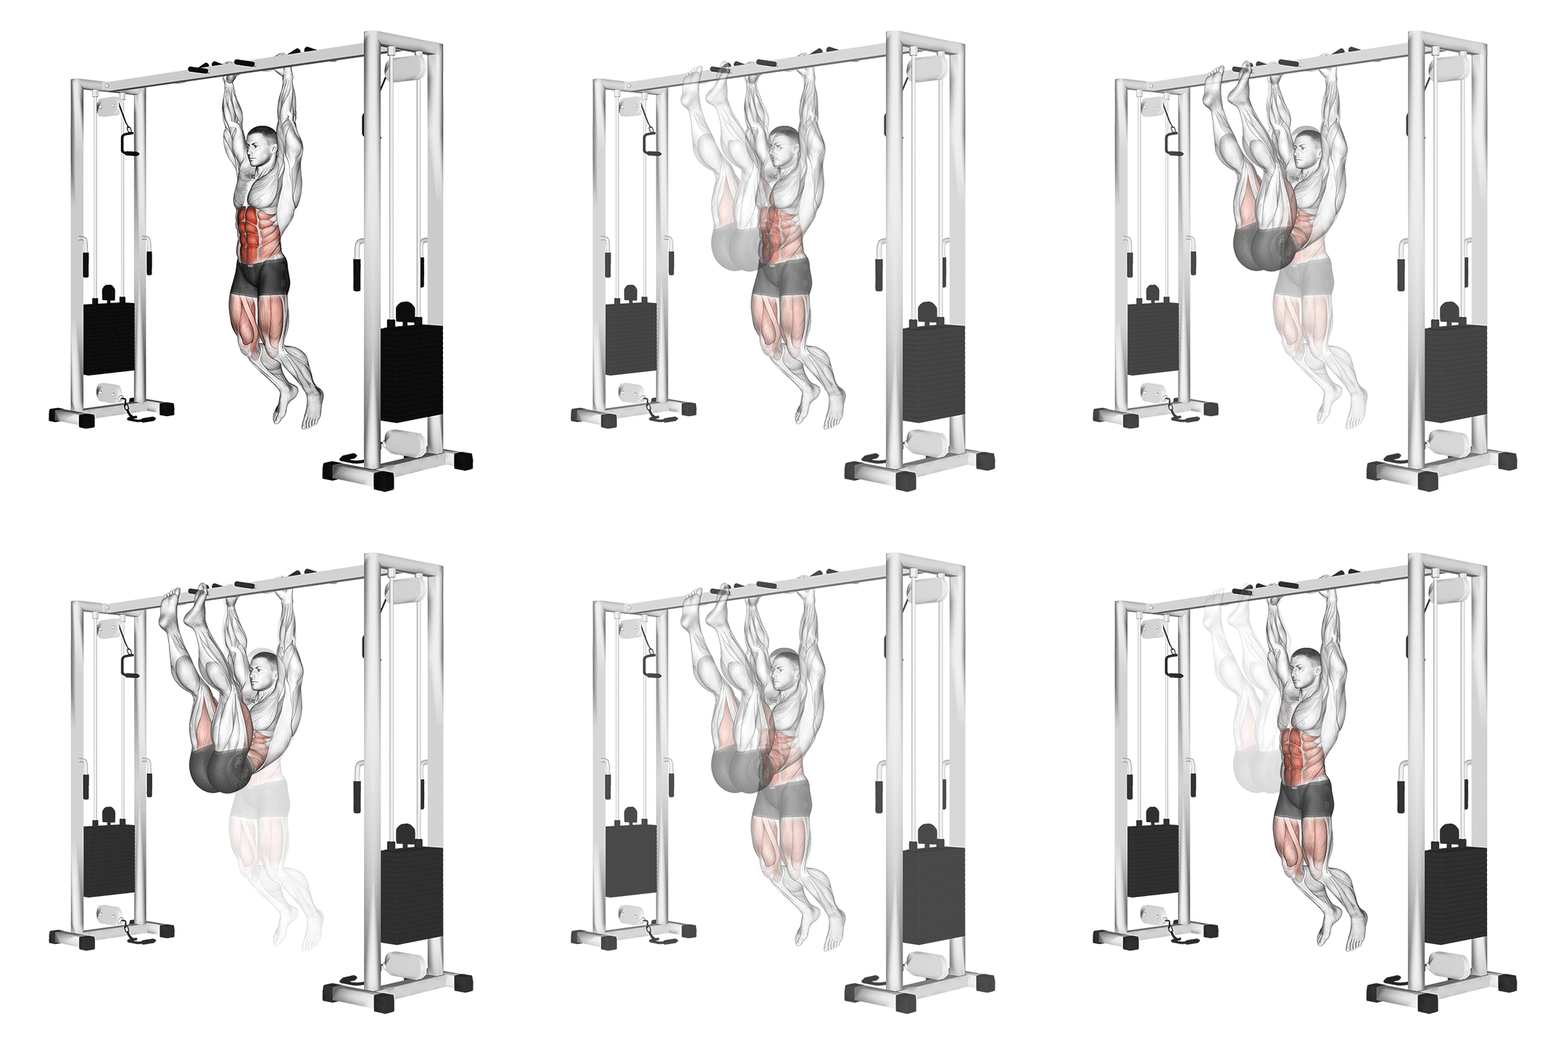
Hanging Leg Raise To Bar
The Hanging Leg Raise To Bar is an advanced core exercise that targets the abdominal muscles, hip flexors, and stabilizing muscles of the upper body. It involves lifting the legs towards the bar while hanging from a pull-up bar, requiring significant strength and control.
Muscle focus
Step-by-step cues
- Begin by gripping a pull-up bar with an overhand grip, hands shoulder-width apart.
- Engage your core and keep your body stable, avoiding swinging.
- With legs straight, lift them towards the bar by flexing at the hips.
- Aim to touch the bar with your feet while keeping your legs as straight as possible.
- Slowly lower your legs back to the starting position with control.
- Repeat for the desired number of repetitions.
Technical tips
- Ensure a strong grip on the bar to maintain stability throughout the exercise.
- Focus on using your core muscles to lift your legs rather than relying on momentum.
- Keep your movements slow and controlled to maximize muscle engagement.
- If full leg raises are too challenging, start with bent knees and progress as you build strength.
- Maintain a neutral spine to prevent strain on your lower back.
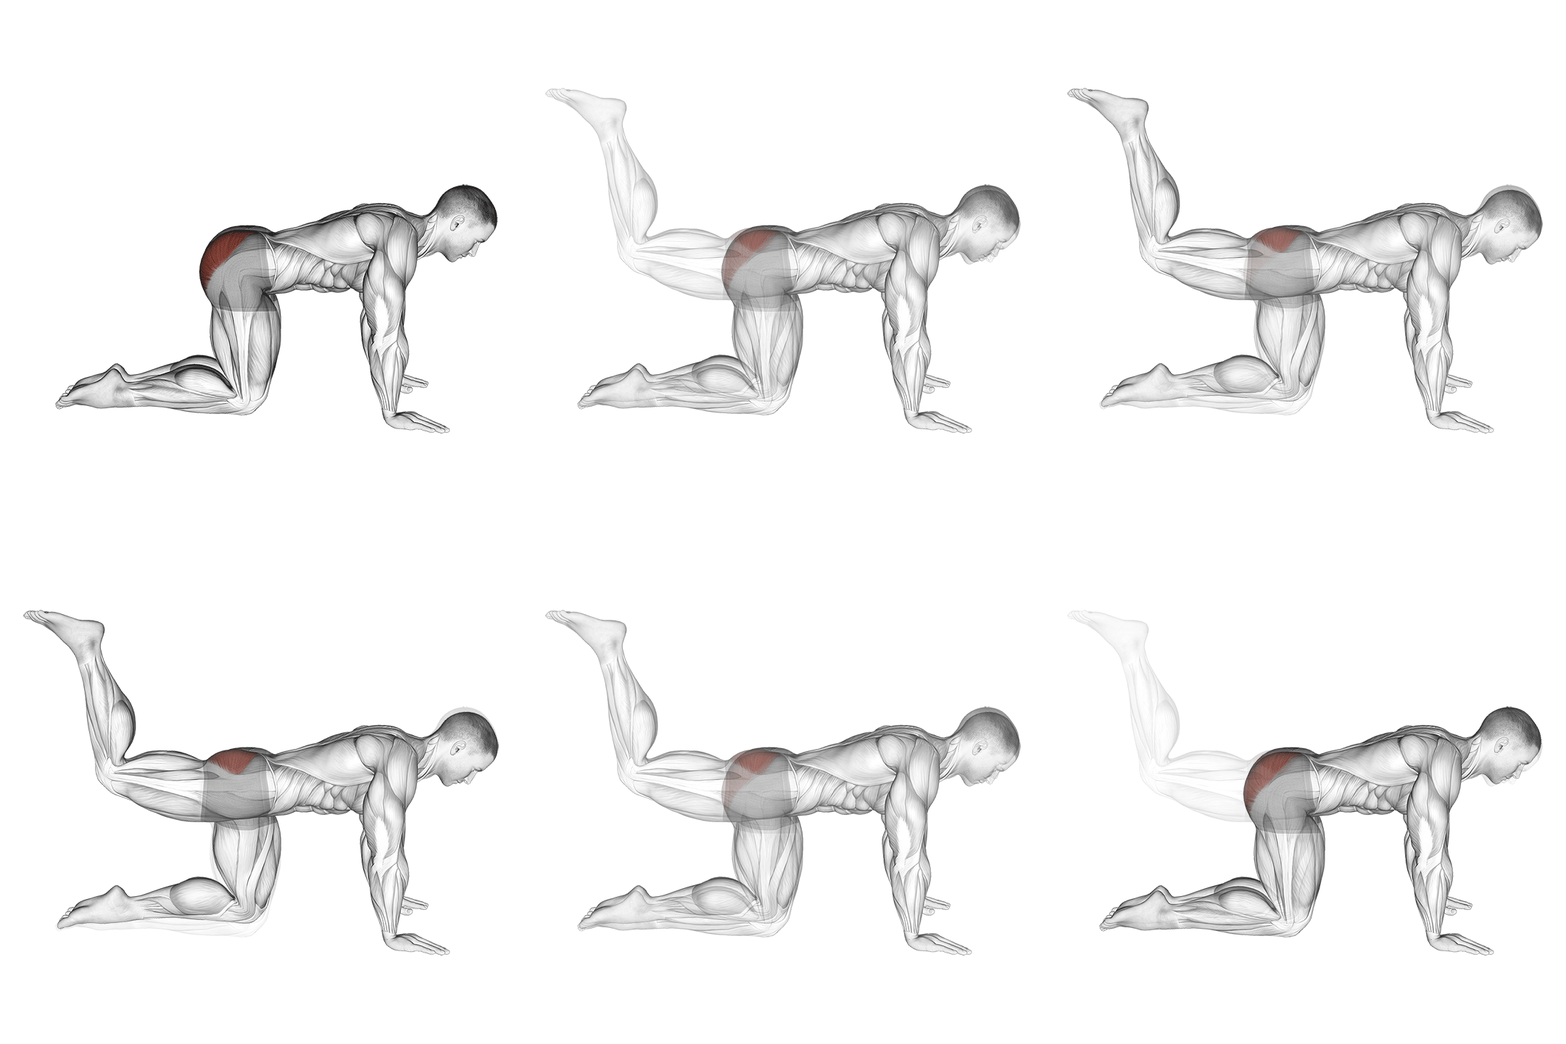
Donkey Kick
The Donkey Kick is a lower body exercise targeting the gluteus maximus, designed to enhance strength, stability, and muscle tone. It primarily engages the glutes while also activating the core and hamstrings. This exercise is performed on all fours, making it accessible for various fitness levels.
Muscle focus
Step-by-step cues
- Begin on all fours with your hands directly under your shoulders and knees under your hips.
- Engage your core to maintain a neutral spine throughout the movement.
- Lift one leg, keeping the knee bent at 90 degrees, and drive the sole of your foot towards the ceiling.
- Squeeze your glutes at the top of the movement and hold for a brief moment.
- Lower your leg back to the starting position with control.
- Repeat for the desired number of repetitions before switching to the other leg.
Technical tips
- Keep your core engaged to prevent lower back arching.
- Focus on squeezing your glutes at the top of each repetition for maximum activation.
- Maintain a steady pace and avoid using momentum to lift your leg.
- Ensure your neck remains in line with your spine by looking down at the floor.
- For added resistance, consider using ankle weights or a resistance band around your thighs.
Sunday
Full Rest
Prioritize sleep and prepare for the next progression week.
Four-week progression
Nutrition guidance
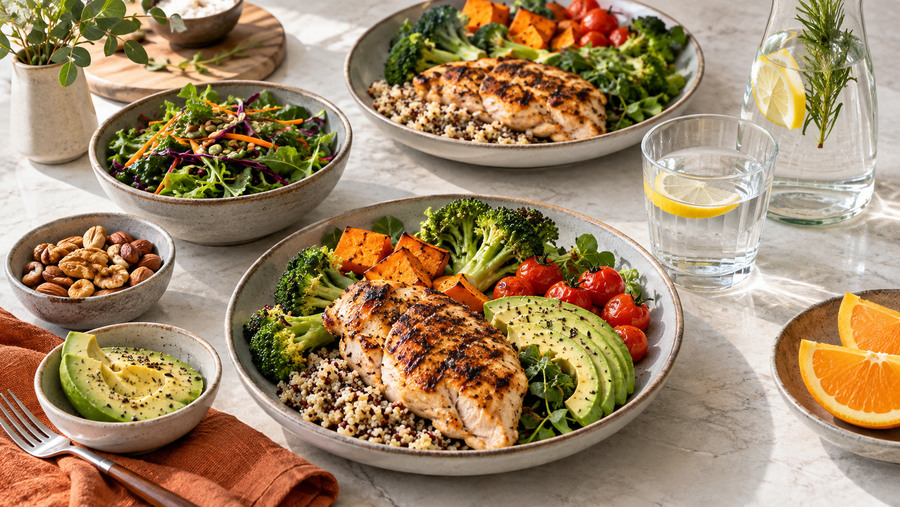
- Start near maintenance calories and adjust slowly using training performance, hunger and body-weight trends.
- Target roughly 1.6-2.0 g of protein per kg of body weight per day across three to five meals.
- Use carbohydrates around training and include vegetables, fruit and healthy fats every day.
- Hydrate consistently and avoid treating one meal or one day as success or failure.
Use these numbers as practical starting ranges, not medical prescriptions. Adjust for your health, body size and activity, and consult a qualified professional when needed.